Control arm assembly, Disassembly, Inspection – Cub Cadet ZT-3400 User Manual
Page 17: Assembly
ZT-2800
®
/ZT-3100/ZT-3400™
15
ZT-2800
®
15
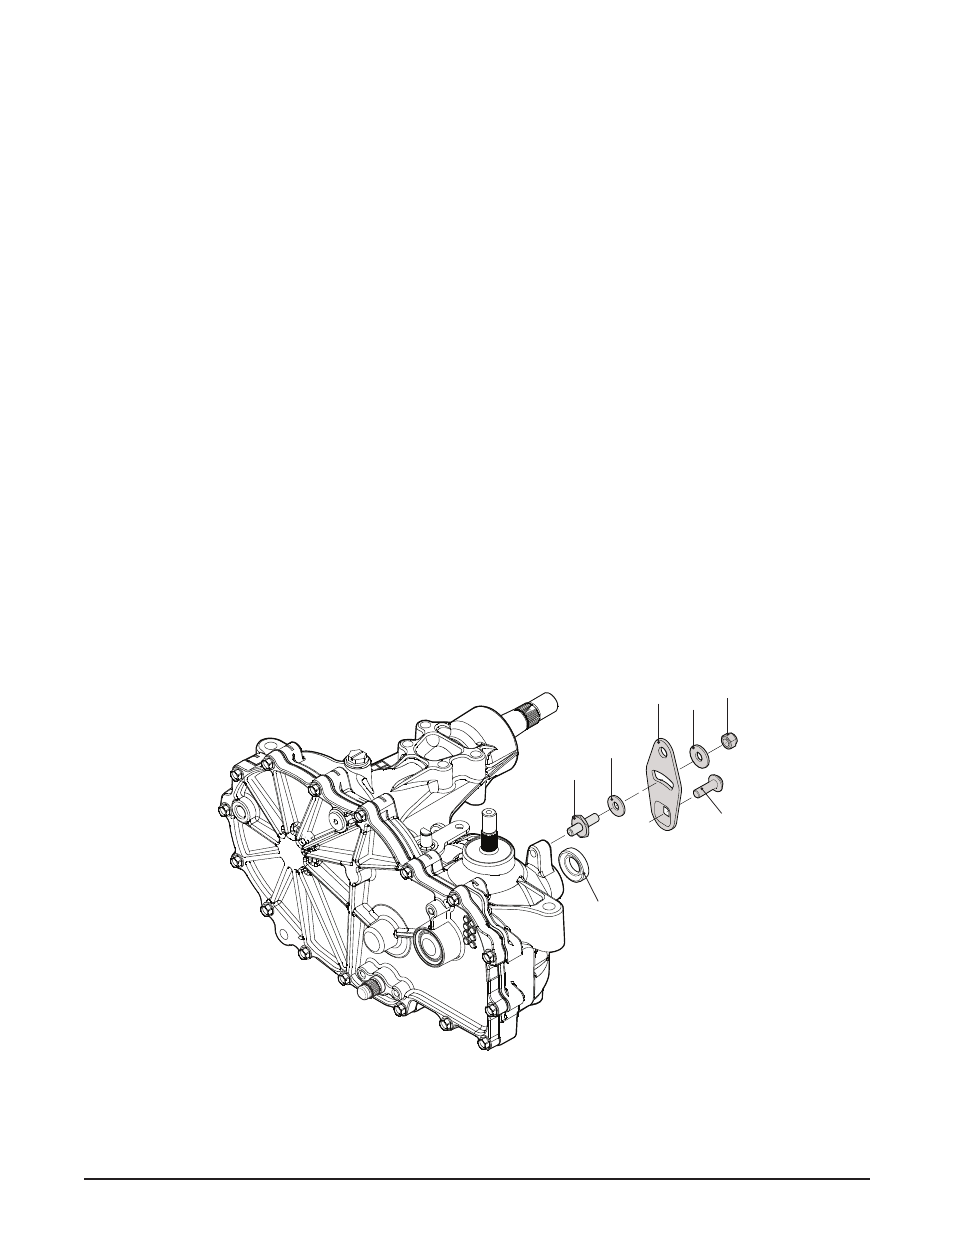
COnTrOL arM asseMBLY
Refer to Figure 9
disassembly
1. Remove all items previously discussed in
their recommended order.
2. Remove the lock nut (47), and the washer
(45). Discard both items.
3. Remove the Torx head screw (46).
4. Remove the control arm (44), the washer
(43) and the stud (42).
NOTE: Only remove the seal (41) if damaged
or worn. The seal cannot be serviced
separately. Refer to “Seal Kit” in the
Items List on pages 43 or 45.
inspection
1. Inspect all parts for excessive wear or dam-
age. Replace if necessary.
assembly
1. Reassemble all parts in the reverse order
of disassembly with the exception of the
washer (45) and the lock nut (47).
NOTE: Discard the washer (45) and the
lock nut (47).
2. When tightening the fasteners, refer to the
table on page 21 for the required torque
values.
NOTE: As a general rule, use the low end of
the torque spec on fasteners when
reassembling the unit.
figure 9, Control arm assembly
47
41
45
44
43
42
46