Cav repair/replacement kits – Cannon Instrument CAV-2000 User Manual
Page 93
87
CANNON
®
Automatic Viscometer Models CAV-2100 and CAV-2200 with VISCPRO
®
Instruction & Operation Manual
Version 2g — May, 2009; CANNON
®
Instrument Company
2139 High Tech Road • State College, PA 16803 • USA
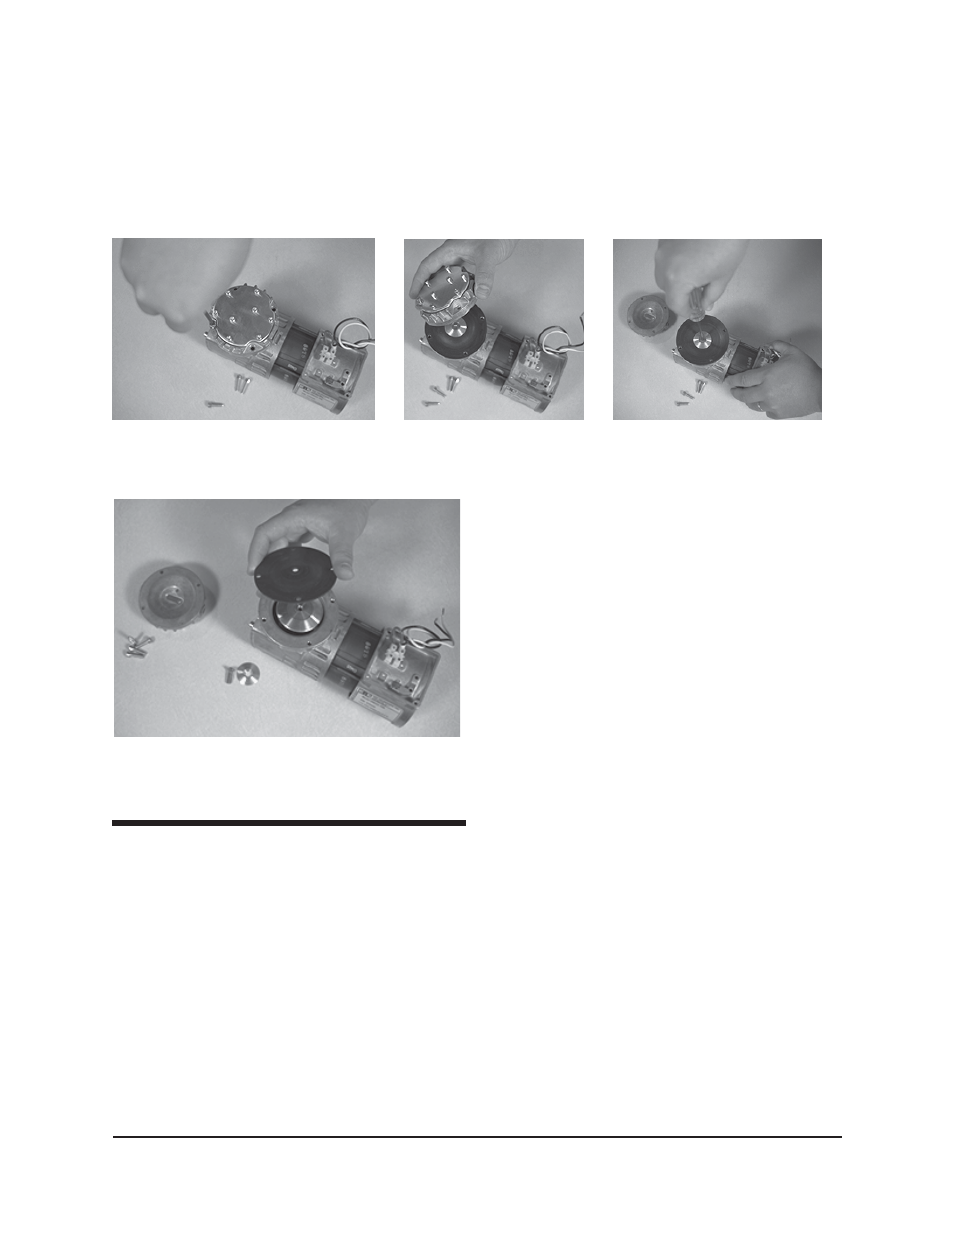
3. On the vacuum pump, locate four symmetrical Allen-head screws on
the top housing. Use a 5/32" Allen wrench to remove the four screws
(see photo sequence following).
4. Remove the top housing of the vacuum pump (see photo).
5. Remove the screw from the center of the diaphragm (see photo).
Removing screws securing housing Removing pump housing Removing diaphragm screw
6. Pull the old diaphragm off of the vacuum pump (see photo).
7. Place the new diaphragm into position. Line up
the hole in the center of the diaphragm with the
hole in the vacuum pump.
8. Replace the metal washer and screw in the
middle of the diaphragm.
9. Replace the top housing, lining up the holes for
the four symmetrical Allen-head screws.
10. Replace the top instrument housing of the CSU-
200 and secure in place with the screws previ-
ously removed.
11. Restore power to the CSU-200 and verify
operation of the vacuum pump.
CAV repair/replacement kits
CANNON
®
Instrument Company provides several repair/replacement
kits, which are shipped with the CAV unit. These may be used for minor
service/replacement of components in consultation with CANNON
®
Instrument Company. The following kits are available:
Spare parts kit
The Spare parts kit is a general purpose kit that may be used for replace-
ment of tubing, fuses, temperature, lighting and valve components. It
includes:
(2) Fluid/Gas Solenoid Valve • (1) Pneumatic Solenoid Valve • (1) RTD
Control Probe • (1) Over-Temp Thermistor • (1) Fluorescent Lamp •
(1) Assorted Fuses, 9 types • (1) Assorted Tubing Kit
(CAV-2100: part #P61.3413; CAV-2200: part #P61.5172—one per bath)
Removing diaphragm from circulating pump