Audio connections, Labeling the channels, Audio connections labeling the channels – Aviom A-16R/A-16CS User Manual
Page 27: Switch on the front panel of the a‑16r is in the r, Position, Emote, Ocal, 18 a-16r p, A-16cs c
18
A-16R P
eRsonAl
M
ixeR
And
A-16Cs C
ontRol
s
uRfACe
u
seR
G
uide
Regulated
500 mA
DC
Power
AA--1166RR
18-24V
A-Net
Out
In
A-Control
MIDI
Out
Thru
In
Return
Send
R
L
R
L
Left
Right
Mono/Stereo
Mix In
R
L
Personal Mixer
/T/Pin 2
+_
/S/Pin 1
/R/Pin 3
Line Out
Insert
Regulated
500 mA
DC
Power
AA--1166RR
18-24V
A-Net
Out
In
A-Control
MIDI
Out
Thru
In
Return
Send
R
L
R
L
Left
Right
Mono/Stereo
Mix In
R
L
Personal Mixer
/T/Pin 2
+_
/S/Pin 1
/R/Pin 3
Line Out
Insert
Regulated
500 mA
DC
Power
AA--1166RR
18-24V
A-Net
Out
In
A-Control
MIDI
Out
Thru
In
Return
Send
R
L
R
L
Left
Right
Mono/Stereo
Mix In
R
L
Personal Mixer
/T/Pin 2
+_
/S/Pin 1
/R/Pin 3
Line Out
Insert
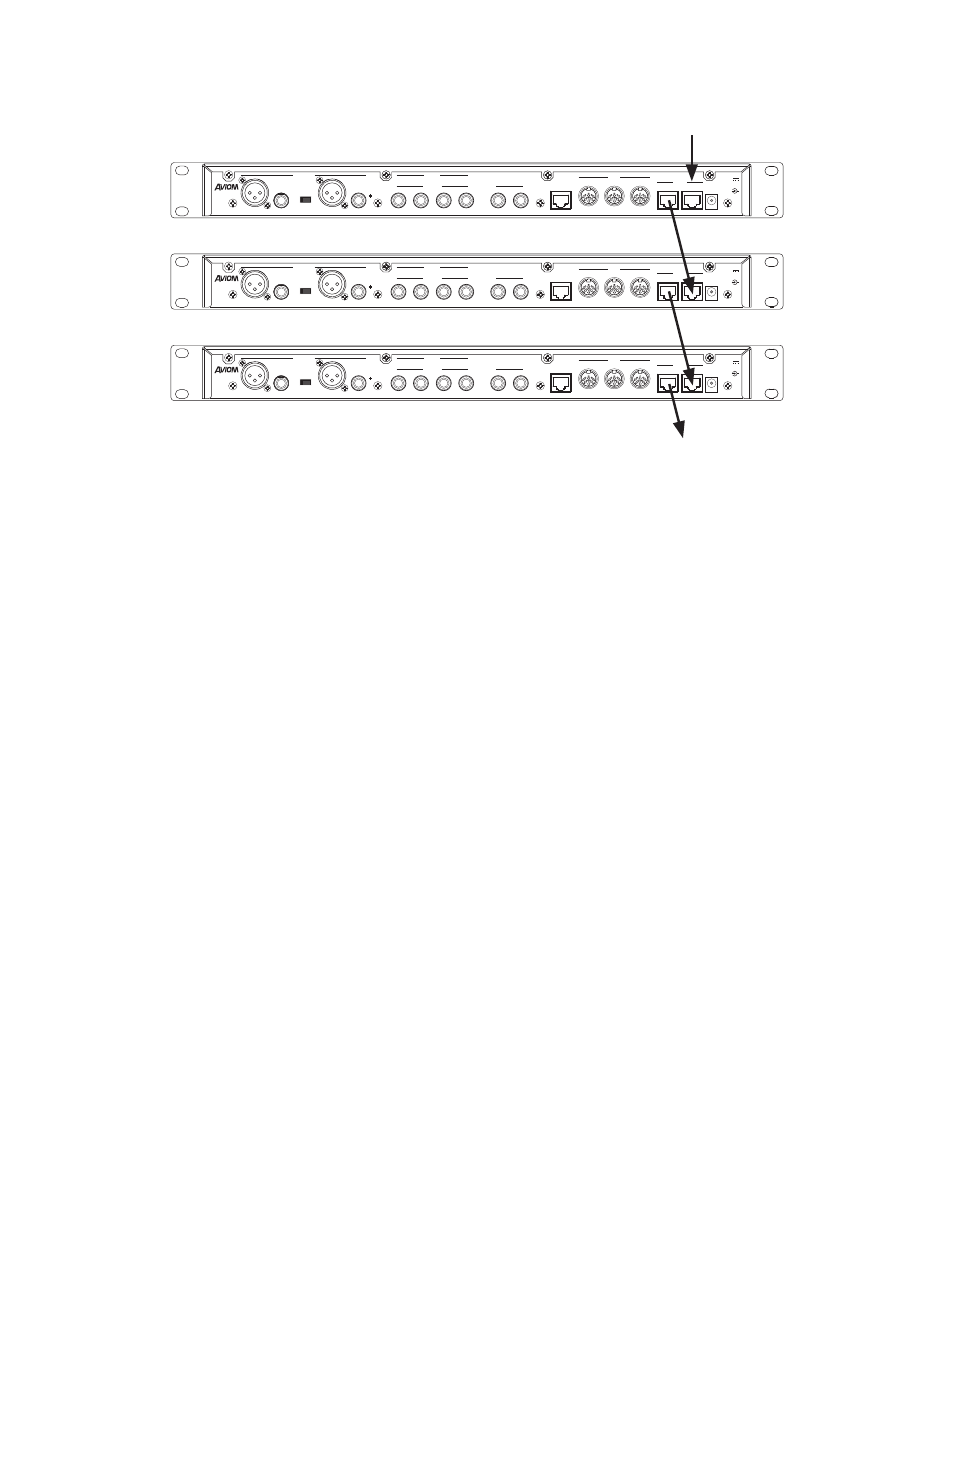
From A-Net input module
Connect A-Net Out to A-Net In to make a daisy chain.
A‑Net can also be distributed in parallel by using an A‑Net Distributor. This
can eliminate daisy chained A‑Net connections.
Audio Connections
Plug headphones or in‑ear monitors into the A‑16R Personal Mixer’s front
panel Headphone jack. If you use powered stage monitors, spot monitors,
or wireless in‑ear monitors, connect the XLR or TRS Line output jacks on the
rear panel of the A‑16R Personal Mixer to the inputs of your audio device.
Before powering up the system, turn the Master Volume control on the A‑16R
Personal Mixer to its minimum setting (full left) to ensure that unwanted
high‑volume audio is not accidentally sent into your monitors when the
system is powered up. The Master Volume control is on the right side of the
Personal Mixer, next to the Bass and Treble controls.
If you are using the A‑16CS Control Surface, make sure that the A‑Control
cable is connected and that the R
emote
/l
ocal
switch on the front panel of the
A‑16R is in the R
emote
position.
Labeling the Channels
The A‑16R Personal Mixer has a convenient label strip (also called a “scribble
strip”) right on the front panel. Use a non‑permanent marker to write the
name of the instrument or audio source appearing on each channel in the
label area. Optionally, apply removable artist’s tape to the label strip prior to
labeling each Personal Mixer.
A convenient MS Excel format label strip template, available on the Aviom
website, can be used to print out text labels for the A‑16R and optional
A‑16CS Control Surface from a computer.