Important, Warning, Brick loading – Steffes 5140 Owner & Installers Manual User Manual
Page 12: Initial set-up
Brick loaDinG
Load the brick, one row at a time, using a left side, right side, center pat-
tern. Start at the back of the brick core and work forward. Make sure the
brick are placed so the grooved side is facing up and the ridges are on the
left and right. (See Figure 5.)
BrICk INSTAllATION TIpS:
•
Install bricks carefully to avoid damage to the insulation panels.
•
Remove loose brick debris to prevent uneven stacking of brick, as
this can make installation of the elements and the brick core temperature sensor(s) difficult.
•
Brick rows MUST line up front to back and side to side.
•
Half brick makes brick loading easier by evening out the
stacks. Use HALF BRICK (white boxes) in the proper rows
and positions as indicated in Figure 5.
•
Alternate the direction of the brick’s indicator in every other
brick row. See Figures 3 and 4.
•
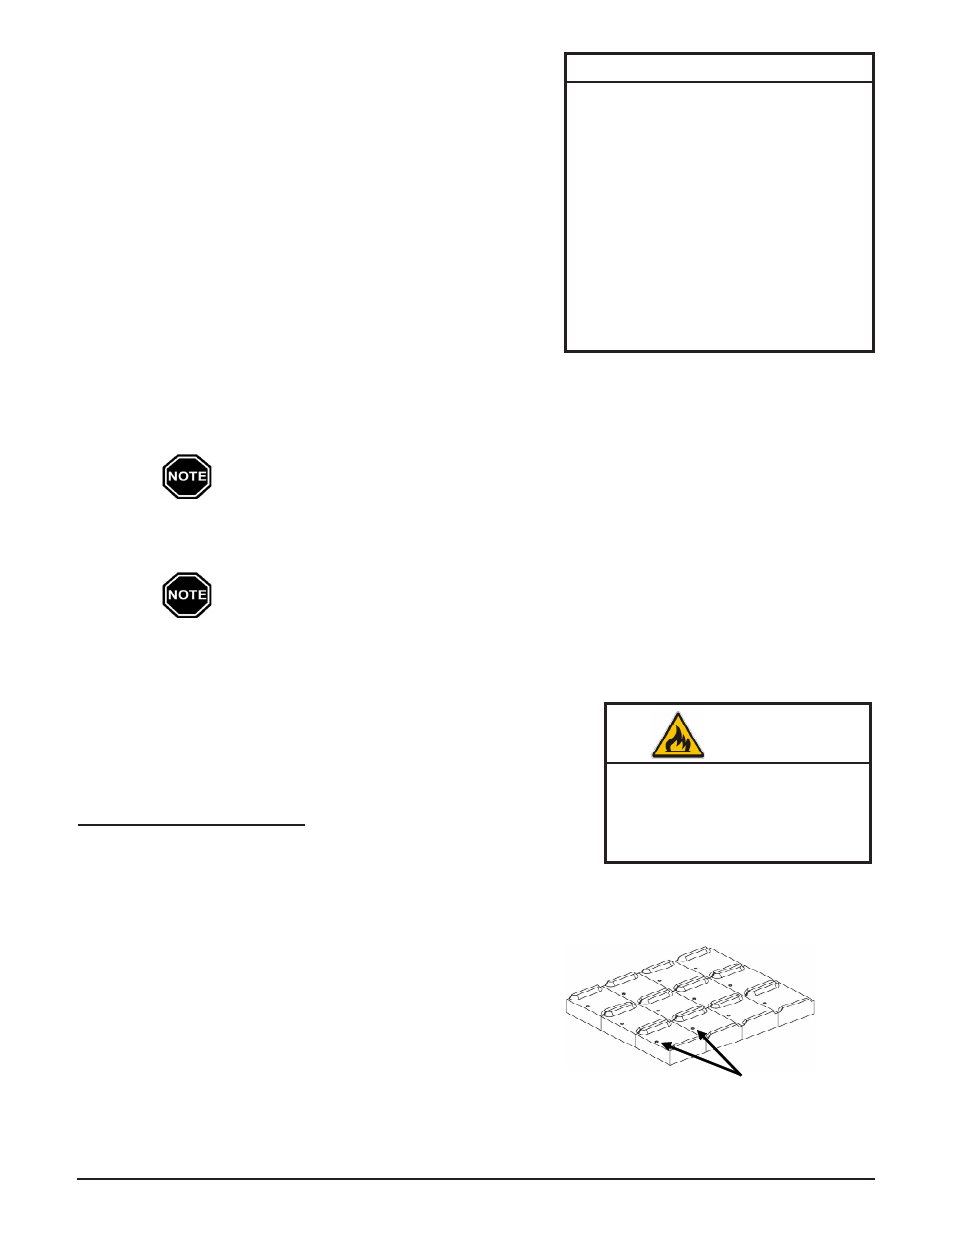
All bricks in odd numbered rows (1, 3, 5, 7, 9, and 11) must
have the indicator facing forward as shown in Figure 3.
•
The bricks in even numbered rows will have the indicator
facing back. See Figure 4.
initial Set-uP
Step 1 Remove the Information Package from the outside of the
shipping box and unpackage the Comfort Plus Hydronic
heating system.
Step 2 Move the heating system into its installation location.
The Comfort Plus Hydronic is capable of fitting through
a 30" doorway (minimum) without disassembling. If it is
necessary to disassemble the system, refer to the disas-
sembly instructions (Page A.12) in this manual.
Step 3 Once in place, adjust the leveling legs on the bottom of
the system as necessary to prevent rocking. If not placed
properly the system may bend or twist during the brick
loading process, making element and brick core tempera-
ture sensor installation difficult.
Step 4 Remove the painted front panel of the brick storage cabi-
net by removing the sheet metal screws along the top, bottom, and sides of the panel. Detach by pulling
the bottom of the panel forward and down.
Step 5 Locate the element wiring harnesses and brick core temperature sensor(s) behind the front panel and dis-
connect them from their shipping position. Carefully position them to avoid damage during brick loading.
Models 5130 and 5140 have two brick core temperature sensors.
Step 6 Remove the galvanized front panel and set it aside.
Step 7 Carefully lift the two insulation blankets, one at a time starting at the bottom, and drape them over the top
of the system.
Use face mask, gloves, and long sleeved garments when handling insulation materials in
compliance with generally accepted safety practices.
Step 8 Remove the front air channel by pulling out at the top.
Step 9 Remove the heating elements from inside the brick core cavity.
To ensure proper operation, read and
follow installation instructions carefully.
DO NOT install the Comfort Plus
Hydronic system on its shipping
pallet.
DO NOT extend the leveling legs
more than one inch.
DO use and follow generally ac-
cepted safety practices when
handling insulation material.
DO have equipment installed by a
qualified technician in compliance
with all applicable codes and regu-
lations.
IMPORTANT
Installation
3.03
Comfort Plus Hydronic
Comfort Plus Hydronic
Installation
3.04
Risk of fire. Can cause personal
injury or death. DO NOT operate
the system if damage to the insu-
lation panels on the inner sides
of the brick core occurs.
WARNING
FIgUrE 3
i.e.: Rows 1, 3, 5, 7, 9, and 11 in 5140
Front
Indicator