Installing the cd-rom changer – Panasonic SQ-TC520N User Manual
Page 14
Attention! The text in this document has been recognized automatically. To view the original document, you can use the "Original mode".
iNSTALLING THE CD-ROM CHANGER
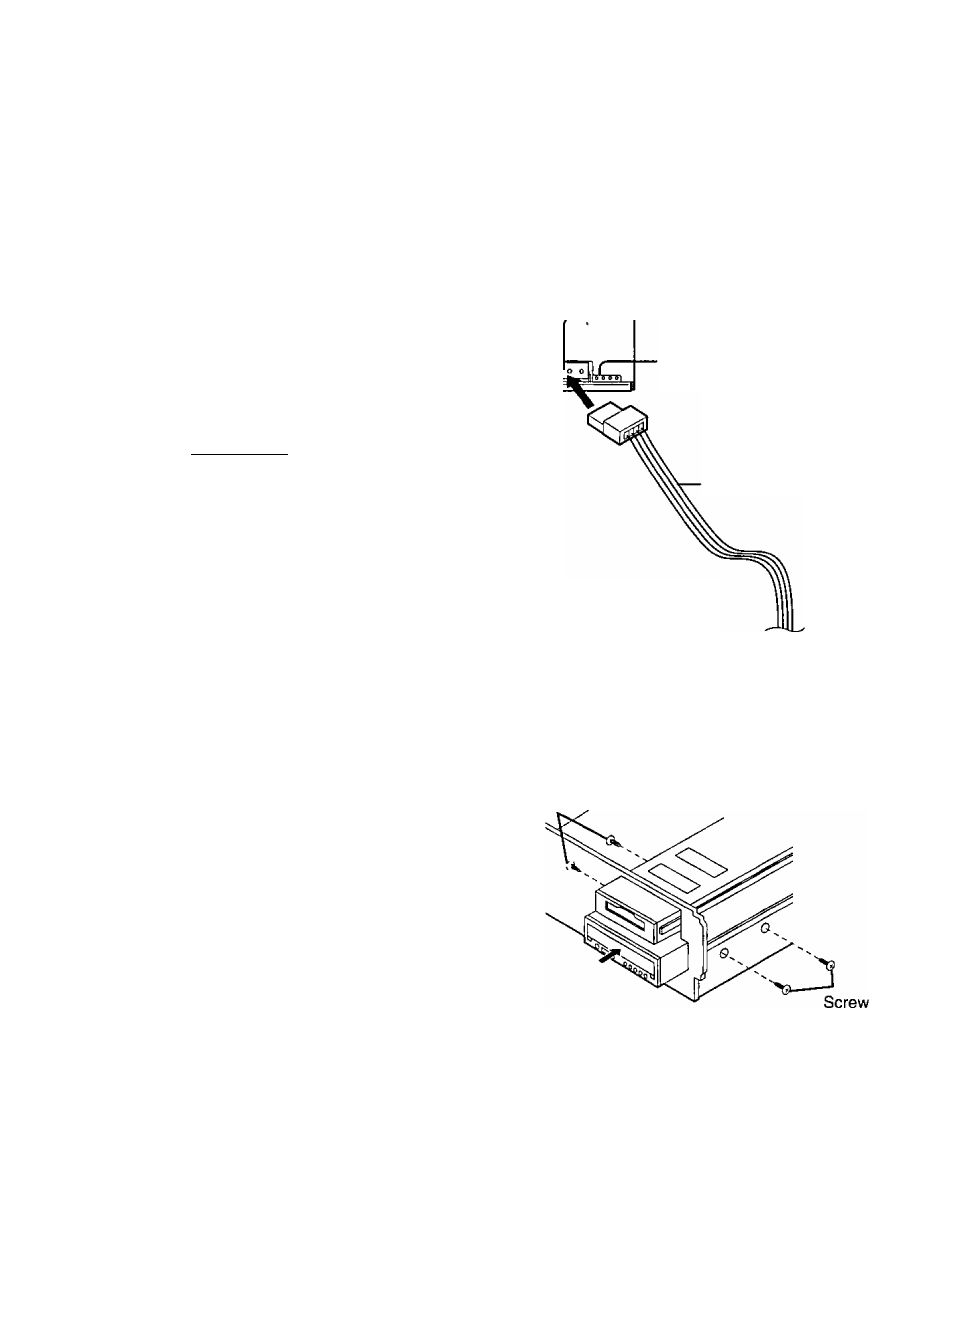
Connect the DC power cable, interface
cable and audio cable.
Jumper Pin (6-pin)-
Audio Out
Connector (4-pin)
Digital Audio-------
Connector (2 pin)
EIDE Interface
Connector (40-pin)
Names indicated in
are suppiied items.
lAudio Cablel
To the sound board
An audio cable can be used if
your system has a sound board
with a CD Audio input terminal.
You'll have to make this
connection in order to listen to
audio CDs (through the sound
board). For details, see the
instruction manual that came
with the sound board.
f
Interface
Cable
CD-ROM Changer
Power Connector
(DC IN)
DMA OFF terminal
(See page 9.)
DC Power Cable
Pin 1 is marked with
a colored stripe.
Align Pin 1 of the
Changer to Pin
No. 1 on the
Computer Systems
Motherboard.
♦
From the power
source inside
the computer
Firmly slide the Changer into the drive
bay. Secure with included screws.
Screw
Reattach the top cover and reconnect
your peripheral devices and AC power.