Installing the cd-rom changer – Panasonic SQ-TC520N User Manual
Page 13
Attention! The text in this document has been recognized automatically. To view the original document, you can use the "Original mode".
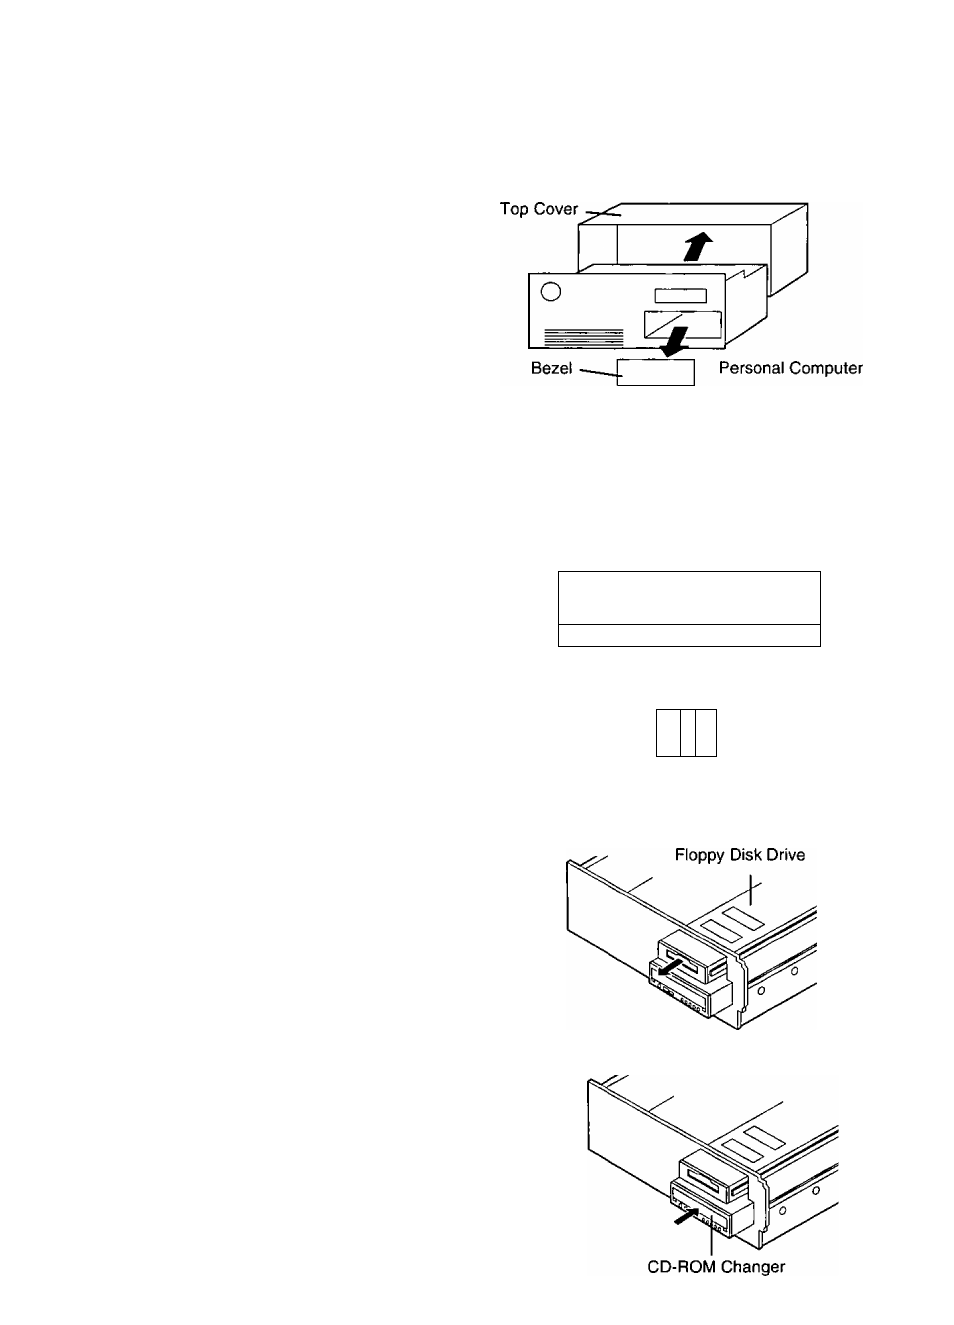
INSTALLING THE CD-ROM CHANGER
©sfMsûMÉlteiBsro
Read this section completely before proceeding.
Consult your system operation manual for CPU disas
sembly instructions.
1 Turn off your system and all connected devices.
2 Disconnect all AC power cables.
3 Remove the top cover from your system.
4 Remove the bezel covering a vacant disk drive bay.
OragOglïfliÛg ülûS
1
Remove the Changer from its pack
aging.
Check jumper pin setting for proper ID
(Master)*.
•Set to SLAVE if you connect to your systems
Primary HDD IDE Controller.
Most installations do not require changing the
jumper pins.
CD-ROM Changer
------- ------ lih
° °
°lirmi
Drive-Select
0 0 0
o o o
-Jumper
CSEL Slave Master
(Default)
Look above your vacant disk drive bay.
If it is occupied by a floppy disk drive:
It might be necessary to slide the floppy
disk drive forward a couple of inches to
ease insertion of the “Big 5”.
Do not disconnect its cables, even If this may
allow for easier CD-ROM Changer installation.
Slide the CD-ROM Changer into the
vacant bay until it is parallel with the
floppy disk drive. Some systems require
mounting.
(Continued on next page)