Vernier LabQuest 2 User Manual
Page 34
Using LabQuest 2 with a Mobile Device
30
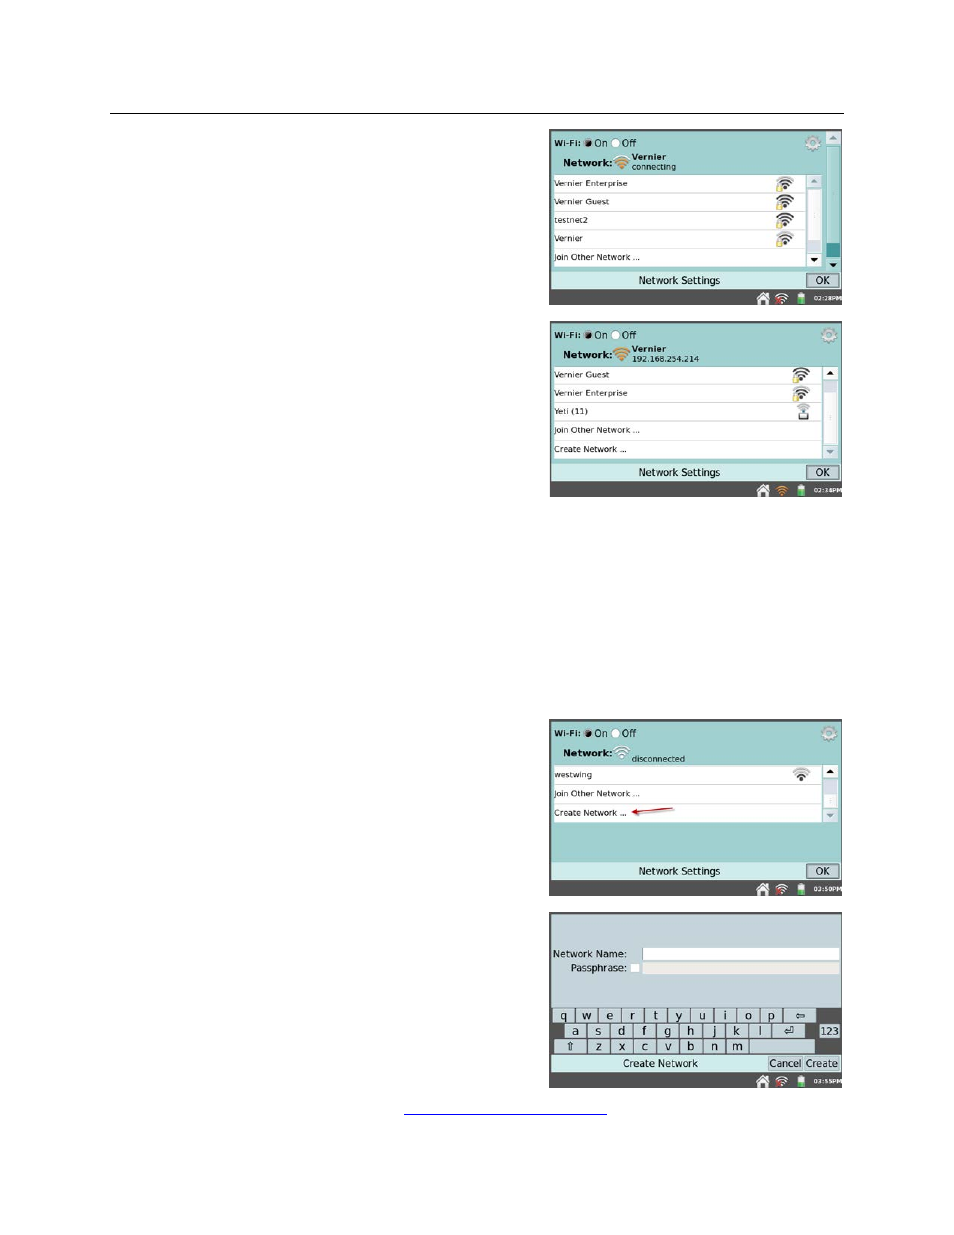
b. Verify LabQuest is attempting to connect to
the network. The network status should say
“Connecting.”
c. Verify LabQuest has successfully connected
to the network. The network status should
have changed to a numeric IP address.
d. When LabQuest has successfully connected to the network, tap OK to return to the
Connections app.
Create a new LabQuest Network (Ad-Hoc Network)
If you do not have access to an existing Wi-Fi network, or are not permitted to access your
school's network, you can quickly and easily set up a network with LabQuest 2.
Note: Students can connect to a LabQuest Network with their mobile devices. This network
will not support access to the Internet. The email function of LabQuest will not work with a
LabQuest ad-hoc network.
a. Select Create Network.
Note: If you are in an area with several Wi-
Fi networks, you may need to scroll to the
bottom of the network list to locate “Create
Network.”
b. Tap the Network Name field and assign a
name to this new network (e.g., Ms.
Johnsons classroom). Then, tap Create.
Optional: Protect your network by assigning
a password that you will provide only to
your students. Select the check box and
assign a password to your new network
(e.g., 1frog, scienceisfun!). The Passphrase
must meet certain criteria. See our web site
for additional information: