Data collection – Vernier LabQuest 2 User Manual
Page 16
12
Motion Match lab), or a smaller number for cart-based Motion Detector experiments
(e.g., our Impulse and Momentum lab).
•
Quit –
Choose Quit from the File menu to exit LabQuest App. Since other applications
can run simultaneously with LabQuest App, there is typically no need to quit
LabQuest App during standard use.
Data Collection
Data collection with LabQuest starts from the Meter Screen, which is the default screen for
LabQuest App. From this screen, you can view sensor meters in real time as well as a summary
of the data-collection settings. Additionally, you can access tools to modify and customize these
settings for your particular experiment.
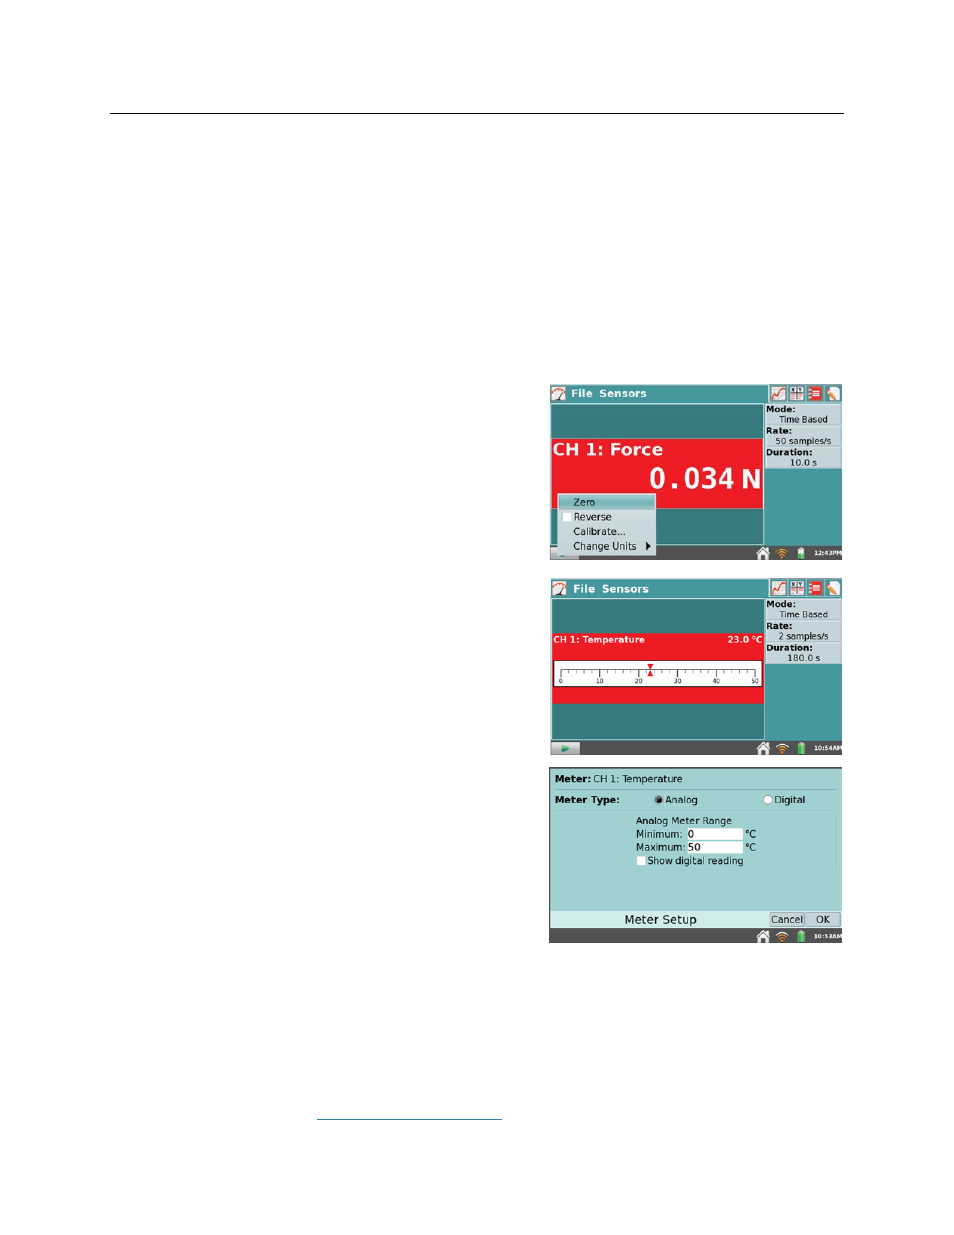
Digital Meters
A digital meter for each connected sensor is shown on
this screen. Tap on a meter to change the sensor’s
settings. The available options will depend on the
sensor and may include options to change the units,
calibrate, zero, and reverse the sensor. These options
can also be accessed from the Sensors menu.
Analog Meters
To display an analog meter, choose Meter Setup from
the Sensors menu, or as a shortcut, tap the digital meter
on the Meter screen.
Within the Meter Setup dialog box, enter the minimum
and maximum values for the meter range. If you want to
view both the analog and digital readings for a sensor,
select the Show digital reading check box in the Meter
Setup dialog box.
Data-Collection Summary
A summary of the data-collection settings (Mode, Rate, Duration) is shown in the panel to the
right of the Meter screen. For most sensors, the default data-collection mode is Time Based. The
default collection rate for the connected sensor is automatically set up when LabQuest identifies
the sensor. To modify the data-collection settings, tap the summary box. Alternatively, you can
choose Data Collection from the Sensors menu. For detailed descriptions of data-collection
modes and parameters, see