Satellite MX3 Turbo Foot Flush User Manual
Page 4
17823 REV J
4
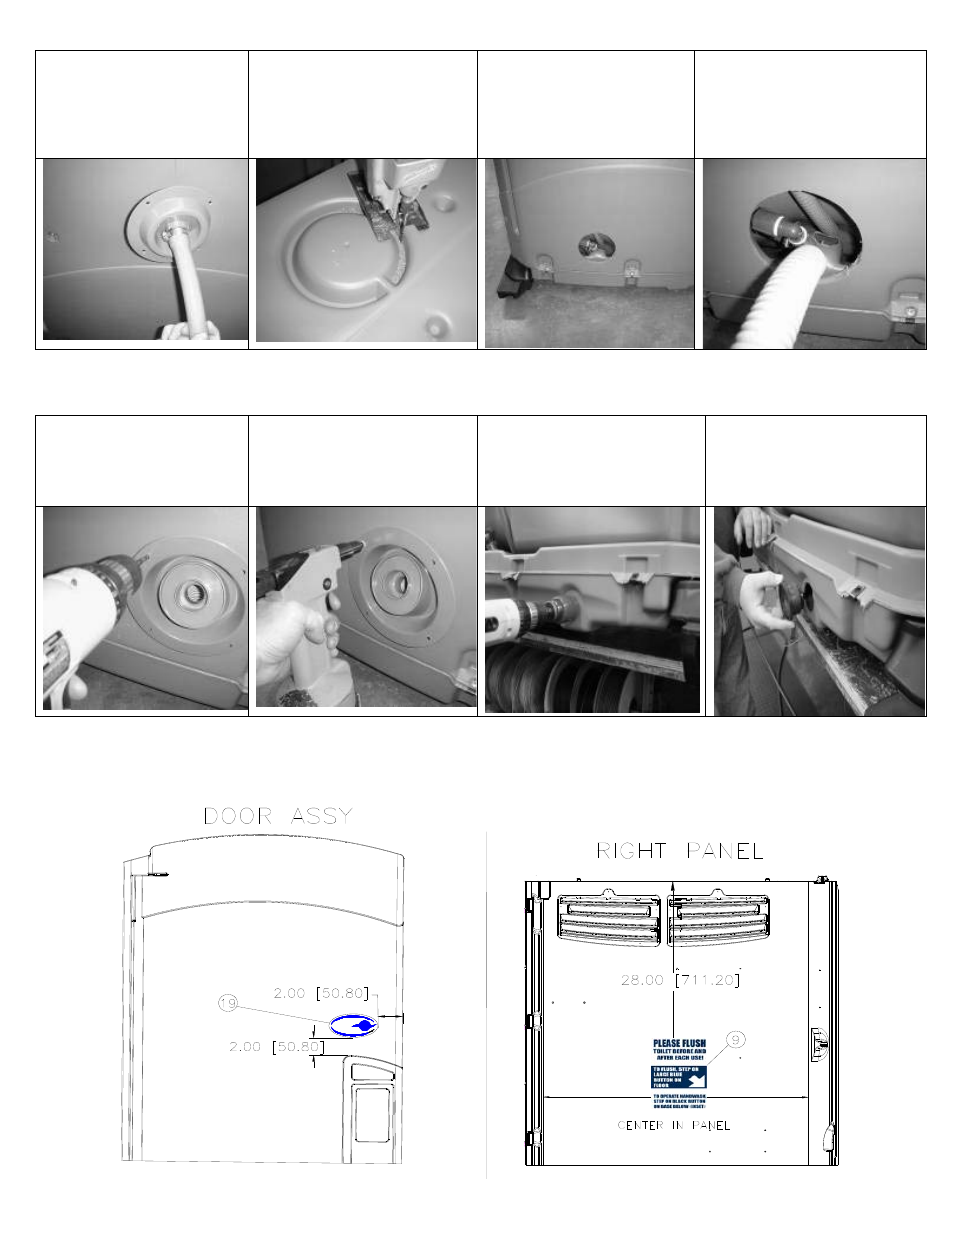
Step#20
step#21
step#22
step#23
Assemble the large hose to the
Fill/Pump-out port using a #20
wormdrive clamp. Note the
curvature of the hose and the
clamp on the left side to the
relationship of the fill port.
Drill out recess using a 5-
1/2”[140mm] hole saw using
center dimple to position or cut at
the outside edge of the recess as
shown using a reciprocating saw.
Assemble the rear panel to the
unit.
Insert the large hose into the 1-
1/2” [38mm] hole in the base.
Make sure the hose does not kink.
Assemble the Fill/Pump-out Port.
Drain plug assembly
step#24
step#25
step#26
step#27
Drill a #10 (3/16”) [5mm] hole
into the rear panel using a hole
in the port as a guide. Be
CAREFUL to drill through only
one wall on the panel.
Rivet the port to the rear panel
using a silver colored expanding
aluminum rivet. Drill and rivet
the (3) remaining holes. Install
plug into fill/pump out port
With holes saw drill 2.00"
[50mm] through dimple located
in rear of the base.
Insert 2.00" plug and tighten
with 5/32" hex head wrench.
Install the ‘Luxury Flush & Wash’ and “Foot Flush” decal.
Luxury
Flush & Wash