Satellite MX3 Turbo Foot Flush User Manual
Page 2
17823 REV J
2
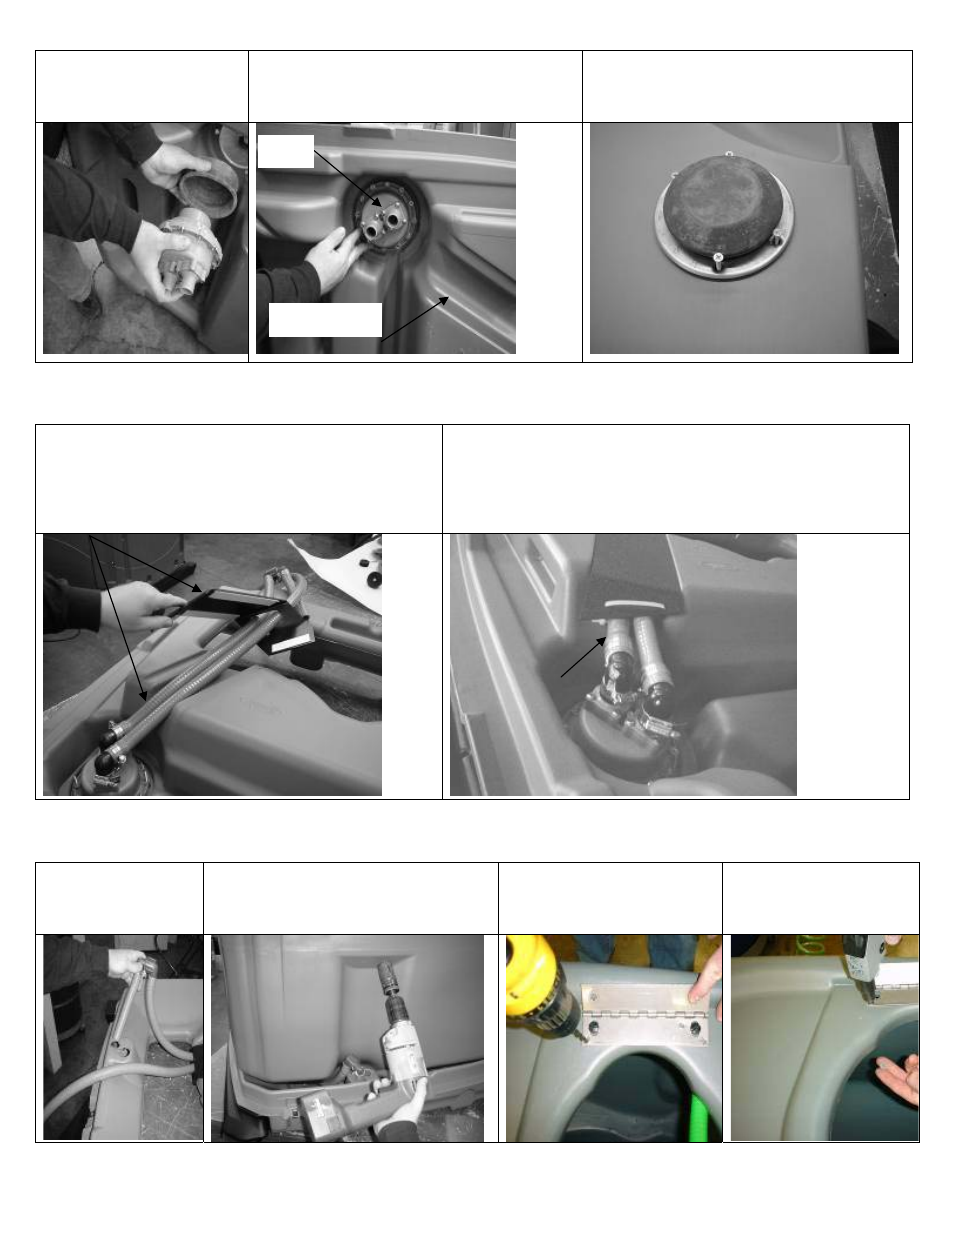
step#3 step#4 step#5
Place the rubber boot on the
pump
Position the pump approximately as shown. The
inlet side on the pump is the closest to the hose
channel on the base.
Place the bezel over the boot with the word
“FLUSH” toward the center of the floor. Start all
the screws by hand. Tighten the screws. Make
sure not to over tighten or bezel will bend.
step#6 step#7
First install inlet hose through slot in bracket as shown. Then
install outlet hose through slot in bracket. With 80 to 120 grit
sandpaper scuff and clean surface of channel and front panel
of base where adhesive on bracket will be installed. (slightly
roughed surface will give maximum adhesion) Peal backing
from the two long strips of adhesive tape.
Position bracket as shown on the base. Peal backing from short tape and
secure bracket to base. (Note: take care to position bracket correctly
before pushing adhesive to surface). Thread wire tie through bracket then
around both hoses. Wire tie lock should be to the outside of bracket as
shown when assembled.
step#8
step#9 step#10
step#11
Insert end of inlet hose
into 1-1/8"[29mm] hole
in top of base.
Drill 2” [50mm] hole on the dimple located
on the right side of the tank. (viewed from
rear). Insert the outlet hose into the hole in
the tank.
Position hinge using plastic
screws supplied with the toilet
seat,. Drill (4) #10 [5mm] holes
through hinge as a template.
Rivet the hinge to the tank
using (4) stainless rivets
(Installed from top) and
backup washers. (Inside tank)
Prepare tank and bowl assembly.
Inlet
Hose Channel