Satellite High Tech 2 User Manual
Page 4
- 4 -
P/N 18968 REV, B
4/07
UNIT ASSEMBLY
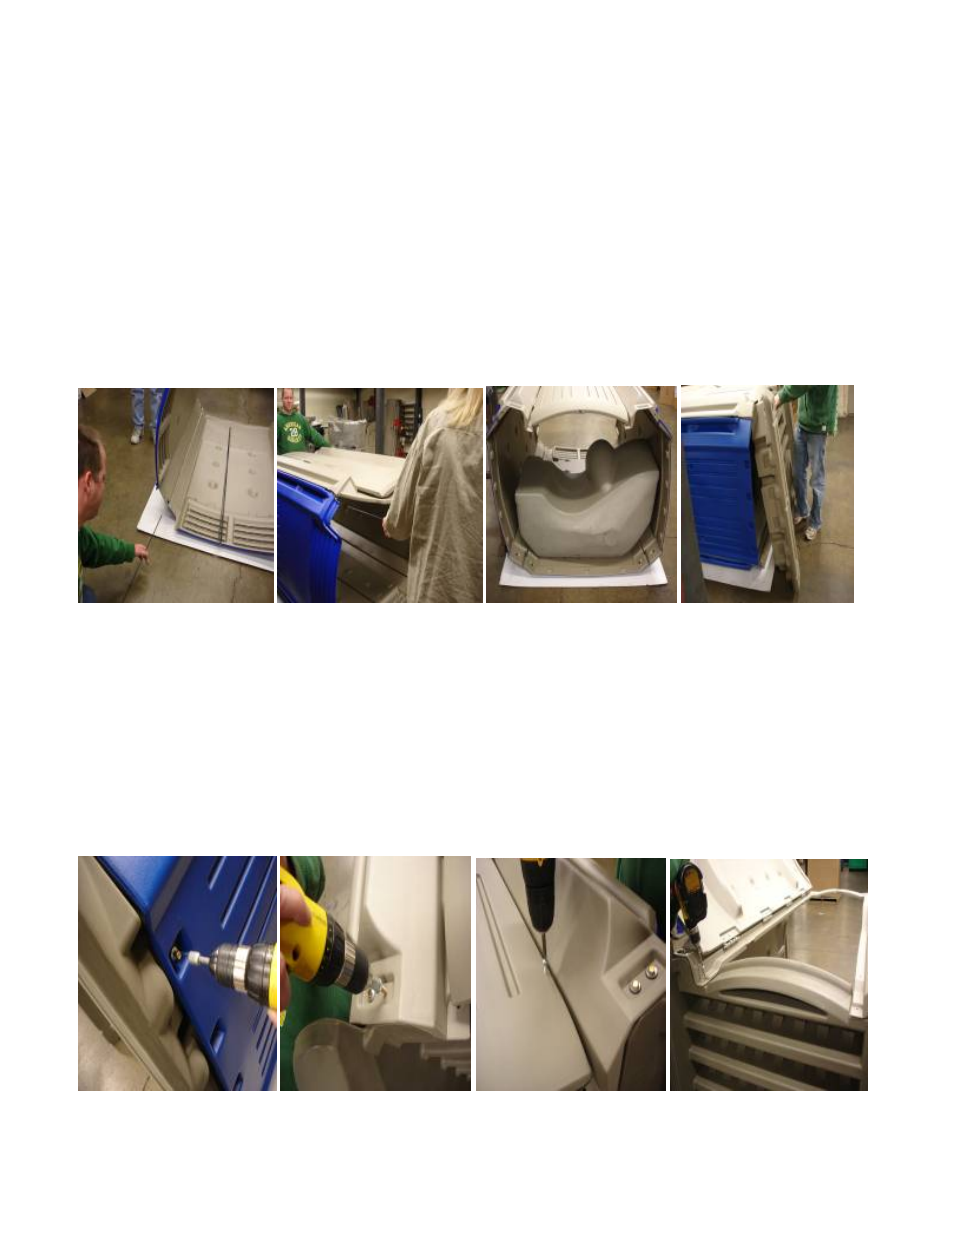
5. Connect side panels to rear panel: Lay rear panel [on sheet of cardboard to protect panel from scratches]
outside of panel down on the floor / ground [Note: rear panel is wider than the side panels & side panels are
interchangeable]. Connect one side panel to rear by sliding fiberglass rod (1) #18681, pointed end in first
starting at top of panels into holes in panel knuckles. (See pic. H) [Note: before inserting fiberglass rod entirely
pull side panel up to make sure rear & side panels are joined completely]. Repeat the same assembly procedure
to install opposite side panel.
6. Connect front to side panels: Set front onto side panels, one person holds bottom & other person holds top of
front in position on side panels. Then one person holds front & side panels together at bottom of front while other
person starts both fiberglass rods (2) #18681 partially into holes in panel & front knuckles [from top of front ].
(See pic. I) Then continue to slide rods in side panel & front making sure panels & front are joined completely by
lifting front from rear before rods are entirely inserted.
7. Install tank: Slide tank #18939 in unit, rear of tank against rear panel. (See pic. J)
8. Install base: Place base #18932 into position at bottom of unit. (See pic. K)
H I J K
9. Fasten side panels to base: with #19496 Screws 1/4 x 3/4” (four per side panel). (See pic. L) Using a phillip
screwdriver, start screws through holes at bottom of panels into the alum inserts in the base. [Note: it is very
important that all the screws be started with a Phillips screwdriver first and then tighten up with a 3/8
nut driver bit]. (If holes in panels don’t line up to allow easy starting with phillip screwdriver elongate
hole in panel sideways until they align easily.)
10. Fasten front to base: (Using the same fastening instruction as in note #9)Attach front assembly #18935 to
base with 1/4 x 3/4" #19496 (two per side ) through holes in right and left frame into alum inserts in base (See
pic. M) Remove shipping screw at bottom of door using phillips bit. (See pic. N) Finish fastening front to base,
open door and install screws 1/4 x 3/4" #19496 (one per side). [Note: it is very important that all the screws
be started with a Phillips screwdriver first and then tighten up with a 3/8 nut driver bit]. (See pic. O)
L M N O