Satellite High Tech 2 Flush User Manual
Page 7
- 7 -
P/N 19403 REV, B
8/08
R S
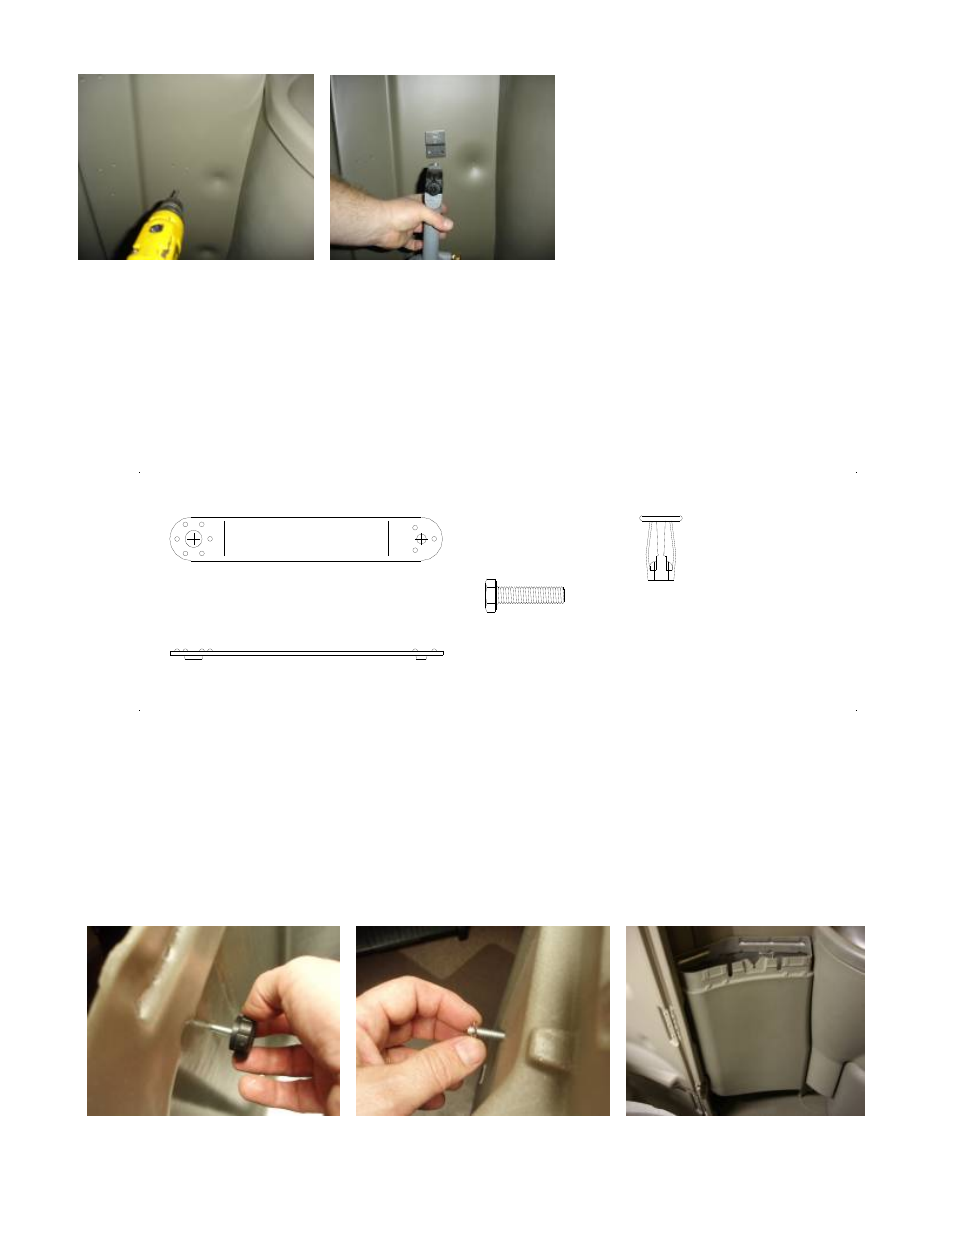
Install Jack nut into wall:
-
Drill a new hole using a 7/16” (.438) [11.13mm] drill bit.
-
Insert the bolt P/N 10089 through the Jack nut wrench P/N 14332 (wrench stamped with the direction to
install the bolt) and into the Jack nut P/N 14331. Turn the bolt finger tight.
-
Push the Jack nut into the drilled hole.
-
While holding the Jack nut wrench take special care to protect your hand (the wrench edge is sharp) turn
the bolt clockwise with a 7/16” wrench until final resistance is felt to crimp insert.
-
Remove the bolt and wrench.
P/N 14332
WRENCH, 1/4" JACK NUT
P/N 14331
INSERT, 1/4-20 JACK NUT
P/N 10089
BOLT, 1/4 - 20 X 1 GR5 PLTD
Install the ¼-20 X ¾ knob # 20562 to the wastebasket by inserting it through the hole on the inside first – out the
back. (See T) Then to hold it in place, press on the ¼-20 round press nut # 20561 over the threads of the
protruding stud until loosely up against the outside back wall of the lower wastebasket. (See U)
Position the wastebasket in unit against left panel to the left of the Handwash tank so that the lower brackets on
the Wastebasket bracket & bracket on the left panel interlock. (See V) Insert the Knob stud into the Jack nut hole
in the wall and tighten the two together by turning clockwise until snug.
Then after a plastic trash bag has been placed in the lower wastebasket - push lower the wastebasket top onto the
wastebasket bottom (now mounted to the wall) until there is a snapping sound.
T U V