Satellite High Tech 2 Flush User Manual
Page 5
- 5 -
P/N 19403 REV, B
8/08
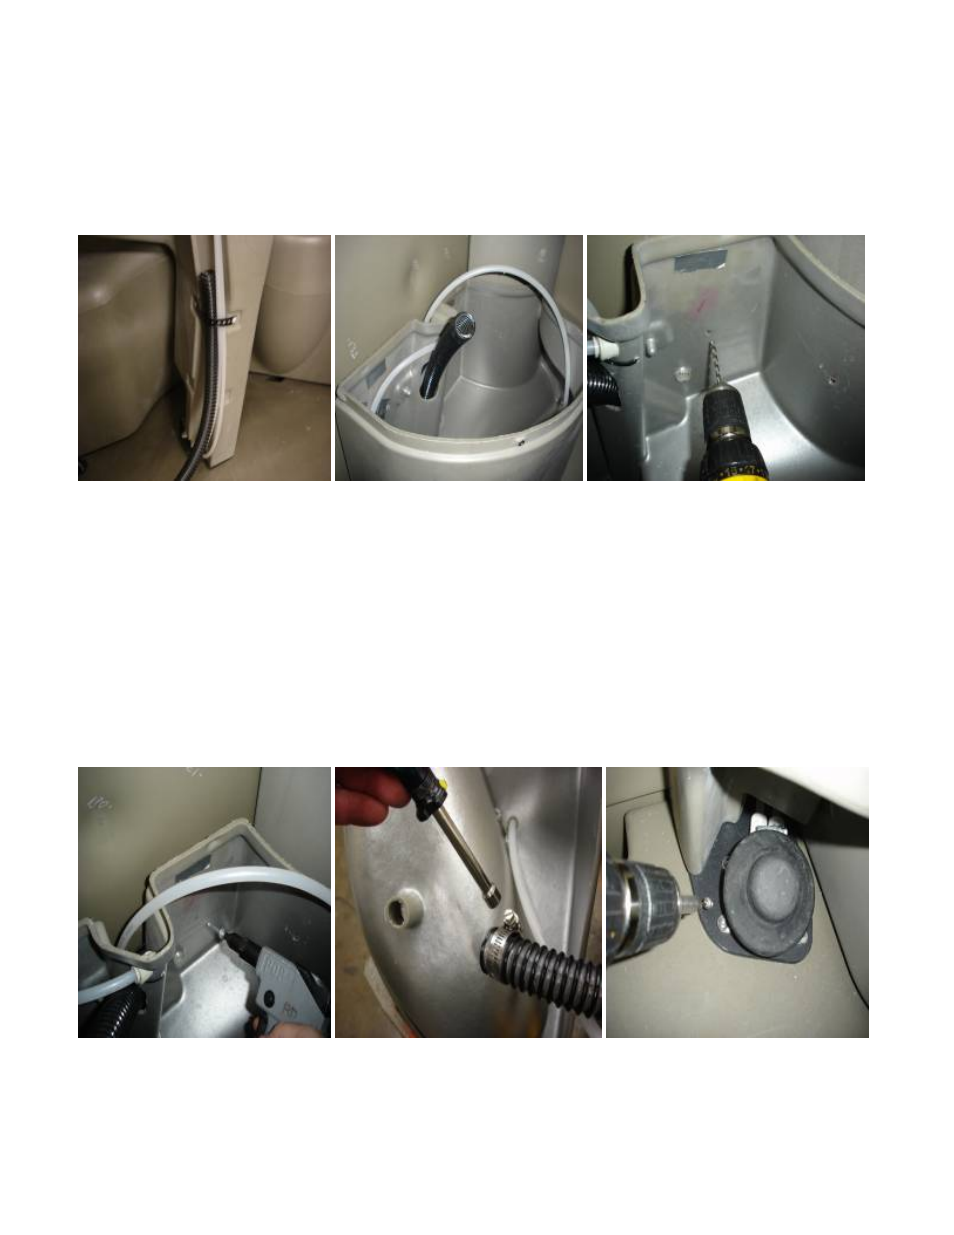
4. Handwash installation:
Position drain hose at rear of Handwash tank:
run hose in channel up through black strap on rear tank.
(See K) Position drain hose top of Handwash tank: through slot in rear of Handwash tank.
(See L) Drill hole into left panel: for securing Handwash tank to panel. Position Handwash tank in left
corner of unit against left panel & waste tank. Transfer drill through hole on back of Handwash tank [on right
side first, using # 10 drill bit]
"be careful not to drill through outside wall of panel". (See M)
K L M
5. Handwash installation:
Rivet Handwash tank to left panel:
using rivet P/N 14427 # 66 LSH (1). (See N) To install second rivet
through back wall of Handwash into left panel:
Transfer drill through hole on back of Handwash tank [on left
side using # 10 drill bit]
"be careful not to drill through outside wall of panel". Rivet Handwash tank to left
panel:
using rivet P/N 14427 # 66 LSH (1). Install hose on stem of basin: loosen clamp P/N 19386 # 16 worm-
drive on end of hose using 5/16" hex nut driver bit slide hose onto stem of Handwash basin & tighten hose clamp
Snap basin onto Handwash tank. (See O) Secure pump mount plate to floor of base with screw # 8
x 3/4" P/N 15513 (1) through hole in pump mount plate, using drill with # 2 Phillips driver bit, make sure bottom of
Handwash is up against the left panel. (See P)
N O P