Satellite Freedom User Manual
Page 9
PN 21337 REV B - 9 - 3-16-12
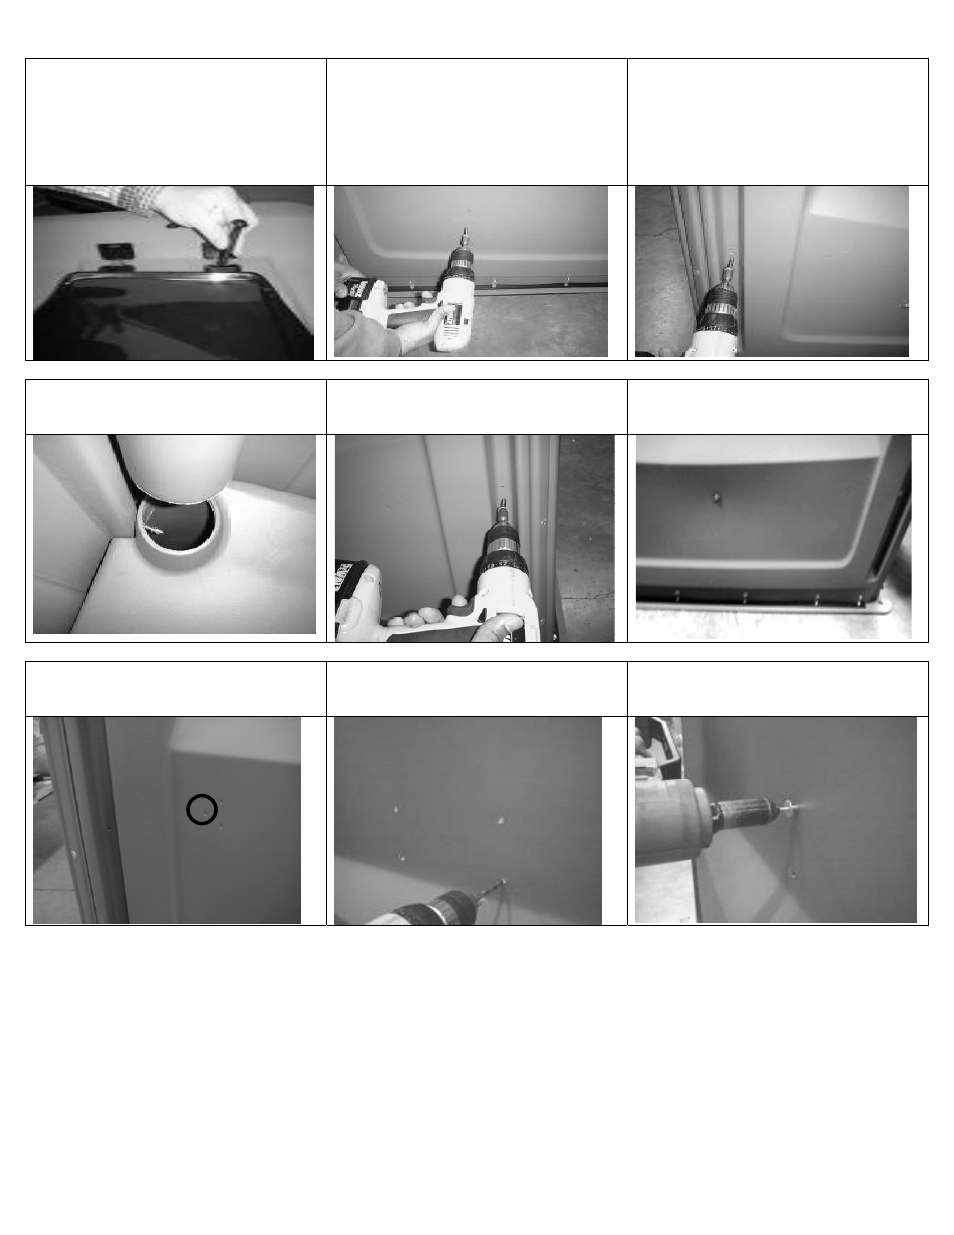
Install Tank and Vent pipe:
27) Install seat lid PN 10570 on tank PN
16538. Plastic bolt through seat lid hinge
into the tank Thread plastic nut on bolt
from inside of tank. Position tank in left
rear corner of unit.
28) Apply pressure on tank out against
panel while installing screws PN# 13860
for the outside of unit. Install screw from
outside through forward dimple in left
panel 15-1/2" [39.37] from the rear and
13-1/4" [33.66cm] up from floor using
3/8" (.375”) [9.53 mm] Hex Driver bit.
29) Install second screw through left
panel into dimple in center of groove
17.50" [44.5 cm] up from floor.
Install Tank and Vent pipe:
30) Insert vent pipe PN 13796 into tank
until it bottoms out against screw.
31) Drive third screw through rear panel
into dimple in groove to tank and vent
pipe at 18" [45.7 cm] up from the floor.
32) Drive fourth screw through rear panel
up from dimple in rear panel 1.75" [44.5
mm] up from the floor.
Install Tank and Vent pipe: Install Paper guard:
33) Drive fifth lag screw into rear panel
dimple (far left dimple on rear panel for
lift handle).
34) Drill out 4 dimples in left panel just
below left handrail using a drill with a ¼”
(.250”) [6 mm] drill bit, at location below
35) Insert rivet PN 11054 from the
outside of the panel.