Installing the evaporator unit (fan coil unit) – Vintage Cellars Platinum MIni Split Tech Manual User Manual
Page 15
www.whisperkool.com | Page 13
INSTALLING THE EVAPORATOR UNIT (FAN COIL UNIT)
Note: During installation WhisperKOOL recommends
elevating the unit close to the install height.
8. Raise the evaporator to the installation location. Align the rear key holes
with the mounting screws and mount the unit.
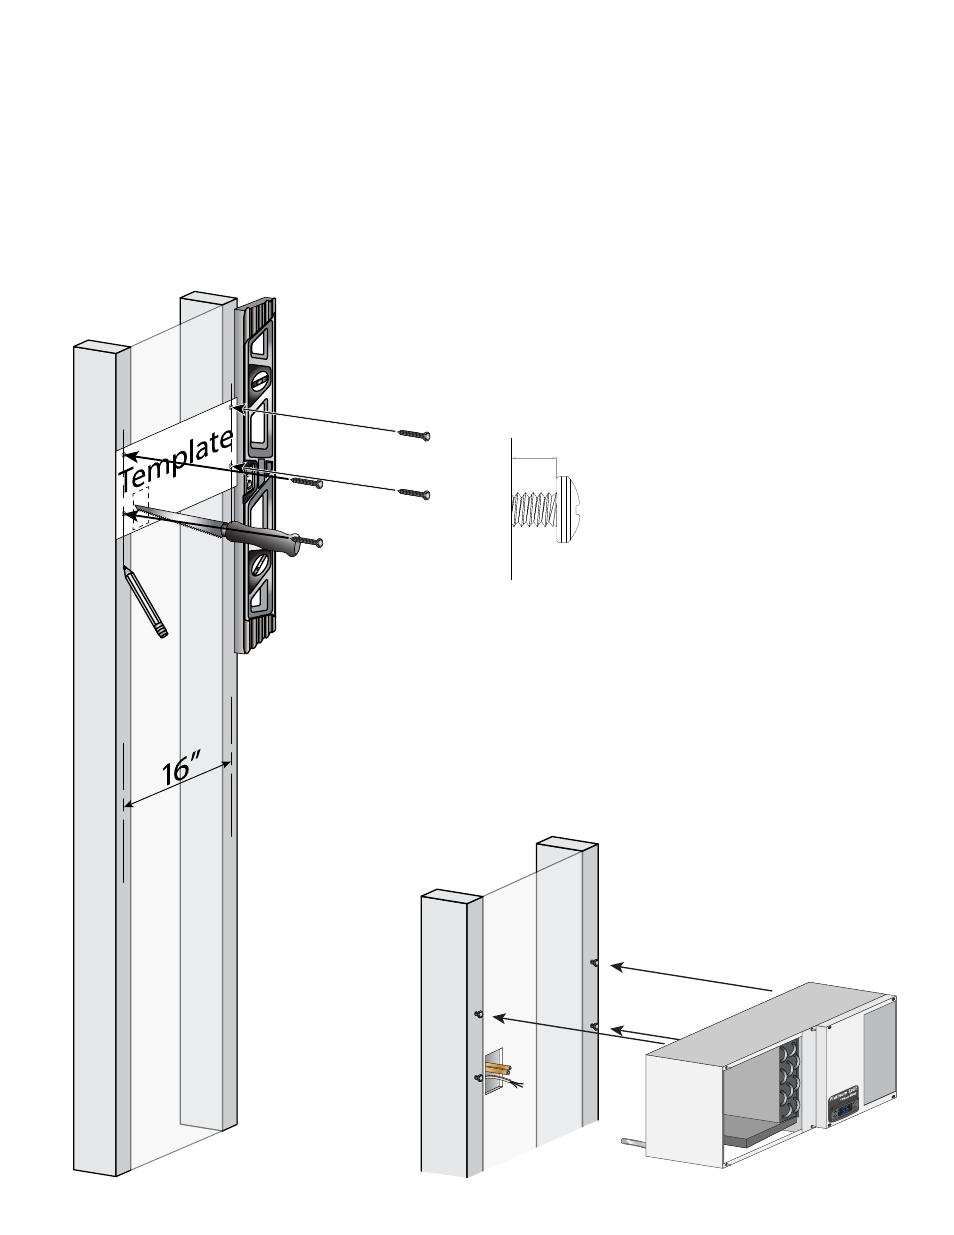
1. Locate two desired wall studs. Mark center lines for the studs vertically on the wall (16 inches apart)
followed by a level horizontal line at your desired height.
Note: The top of the unit needs to be installed at a
minimum of 6 inches from the ceiling and no further
than 18 inches from the ceiling.
Note: The evaporator is designed to be mounted on two standard 16” spaced wall studs.
2. Place the installation template on the wall lining up
the vertical lines through the sight slots.
3. Mark through the indicated Mounting Screw holes
and location for the Access Hole.
4. Set Installation Template aside.
5. Install the supplied four 2” #8
Hex Head Screws into the marked
mounting screw locations leaving 1/8”
between the wall surface and screw
head.
6. Cut out the Access Hole using a drywall saw or desired method. Be sure
to clear all debris and insulation.
7. The wall is now ready for installation. Place the prepared unit below the
install location.
1/16”
WALL
STUD