Torbal ATS120 User Manual
Page 30
- 29 -
Instruction Manual – ATS / BTS Moisture Analyzers
Cleaning the Analyzer
•
Before cleaning the unit or replacing halogen bulbs, always unplug the power cord from the electrical outlet.
•
Before performing any maintenance on the unit, make sure all parts and surfaces of the Analyzer have cooled.
•
Use a soft, lint-free, slightly damp cloth to clean the Analyzer.
•
Wipe the unit gently. Do not allow any liquid to enter into the Analyzer’s weighing or drying mechanisms.
•
Do not touch the temperature sensor (see parts description).
•
Do not apply extensive pressure to the LCD display.
•
Do not use chemicals especially benzene when cleaning the surface. Corrosive chemicals may damage the finish.
•
Alcohol may be used only to clean the scale’s stainless steel pan support or the pan handle.
•
To prolong the life of the halogen bulbs, be sure the bulbs are clean and free from fingerprints. Even a small amount
of oil from your fingers can cause the bulb to break when it is turned on.
Replacing the Halogen Bulb
Replace the halogen bulbs when they are defective or when you sense that drying is taking more time than usual.
Warning:
•
Before replacing the halogen bulb, avoid electrical shocks by unplugging the power cord from the electrical outlet.
•
Make sure the rated voltage of the new halogen bulbs is correct for the voltage of the power supply,
•
Handle the old bulb with care to avoid cracking. Broken glass may cause injury.
•
Never touch a halogen bulb with your bare fingers.
•
Always wear gloves when handling a new bulb. Even a small amount of oil from your fingers can cause the bulb to
break (or shorten its life) when it is turned on.
•
If a bulb is touched, before being used it may be cleaned with a lint-free cloth.
•
When replacing the bulbs in the Analyzer, avoid touching the temperature sensor
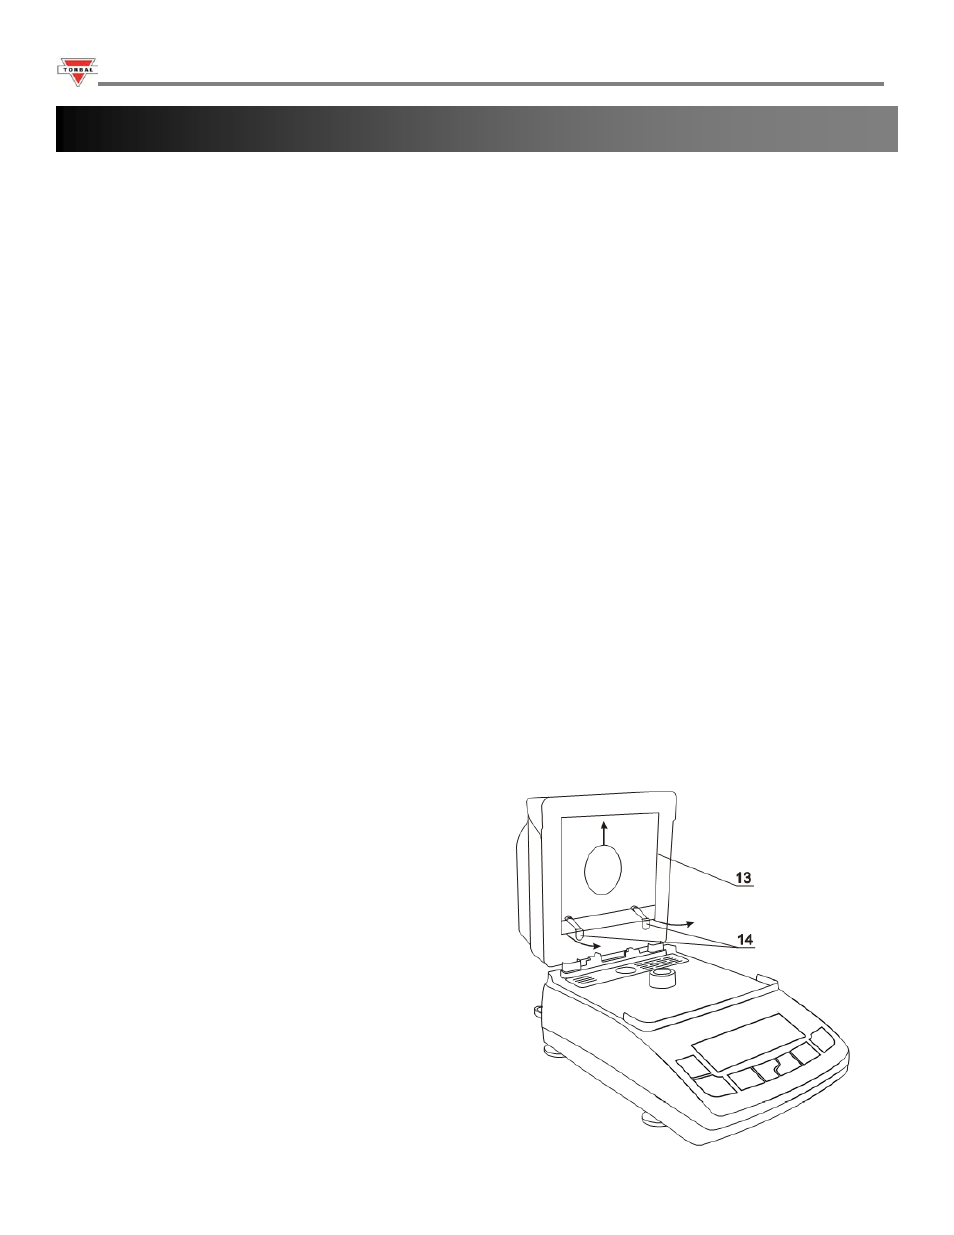
To replace the halogen bulbs follow the steps below:
1.
Open the drying chember
2.
Raise the protective glass plate upward utill it is
released by the bottom latches that hold the
glass in place.
3.
Gently remove the glass by tilting the lower
edge of the glass in the outward direction, as
shown in the illustration.
Chapter 20: Replacing the Halogen Lamps and cleaning the chamber