Attach pressure plates – EFCO S5600 Structural Glazed User Manual
Page 22
EFCO CORPORATION 7/2012 PART NO. Y306
Page 22 of 28
Series 5600 Silicone Structural Glazed Installation Instructions
Section VI: Glazing Preparation
Attach Pressure Plates
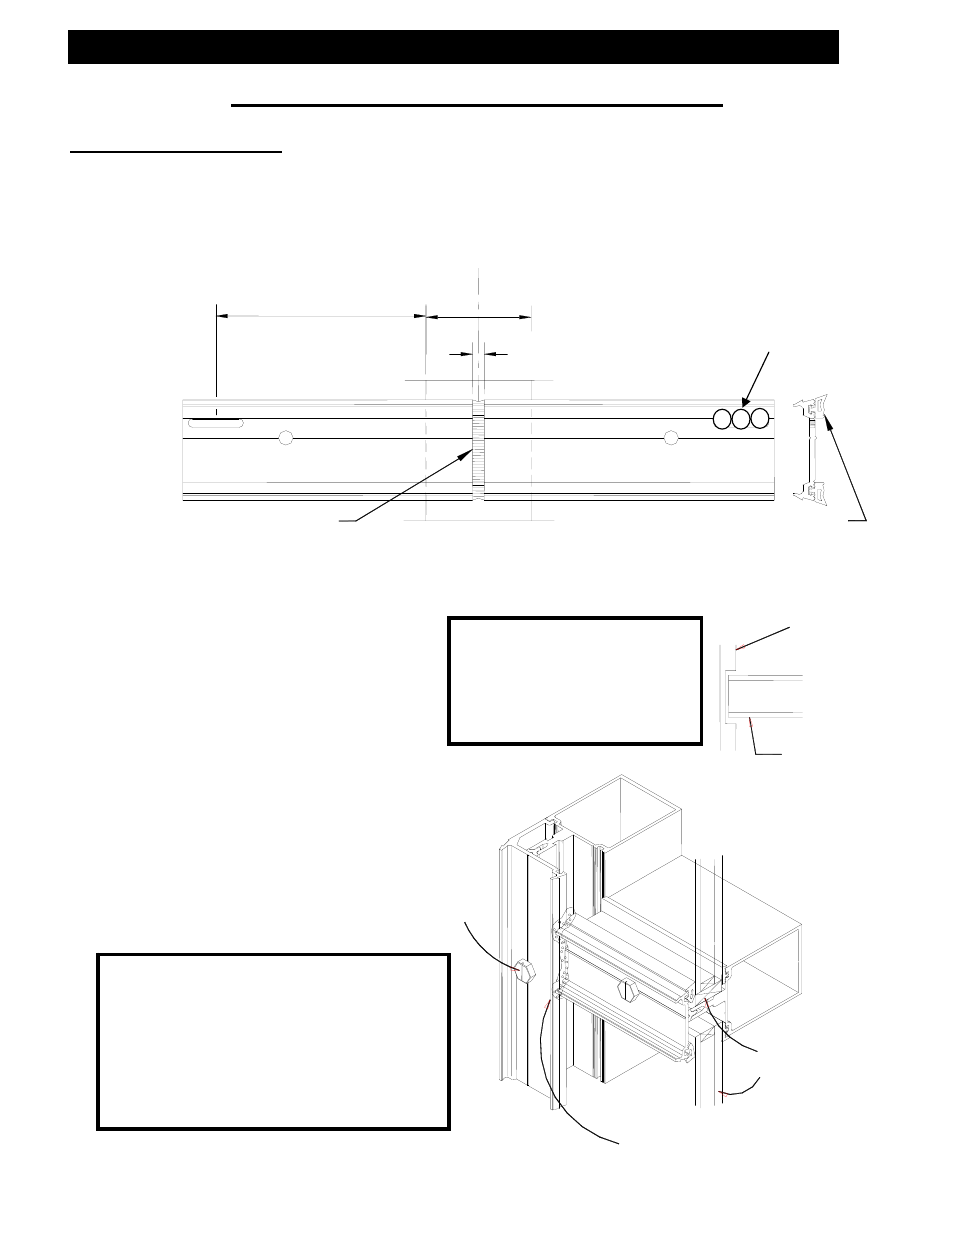
A.)
Apply glazing gaskets to pressure plates.
B.)
Gaskets applied to vertical pressure plates must be cut flush at both ends, except in
multi-story applications, gaskets must extend 1” beyond the end at expansion joints.
C.)
Gaskets applied to horizontal pressure plates; cut ¼” long both ends maximum.
D.)
Attach pressure plates with #13 X 5/8” SS HWHSMS pressure plate screws.
Trim gaskets at joints
Seal joints with sealant.
Vertical Gasket
Mull Plug
#13 X 5/8” HWHSMS
1” Setting block
Seal horizontal pressure plate to
vertical pressure plate so they are
air and water tight.
Glass line
Note: Field notch vertical
gasket to clear joint
plugs at horizontal
location. Seal all
corners of gaskets
with sealant.
Customer / Installer Note: EFCO
setting blocks are typically 4” in
length with different depths. If the
glazing infill is “NOT BY EFCO” and
glazing sizes are larger than 40 square
feet, then the glazing details must be
reviewed by the glazing manufacturer
for proper setting block size.
OPTIONAL WEEP HOLES
5/16” weep holes Drill 3 side by side
centered 4” off each end of the
pressure plate. Locate C/L of holes
5/32” above top of tongue.
4"
2 1/4"
1/4"
TYP.
C MULL
L