Dynojet Spring Applied Air Release (SAAR) Brake Assembly User Manual
Page 21
S P R I N G A P P L I E D A I R R E L E A S E ( S A A R ) B R A K E A S S E M B L Y I N S T A L L A T I O N
Installing the SAAR Brake Assembly
Version 1
Spring Applied Air Release (SAAR) Brake Assembly Installation
17
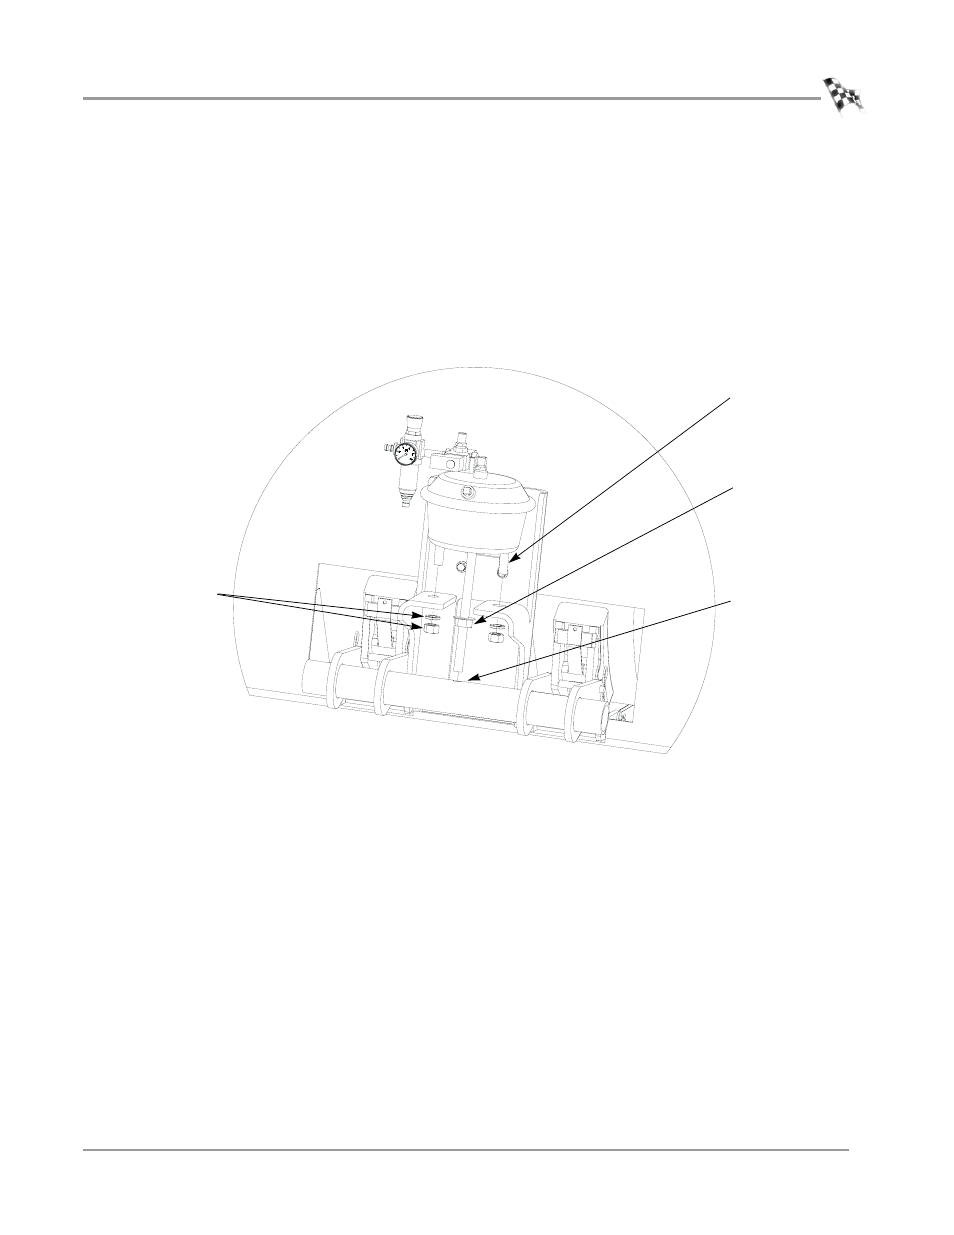
5
While lowering the air can through the hole in the tube, align the air can studs
with the holes in the bracket.
Note: The rod will not extend all of the way through the tube until the electronics
are connected and air pressure is applied to the air can.
6
Loosely attach the air can to the bracket using the two 5/8" nuts and lockwashers
removed earlier.
Keeping the nuts loose will allow for adjustment while extending the air can rod
the remaining distance through the tube. The power and air connections are
necessary to finish connecting the brake assembly.
Figure 18: Install the Air Can
BR029
use 5/8" lockwashers
and nuts to attach air
can to bracket
insert air can rod into
hole through tube
washer and upper nut
will be tightened down
onto tube after lower
nut is fastened
air can studs