Installing the air can – Dynojet Spring Applied Air Release (SAAR) Brake Assembly User Manual
Page 20
Spring Applied Air Release (SAAR) Brake Assembly Installation
S P R I N G A P P L I E D A I R R E L E A S E ( S A A R ) B R A K E A S S E M B L Y I N S T A L L A T I O N
Installing the SAAR Brake Assembly
16
I
NSTALLING
THE
A
IR
C
AN
1
Thread the pipe fitting which extends from the solenoid subassembly into the
threaded hole on the top of the air can. Apply pipe thread sealer to the fitting if
sealer is not already present.
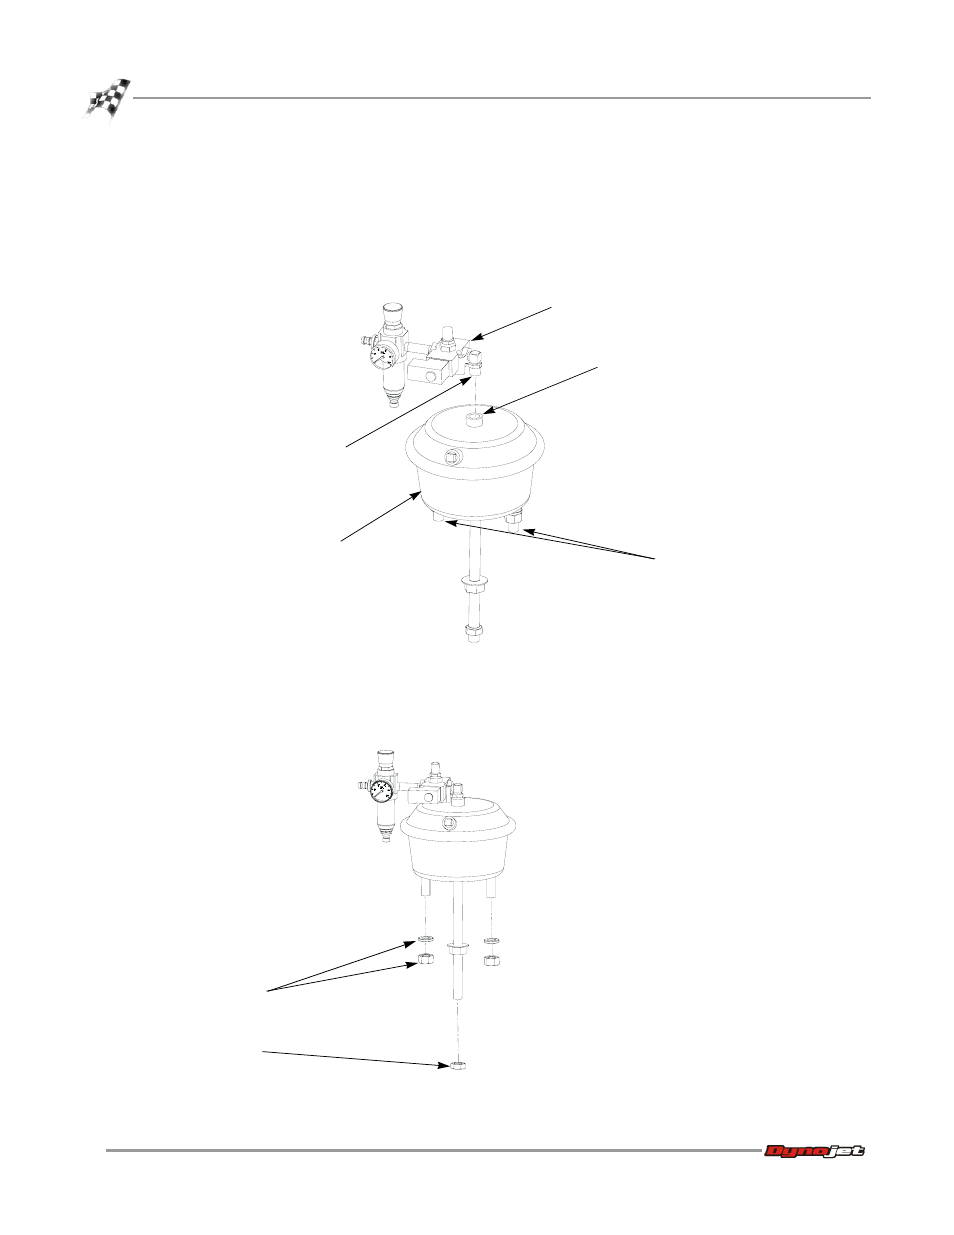
2
Align the solenoid assembly so that it is parallel to the two bolts that extend from
the bottom of the air can as shown in Figure 17.
Figure 16: Attach the Solenoid Subassembly to the Air Can
3
Remove and set aside the two 5/8" lockwashers and nuts for the air can.
4
Remove and set aside the 5/8" nut from the long threaded rod at the bottom of
the air can.
Figure 17: Prepare the Air Can Assembly
AB093
solenoid assembly
threaded hole
in air can
threaded pipe fitting
air can
align solenoid assembly
with these two studs
BR030
5/8" lockwashers
and nuts
5/8" nut