Detex 03R Trim for 60 Series User Manual
Page 3
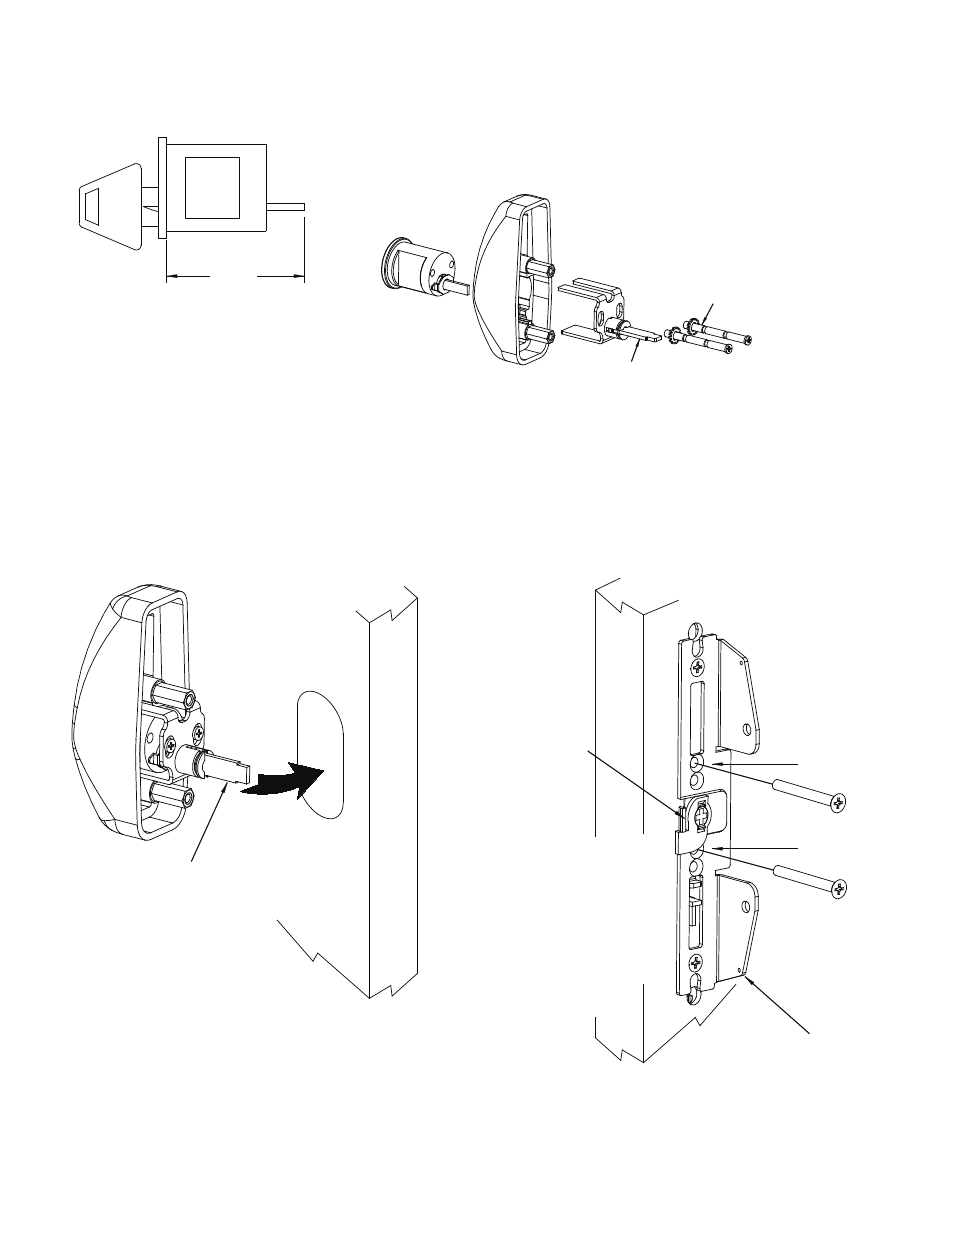
4. PREPARING THE CYLINDER:
Cut rim cylinder tailpiece as
shown below.
Cut break-away
cylinder screws as
needed for proper length
5. ASSEMBLE THE TRIM:
Assemble the cylinder (with key removed), trim housing
& tailpiece assembly.
The unit comes assembled with the tailpiece used on
1-3/4 to 2" thick doors. For 2-1/4" thick doors, replace
with the longer tailpiece provided (p/n 105239-1).
7. INSTALL TRIM ON DOOR
With the required BP12 backplate secured, use the appropriate length screws in the TOP HOLE in
each pair of backplate holes above and below the cam (as shown) to install trim.
TOP HOLE
TOP HOLE
Cam
Align tailpiece to cam when
installing
To access screw holes, peel off
the label attached to top of cam.
Turning the key to rotate the
cam may be necessary to allow
access to both screw holes.
When finished, cam MUST be
in position shown. Tailpiece
MUST NOT protrude past
surface of cam.
1-3/4"
±1/16"
Will always be 90° to
cylinder tailpiece
Must use BP12
backplate supplied
with device
p/n: 104148-2
6. GO BACK AND FOLLOW EXIT DEVICE INSTRUCTION STEPS up to, but not including
ASSEMBLE DEVICE TO DOOR. Trim must be installed BEFORE device is assembled to door.
8. CONTINUE ON WITH DEVICE INSTRUCTIONS.
LHR
installation shown
104871 Page 3