Step 1: prep door, Steps 3-4: install mortise lock and trim device, Step 2: prep trim device – Detex 14DM Trim User Manual
Page 2: Install trim device 3 install mortise lock, Install mortise cylinder and trim input shaft 2
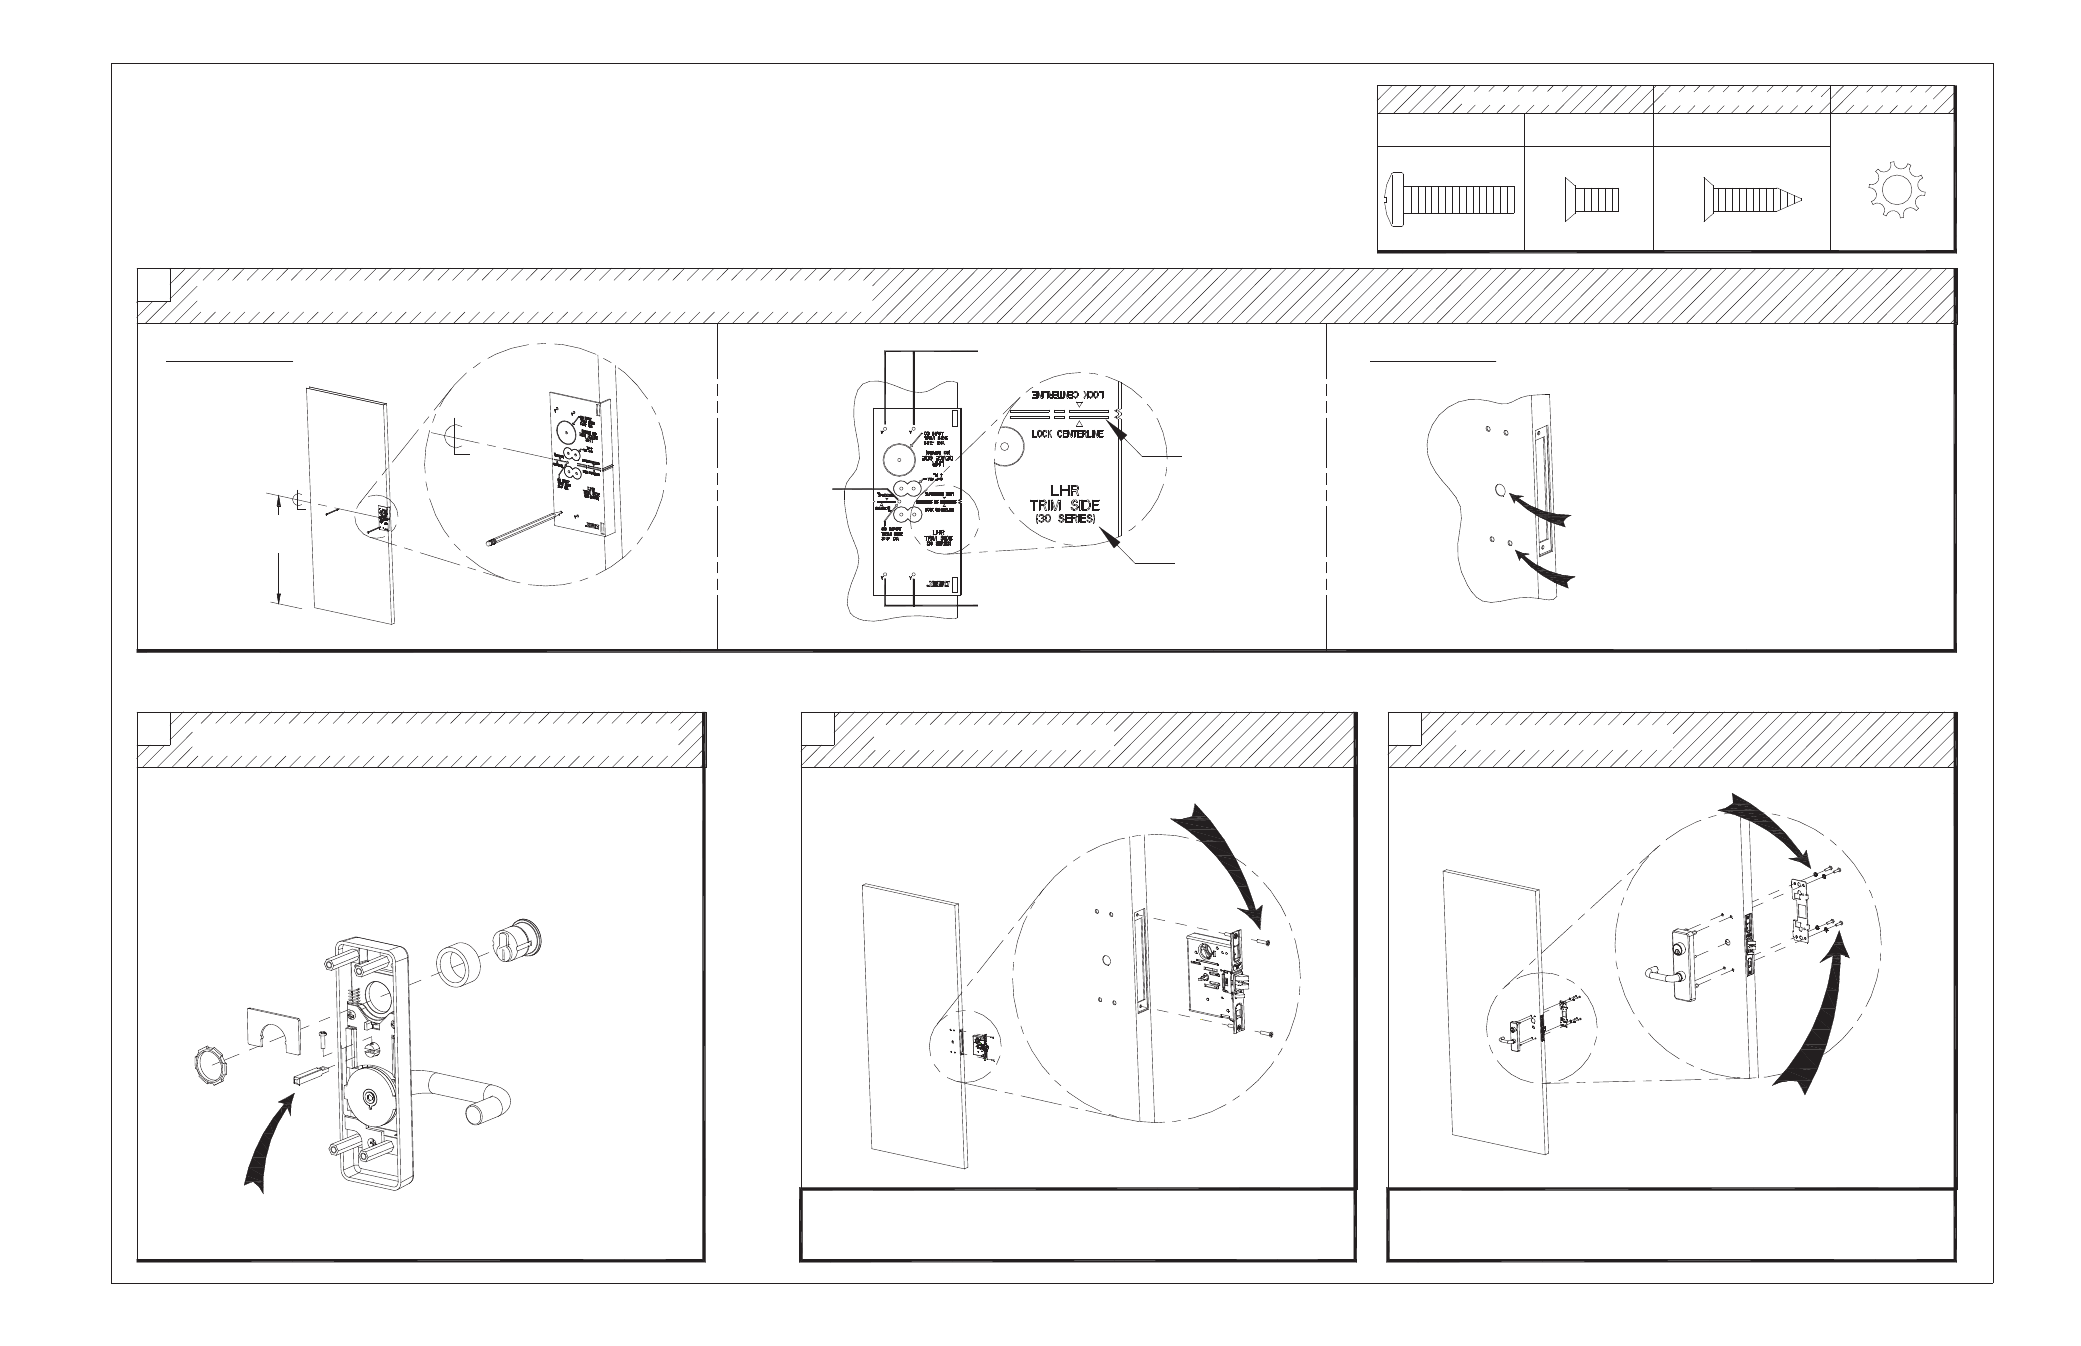
TRIM side: Use plastic template to mark and drill TRIM holes
1
STEP 1: PREP DOOR
08, 09, 14 LEVER TRIM INSTALLATION INSTRUCTIONS
4
STEPS 3-4: INSTALL MORTISE LOCK AND TRIM DEVICE
Mark centerline for
trim 40" above
finished floor
MARK HOLES
DRILL HOLES
NOTES:
1) Mortise lock NOT supplied with TRIM device.
2) For a retrofit application, remove lock and device before installing new trim.
3) LHR installation shown (Reverse all steps for RHR).
Install TRIM device
3
Install MORTISE lock
#1/4 Lockwasher
Install backplate with
(4) "A" screws
Install lock with (2) "I" screws or
(2) "J" screws for wood doors.
I
#12-24 x 1/2"
A
#1/4-20 x 1"
Machine Screws
J
#12 x 1"
Sheet Metal / Wood Screw
Mark trim holes
Mark trim holes
Drill 1/2" diameter holes thru trim side only
4 places
Drill 3/4" diameter hole thru trim side only
Install mortise cylinder and trim input shaft
2
STEP 2: PREP TRIM DEVICE
Install trim input shaft
1. Key should turn cylinder easily to slide locking bar in both directions.
Cylinder P/N: 102281-X
Short collar included
P/N: 100572-X
3. Mortise cylinder NOT supplied with trim, but can be ordered
Mark trim
input hole
2. Mortise cylinder installed on 08 & 09 trims only
NOTE:
separately
Continue installation using device instructions (p/n:101349)
TRIM INSTALLATION COMPLETE
Lock washer
#1/4 Lock washer
IMPORTANT!
For modular cable devices, see electrical intructions for cable routing
Lock Centerline
LHR Trim Side