Operation, 3 spd std gate 3 spd rev gate – B&M 81052 Stealth Magnum Grip Pro Stick Black Automatic Shifter. User Manual
Page 7
is shifted to the Reverse position. Adjust the switches if re-
quired. Reconnect the coil wire.
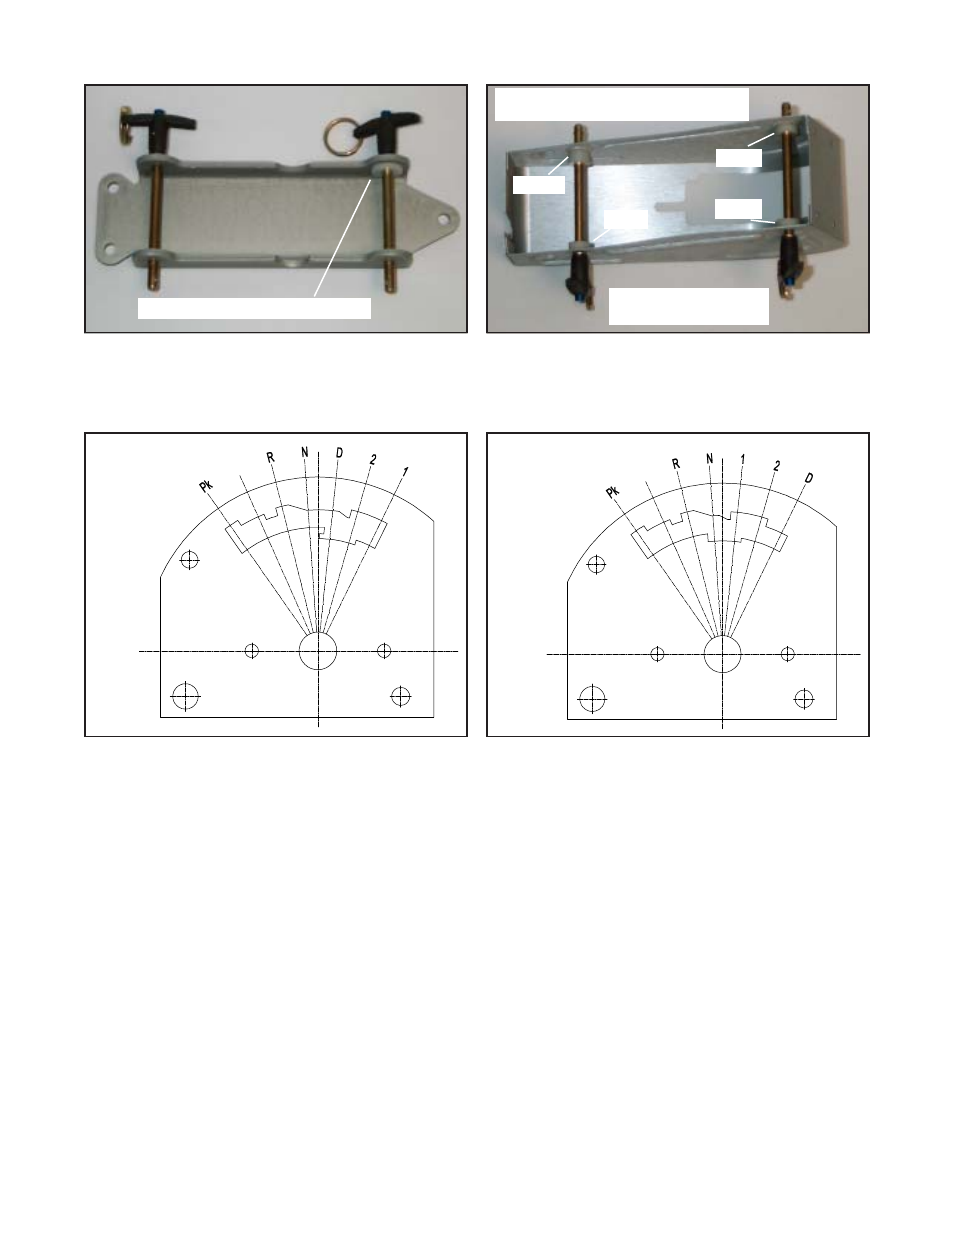
MOUNTING BRACKET AND ALUMINUM HOUSING
If the quick release mounting bracket is being used, it is
screwed to the floor with four mounting screws. One spacer
washer is required between the mounting bracket and the
shifter in the location shown in Figure #10. The shifter is held
onto the bracket with the two quick release pins.
The aluminum housing can be used with or without the mount-
ing bracket. If it is used with the mounting bracket, no spacers
are required. If it is used without the mounting bracket, four
spacer washers are required between the shifter and the
cover as shown in Figure #11. The two quick release pins
are used to hold the cover to the shifter or the shifter and
mounting bracket. A sheet of shift pattern decals is included
with the cover. Select the one that fits your shift pattern and
press the decal on the top of the housing to line up with the
stick.
THREE SPEED FORWARD PATTERN (SEE FIGURE #12)
1. First Gear: (Starting with the shifter in Park) Pull the trigger
lightly until it stops, then pull the stick all the way back releas-
ing the trigger at mid travel.
2. Second Gear: Push the stick forward to stop.
3. Third Gear: Pull and hold the trigger firmly, then push the
stick forward to stop. Release the trigger and remove the pres-
sure from the stick allowing the spring loaded selector pin to
raise to the top of the gate opening.
4. Neutral: Push the stick forward to stop.
5. Reverse: Push the Reverse Lockout lever forward, then
push the stick forward to stop.
6. Park: Pull and hold the trigger lightly until it stops, then
while holding pressure on the trigger push the stick forward
until it stops.
THREE SPEED REVERSE PATTERN (SEE FIGURE #13)
1. First Gear: (Starting with the shifter in Park) Pull the trigger
lightly until it stops, then while holding the pressure on the
trigger pull the stick rearward slowly until the stick stops at
the “1” position.
2. Second Gear: Pull the stick rearward against the stop.
Figure #10
Figure #11
Use epoxy to attach spacer here
Use epoxy to attach 4
spacers as shown
1 Thick
1 Thin
1 Thin
1 Thin
Spacers required when using cover
without quick release bracket
OPERATION
How to shift Magnum Grip Pro Stick Shifter
Note: The Reverse Lockout Lever (See Figure #1) described in the following instructions ONLY needs to be operated when shifting from Neutral to Reverse
3 Spd Std Gate
3 Spd Rev Gate
Figure #12
Figure #13
7