B&M 35229 TRANSPAK User Manual
Page 5
bore. The stock spring will not be re
used. Insert the RED spring from the kit
into the bore then install the valve,
aluminum plug, and roll pin in reverse
order of removal. Important: Do Not
dry or wipe parts with cloth rags be-
cause the lint and loose threads can
contaminate the transmission fluid and
result in jambed pressure regulator and
shift valves. Clean valve body and sepa-
rator plate with clean solvent and air
dry.
ASSEMBLY
STEP 9. Heavy Duty and Street;
Check ball placement (See Figs. 6 &
7) Place check balls in the valve body
and case in the positions shown. Use a
dab of grease or petroleum jelly to hold
check balls in position. There are (3)
check balls located in the valve body
and (8) in the case.
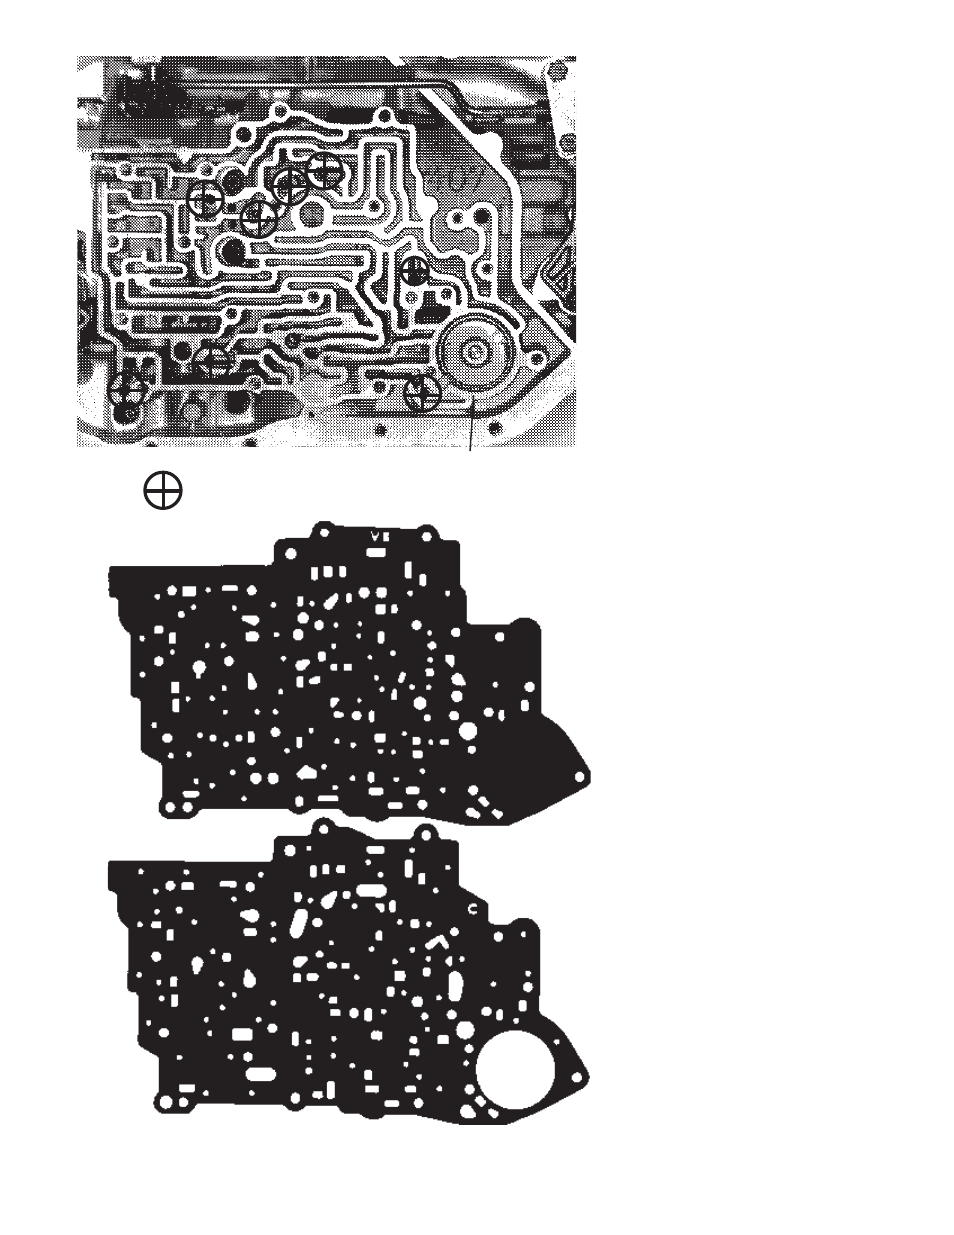
STEP 10. Place the new separator plate
gaskets on the separator plate (See
Fig. 8.) Use a dab of grease or petro-
leum jelly to help hold the gaskets to
the plate. The gasket with the ‘C’ cut in
it goes next to the case and the gasket
with the ‘V or VB’ cut in it goes next to
the valve body. Make sure no holes in
the separator plate are covered by the
gasket.
If your gaskets become damaged
anytime during the installation of the
kit, replace them. Purchase OEM
gaskets for your specific year and
model vehicle.
STEP 11. Heavy Duty Level Only;
Insert the 3-4 accumulator pin in the
case. Over the pin place the spring and
then the accumulator piston. Use a dab
of grease or petroleum jelly to hold
components in place (See Fig. 9.)
STEP 12. Street Level Only; Insert
the 3-4 accumulator pin in the case.
Over the pin place the Red (3/8") spacer,
spring and accumulator piston. Use a
dab of grease or petroleum jelly to hold
components in place (See Fig. 10.)
STEP 13. With the 3-4 accumulator
components and case check balls in
place, place the separator plate - gas-
ket assembly up to the case followed
by the 1-2 accumulator plate. Carefully
line up the gaskets and install the short
accumulator plate bolt. Tighten bolt
finger tight (Note: When installing valve
body and accumulator housing install
all bolts finger tight first to allow the
Place ckeckballs in the 8 locations
marked
3-4 accumulator
Fig. 8. Valve Body Gaskets.
5
Fig. 7. Case Checkball Placement.
Valve body
gasket
Case gasket