2 installing the ls-10 scanner, Installing the guide rails, The computer drive bays – Nikon 35MM Film Scanner LS-10E User Manual
Page 30
Attention! The text in this document has been recognized automatically. To view the original document, you can use the "Original mode".
[C]
[a]
[b]
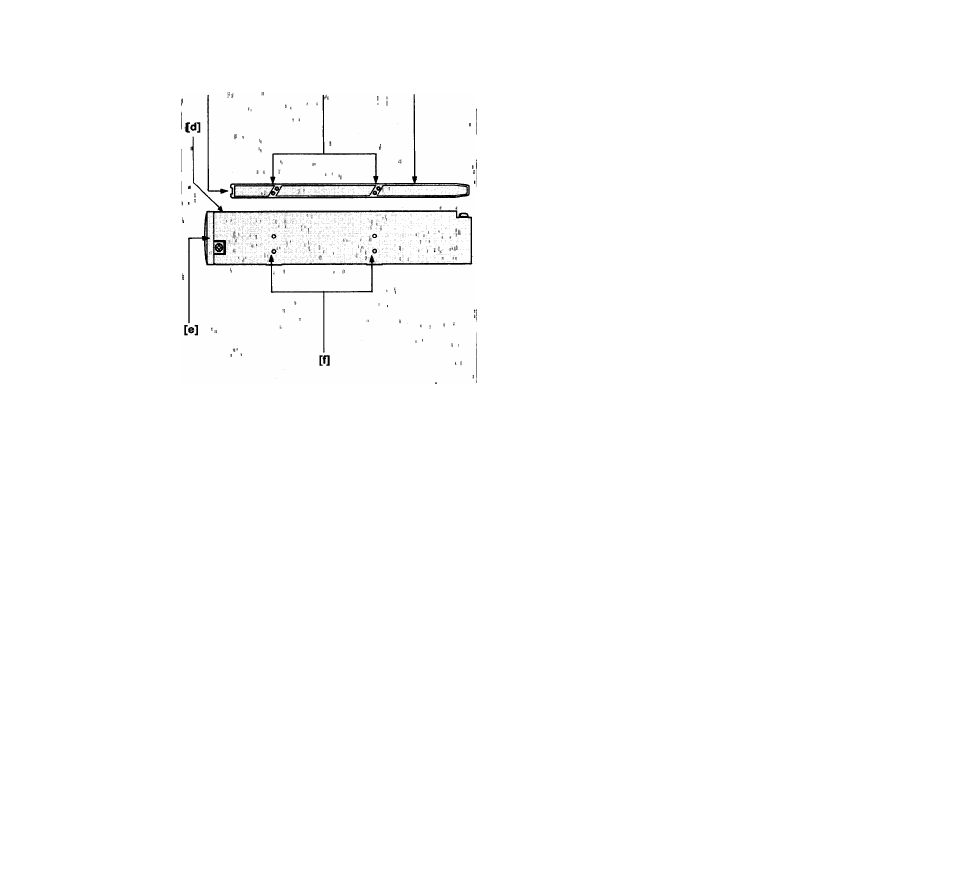
Fig. 3.3
The LS-10 scanner side view with raiis
Vue iatérale du LS-10 et rail guide de montage
Seitenansicht des Scanners LS-10 mit
Führungsschienen
Both sides of the LS-10 are identical as shown in Figure
3.3. Note the set of two tapped holes on each side. One
set of holes on each side of the scanner will be used for
the rails as shown in this figure.
[a] Mounting holes
[b] Guide rail
[c] Locking tab
[d] Top panel
[e] LS-10 front panel
[f]
Tapped holes
3-2 Installing the LS-10 Scanner
Installing the internal-mount scanner is very easy. The
guide rails provided with the scanner must be screwed
to the two sides of the scanner. The scanner must be
inserted into the drive bay using the computer drive bay
slots. Connections to the back of the scanner include the
computer power and the SCSI flat cable.
Due to the tight space constraints inside the computer, it
is not possible to connect the cables to the scanner after
the scanner is installed. The SCSI cable and terminating
networks are easier to connect to the scanner before the
scanner is mounted in drive bay. The computer power
connector is typically easiest to connect to the scanner
when the scanner is partially pushed into the drive bay.
Installing the guide rails
Each computer can have its own special requirements
for mounting devices into the internal drive bays. In
most cases, a pair of guide rails are screwed to the
sides of the scanner to slide into the drive bay as shown
in Figure 3.3. These guide rails are also used to lock the
scanner in place.
The computer drive bays
In order for a scanner to be mounted internal to the
computer, the computer must have the following:
1. An externally accessible 5 1/4" half-height bay
2. A standard power supply connector
3. A card slot available on the motherboard
30