Assembly step 2, Assembly step 3 – Craftsman 139.53225SRT User Manual
Page 9
Attention! The text in this document has been recognized automatically. To view the original document, you can use the "Original mode".
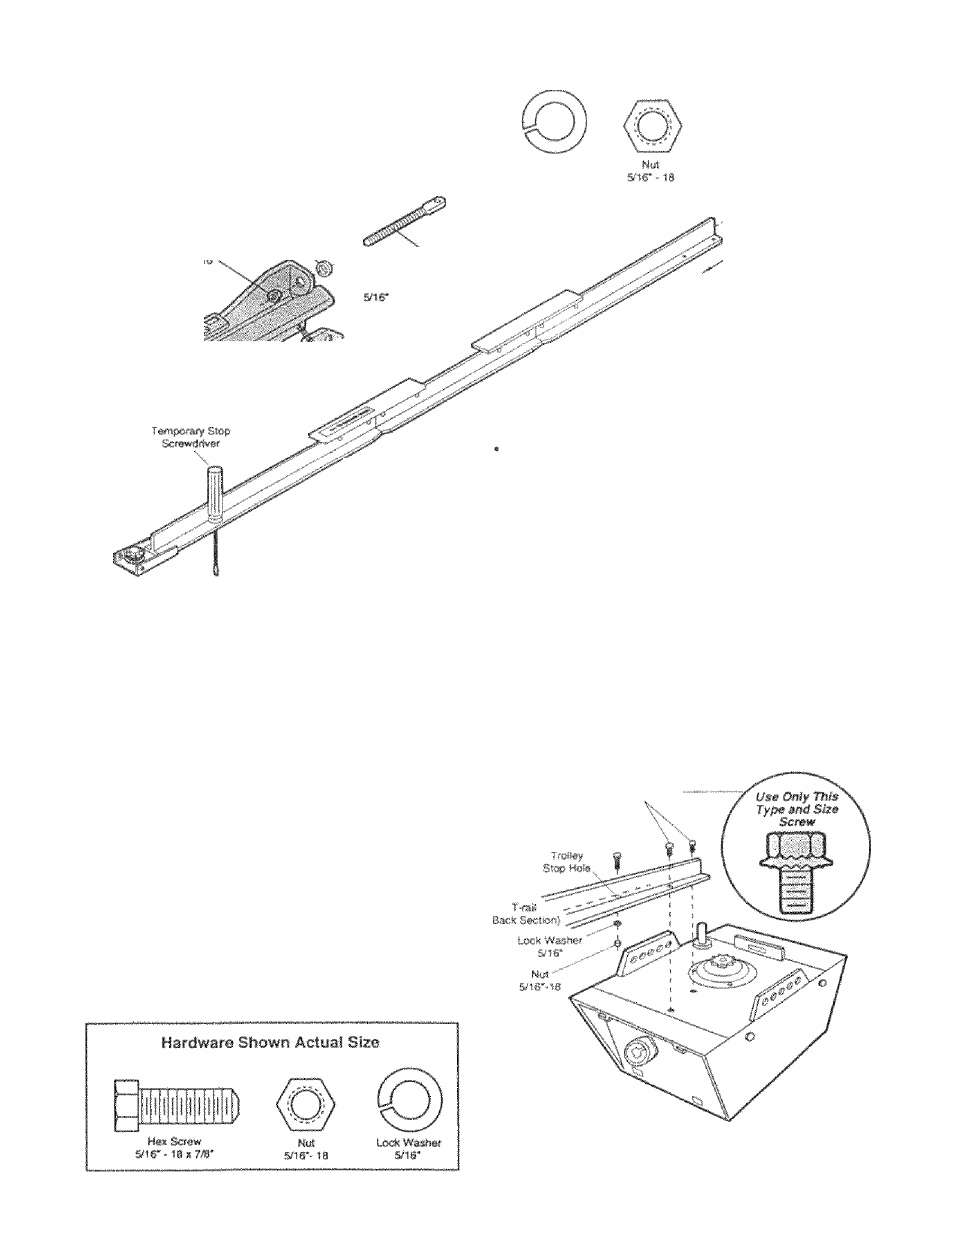
Assembly Step 2
install the Tmliey on the 'Tornii
Attach the threaded shaft to the trolley with the
lock washer and nuts as shown.
loci«
SIS'.
T
fo
I!ȴ
Hardware Shown
Actual Size
Loc'k Wash«f
&'tr
iltey
Irsfler Hyi
rmn
Hifi^sded
r' .J
'm
toto
' As a temporary stop, msert a screwdriver into the
hole in the front end of the T~rail.
• Slide the trolley assembly along the rail to the
screwciriver stop,
If trolley hits against any nuls en the T-rall, the
tjolts and nuts were atttched from the wrong
side and must t» repositioned. Review' Step 1.
Assembly Step 3
Fasien the T-rail to the Opener
• Place the opener on packing materiai tO: protect
the cover. For convenience, put a support under
the cable pulley bracket.
• Remove the (2) 5/16*«l8x1/2‘ washerecl screws
moynied in the top of the opener.
• Align the hoi-es in the back section of the T-rail with
the holes in the opener.
• Fasten the rail with the (2) wasiiered. screws
pnevtously removeci. Tighten securely.
Remember to- use only these screwsl Any other
screws will cause serio-us damage to the opener.
• Insert', a 5/16*-18x7/8* hex screw iii'to- the trolley
stop hole iri: the T-rail as shown. Tighten securely
with a 5/16* lock washer and nui This screw limits
trolley travel in the UP direction.
n
To fasten rail, use only those screws meiinted
in the top of the opener. Any other screW'S wit
cause serious damage to the opener.
Washefiid
Siittm
S/l6*-10»1i2*
Hix Screw
5/ir-l'8*7/a-
\