Assembly step 4, Figure 3, 3 ( anr.u v, ¡jíf/i- rt knhmg – Craftsman 139.53225SRT User Manual
Page 10: Figyfe 2 op€fi^ sp'ocke
Attention! The text in this document has been recognized automatically. To view the original document, you can use the "Original mode".
Assembly Step 4
Install the Chsin/Caüíe &
Attach the Sprocket Cower
^9
IHI:
II n , ,i .1
dv# Chain arttfCaW«
,n',Cf fH‘ ffftnsing
3 ( Anr.u V, ¡Jíf/i- rt Knhmg.
SertO'ys ln|urf can result If fttigers b-ecom#
entangled In moving opener sproctet. Attach
sprockei cover securely. Never operate opener
while yoyr hand is near the opener sprocket.
FIgyfe 2
Op€fi^
Sp'ocke
1 mVfI ' ' )i
n ÌC
If *f<
• D.-t.rh t;if
1
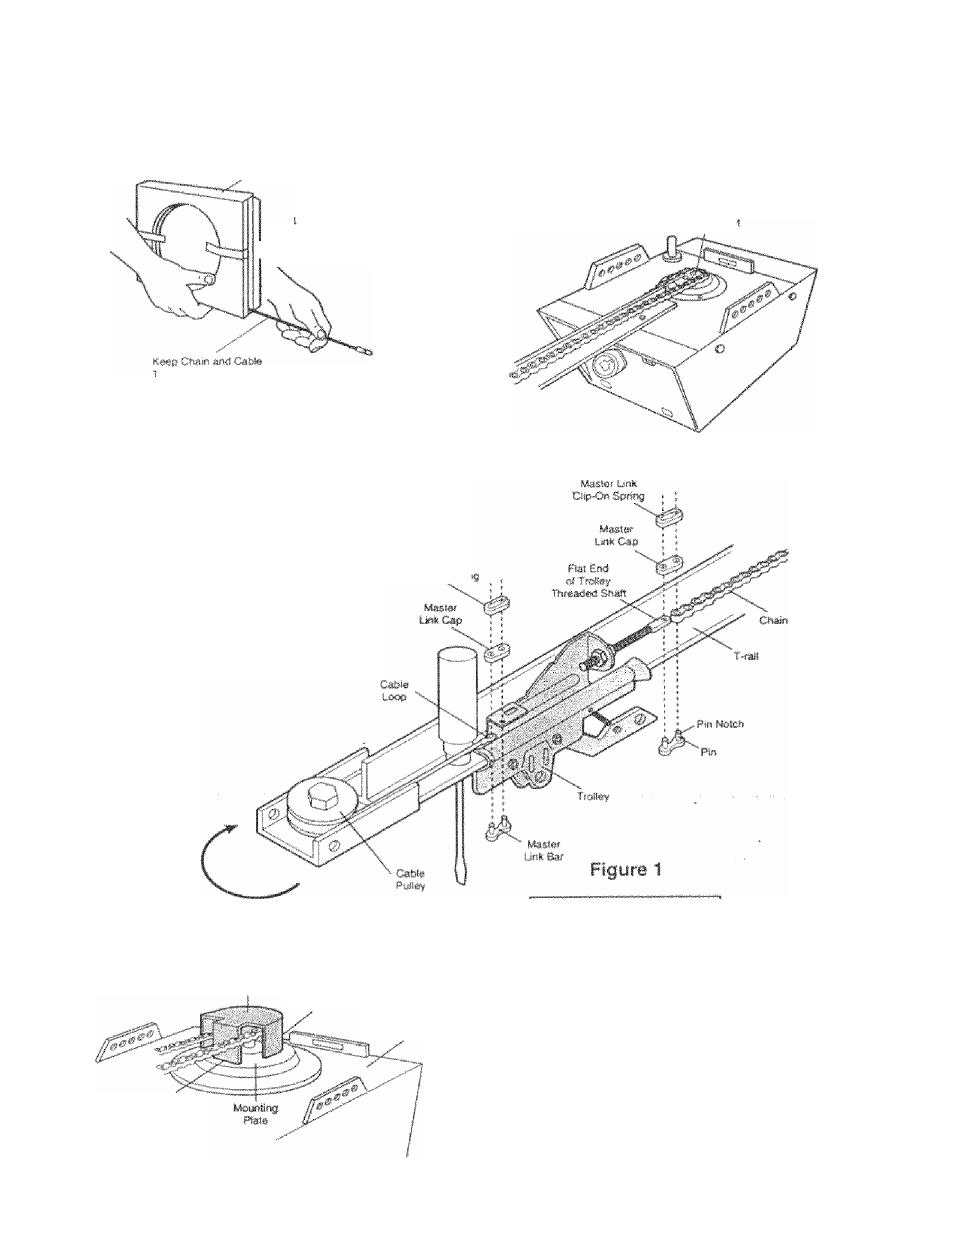
.,'iiíií- !nu(. from the cartoli and íaMoTí it
to tht- {folfi-/ wítÍ! il íii.i'jrif link fíOíTi the hardwrjte
bag bet .Twclm ImK piocedure, f-'tguro 1
• W'tbi tito dt'tlcy ag-iin it the ecr»>wdnver, diepenoo
the rabit around !
ííh
pulSoy.
• f’i(x of'd book tifound tfie opefrfif sprocket,
F igu.’f 2 Uo auf" rprockot toiith crigage bin
chain Continui' forwtiid to the trolley
thre,idofj sliah, Figurr,- 2
*' b , ‘
[ i f
> j- M J « t <1. Í if i O ’ji H I
th*’ ciifiin P) ttio flat end of the phaf!
Check to make sure the chain is
not twisted.
• Remove the scfewdrtver.
Figure 3
! I» k
f b|‘ ■- *p SiJii
!ns.laJl Chain
and
Cab»
in. This 0if*ctiOf>
Spfocfcet
Cover
Baci« Tab Sfot
Tep of 0|jen«r
Master LJnls Proe^eiiur»;
Push pins of masfef ink to
ftfoygh «ijle hxip and hole i.o
front end of trolley. Push ca.p
over pins anc! Into notches.
Slide ctip-on spring over cap
and ito .notches until both
pins are sasorely locked.
Ffonf Tab SW
To attach the sproctet cover.:
• Insert the back tab in the opener slot. Squee-ze the
cover slightly and insert the front tab
in
H-m '.tot
on
the
mounting plate.
10