Installation step 3 – Craftsman 139.53225SRT User Manual
Page 15
Attention! The text in this document has been recognized automatically. To view the original document, you can use the "Original mode".
Installation Step 3
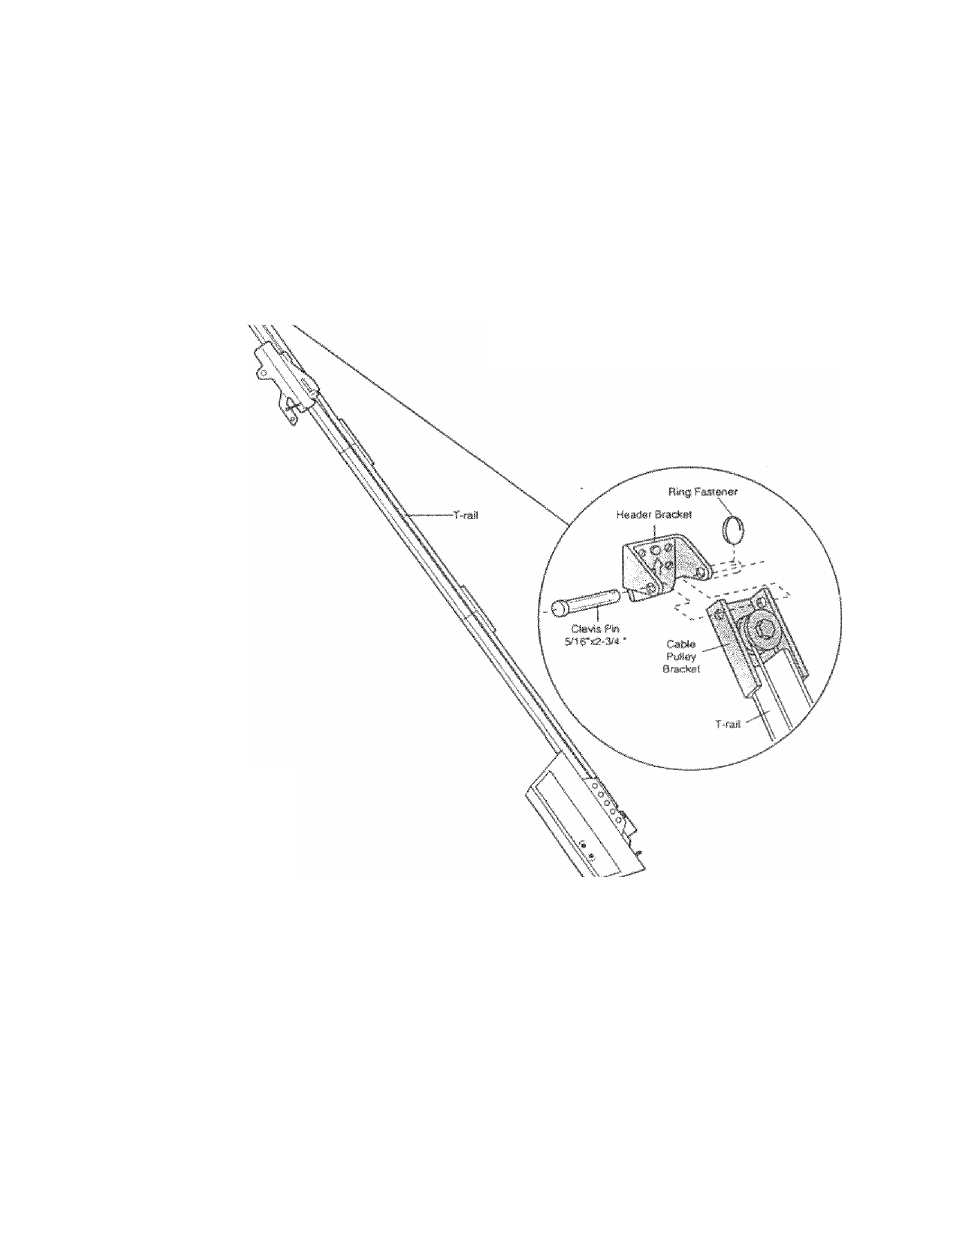
Mttaeb tfte T-mil to the Header Bracket
\^\ HivA-tl
-7''\h
7
j-» /
'
\ X
• Position the oponoi on the ^jaracje floor below the
header bracket Use packinr) maleriaS as a
protective bas«-
If the door spring is in the way you't! need help.
Have someone hold the opener securely on a
temporary support to allow the T-rai! to clear the
spring.
• Position the (able pulley bracket against the header
bracket.
• Align the bracKel hokis arid joiii witii a clevis pin as
shown.
_
• Insert a ring lasiener
to
secure.
../.jarage
Door
lii
Tflmporafy
' Support
Hardware Shown Actyal Size
O
Clwts Pin
S/«* It 2-3/4"
O
Ring FsJstetiet
IS