Installation step 5, Figure 1, Figure 2 – Craftsman 139.53225SRT User Manual
Page 17: Hang the opener
Attention! The text in this document has been recognized automatically. To view the original document, you can use the "Original mode".
Installation Step 5
Hang the Opener
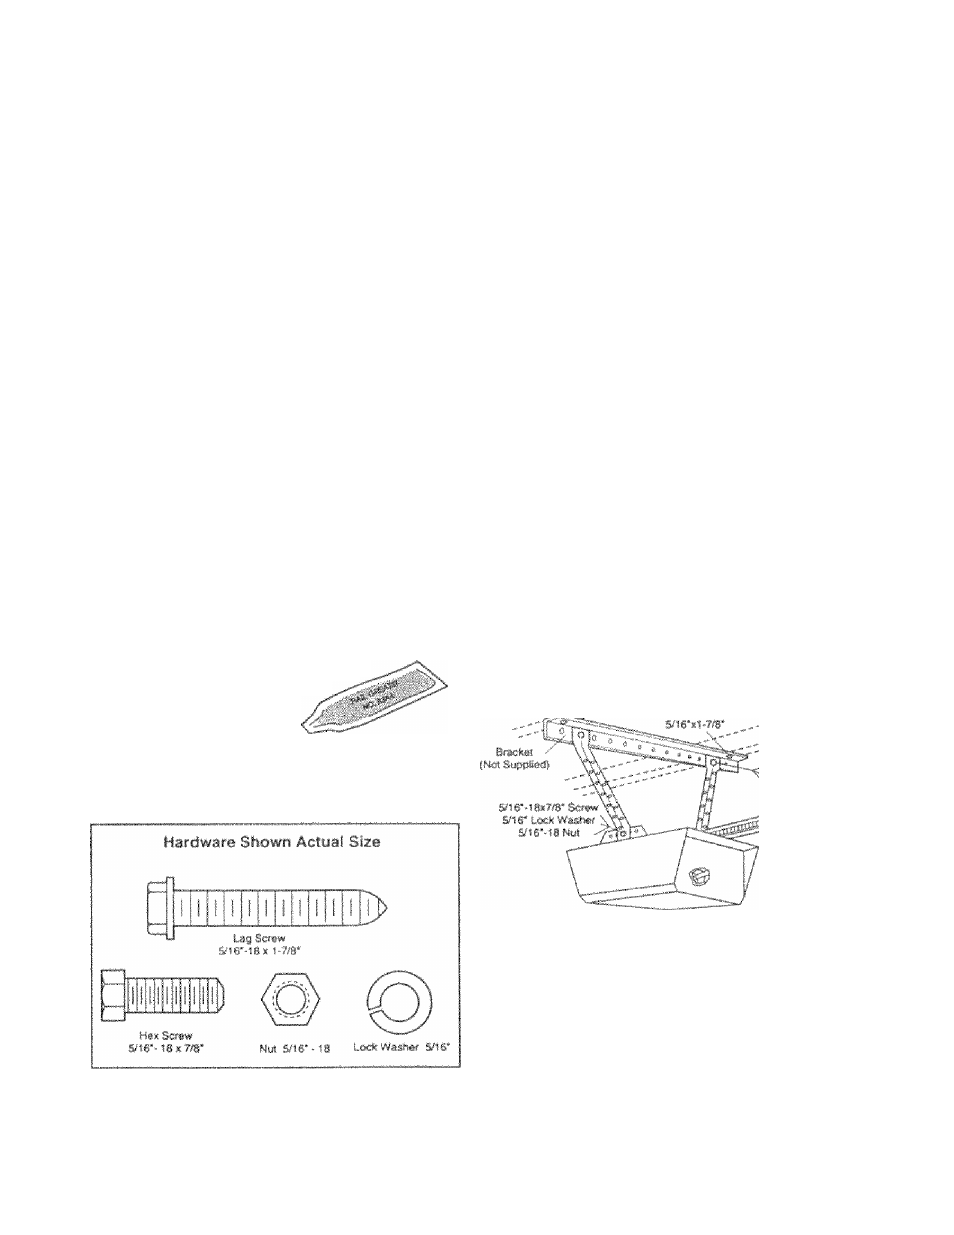
Two representative insiallaitons are shown.
Yours may be different Hanging brackets should
be angfed, Figure 1, So provide rigid Kupport, On
finished ceilings, Figtrre 2, attach a sturdy metal
bracket lo otruciura! supports before installing tne
opener. The bracket and fastening hardware are not
supplied. See accessory pngo
» Measure the distanci! ironi
ouch
nde of ttie opener
lo tfse structural support.
» Cut both pjecers of ifie fionging t)racket to roquirod
lengths,. •
• Drill .'4/1C" pilot hot*, s in Ifii- '.Jrur.turnl fiuppCifl'
» Attach nnn <■'’
0
^ 'd c.'ich bracket tf> ’ f uppor; with
b/1h‘x1 //8' l.'Hj ;ic.rows.
» Faster! tfin uporstc to the hariqi’ig braukets wilii
ГУ16’.13хГУв" 'jurewe, lock ?а1оЬ>.'г.с and riutc
»irtiGck to make сию die i ■ c«! u, сд.п?огг;с1 over the
door (i,>r in line r;th ihe hem Jar t>r.""ckpi (f thn
t/rackfii !c not ct-nicTod eimve the door)
• t{amove rhv Fod
oum
tiic. iifjcr rriannally if me
rfoor flits the reel, CJ!C'- ficrinra brtickn!
Grease the lop and ynciers-ide of the
rail surface where the trolley
slides. A tube
of
§.rease is
supplied.
'.T
Thé opener oould fall зт1 mjore someone ¡t ;t
is not properly sccun.'iL Farrfen ihc oponor
securely to structurai supports of the- garage.
Figure 1
'■ bir'“ufdl
,
\г;р)Г
u. U ‘
ff Л
W trf i ^ ?V
ги/ f' fhf
^ ! i <* ?
1Ч-1 G
Figure 2
Support
HHiSirt tf oi li \W
j
' /VS i‘
H'vi»'’
mi/'fr ' hu
17