Fasten the heade-r bracket to the wall, Fasten the header b-racket to the ceiling, Installation step 2 – Craftsman 139.53225SRT User Manual
Page 14: Install the header bracket, Crfltef, 1 i 1 ! j ! j 1 1 f— ijags
Attention! The text in this document has been recognized automatically. To view the original document, you can use the "Original mode".
Installation Step 2
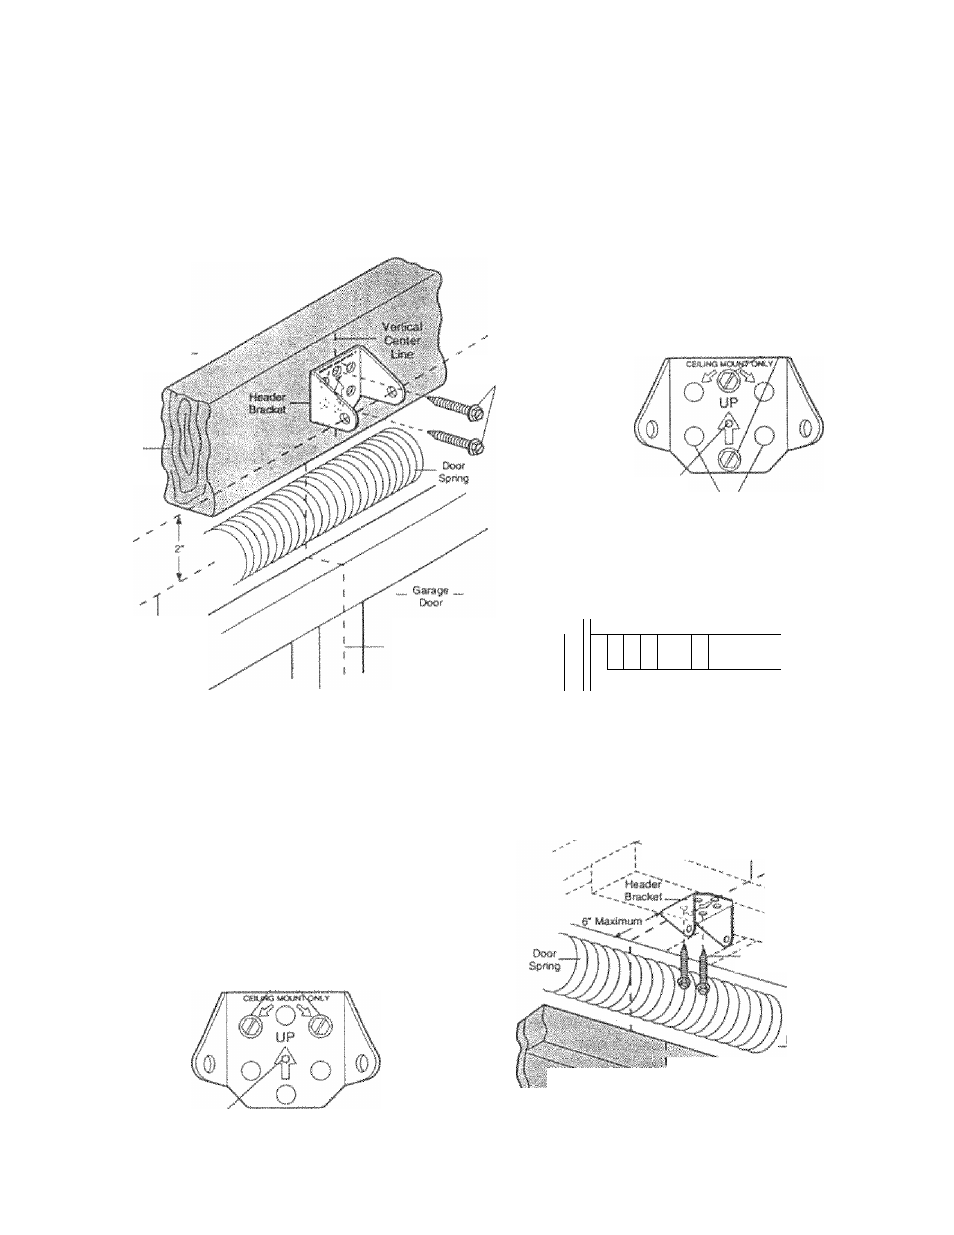
Install the Header Bracket
You can attach the header bracket either to the
wall above the garage door, or to the ceiling.
Follow the instructions which will work best for
your particular requirements.
Fasten the Heade-r Bracket to the Wall
Centof lire btackot on the veriinnl guideline with
the bottom edge of tfre bracket on the horizontal
line as shown (vrith the arrow pointing toward the
ceiling).
Wall
»4
StfOCWOl
Supjiort
Mark feiiher sf-it of bracket bolci) (do not use ihc
holes clesignaieci for ceiling mount). Drill 3/16* pilot
tioies and fasten the bracket securely to a structural
support v/j!h the fiaidware provided.
Wall
La
0
Scrftwrs
S/ir*!8J<1-7/r
TS# naii hot« »
iof
mtf-. Ym
musi u-t lay out)'» su
omint fli«t N
5
wJ»f Ijra-chst
V
O'pBofial
Wail MiMntteg
Mote*
Hardware Shown- Actual Size
Highest
Pisift-t
of
Trsvisl
(of Garagi Door}
Verticai
Cenier
Una
!
1
i
1 ! j ! j 1 1
F—
IjagS«*»
i/i6*-ia * 1-7/8*
Fasten the Header B-racket to the Ceiling
■ Extend the vert-ical guideline onto the ceiling
as
shown.
Center the bracket un the verticai rnaik, no more
than 6' from the wall. Make sure the arrow ¡a
pointing toward ffir,' wall. The bracke! can bfj
fnr.jijntod flush ar^jainsl the ceiling vrhon dearrsnee
«0 minirnal.
Mark holes dfeugnated for ceiling rnntiri! only Drill
3/16" pilot holes and fasten bracket securely trj a
strtictura! support
With
the hardware provided,
Msl} s'j M-'! j'Fbi=’J
Crfltef:
Vert:c»l
Caisisf tin*
tag
Samws.
Th«
n,i .
f
7 • , ,r fX' ■ ’ M V
i
I
!i(tU
You n
1
'IV i ■; iij >ixi< ill
m
i:
_ ...... ........ _
14