Aipstment procedures for one-piece doors, Fijtyopei, Oosf айв – Craftsman 139.53225SRT User Manual
Page 27: С!©ш1, Open ooof
Attention! The text in this document has been recognized automatically. To view the original document, you can use the "Original mode".
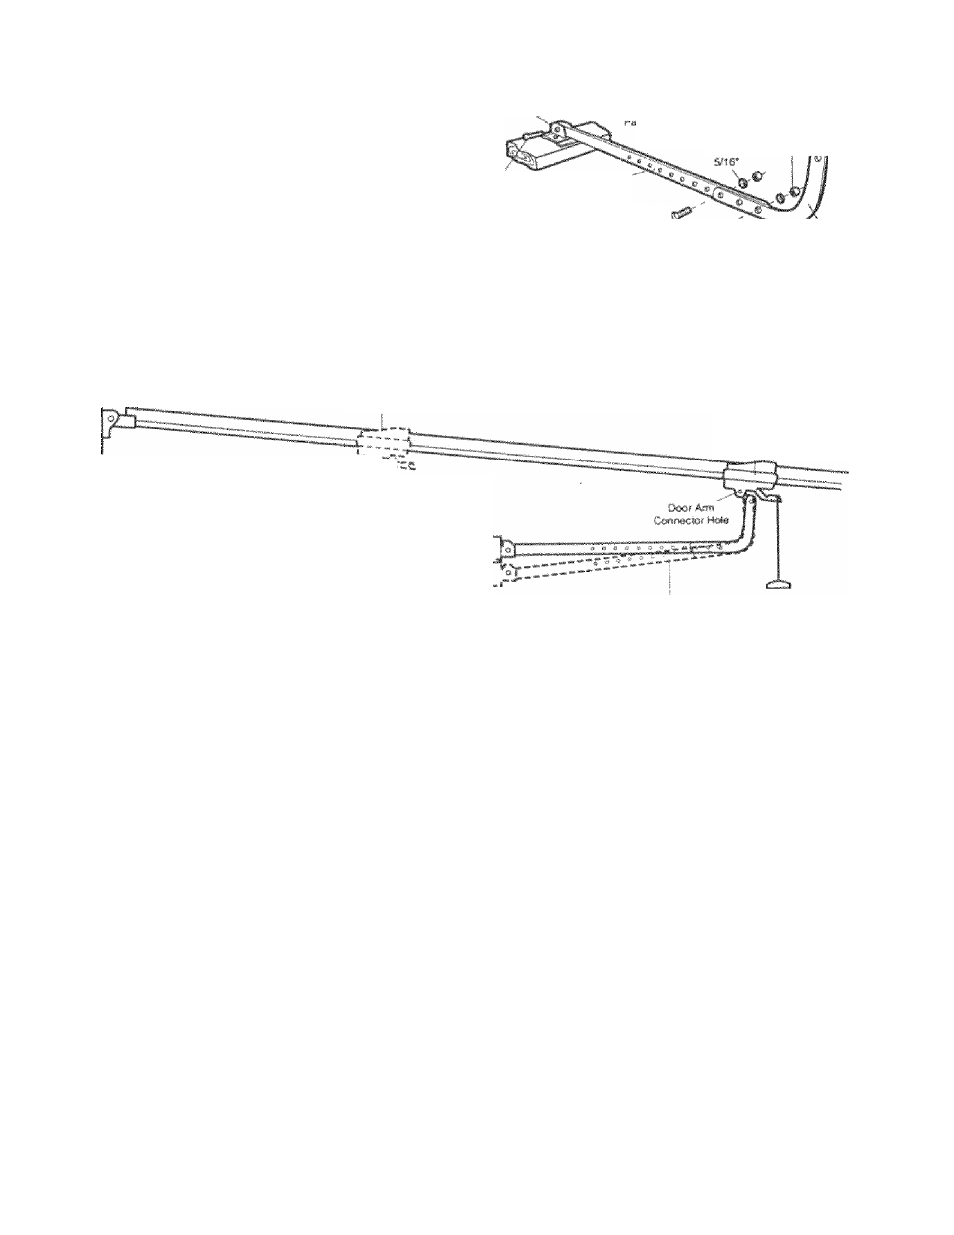
Assemble the Door Arm:
• Fasten the straight and cutved door arm sections
together to the lorigesi possible length (with a 2 or
3 hole overlap).
With ttie iluor closed, connect the straight door
arm section to ttie door bracket with a clevis pin.
• Secure with a ring fastener.
Огюг
Bracket Q,
Rir>e
N«l#
Lock S/ie*48
'МШШШ
Ciem- Pin stmighi
AfilJ
Sc««» -
----- ^
СшЫ
Dow Afrn
On one-piece rjcxirs, Ре!пге i;onrnx:!ing the door arm to the trolley tho travel limits must te adjusted. Limit adjustment
•cre-A's are located fv, the Lift side pariol m; etiown on pag»' 2P. Follow adiuGtnionf prctodurec below.
Fulf Ctos#tJ
Tftsiley
FiJtyOpei
Twltey
Oosf Айв
I t
J )
0«f Aim
*
I
Cafineaor -Moie
С!©ш1
Door
Open Ooof
Door with
Ba-ckwereJ Stent
Door Atm
Aipstment Procedures for One-Piece Doors
Open Door Adfustment:
Decrease UP limit
' Turn the UP limit adjustmeot screw countBc
cicicicwise 5* *1/2 iurns.
' Press the Wall Control posh bar or button. The
trolley will travel to the fully open position,
' Manually raise the door to^
the
open position
(parallel to the floor), and lift the -doof arm to the
trolley. The arm should touch the trolley just in
back of the do-or arm. connector hole. Refer to the
fully open trolley/door arm positions in the
illustraiion. If the arm
does not
extend far enough,
adjust the limit further. One full turn squats 2* of
trolley travel.
Closed Door Adjustment;
Decrease DOWN iimit
Turn iite DOWN hniit cdiuOii’eni screw ciackwcm 5
complete turns,
■ fttRsc the Wall Control push bar or button. Tho
trolley wii! travel to the fully closed position.
' Manually dose the door and trit the door arrsi to the
trolley. The aim .ttiould touch the trolley just ahead
ot the door arm connector hole. Refer to the fully
closed trotloy/doof arm posiiior.s in the illustfation. If
the arm is behind the connector hole, adjust the limit
furtfier. One full turn eitunls
2'
of trolley travel.
Connect the door arm to the irofiey.
* Close the door and join the curved arm to the connector hole in the trolley with the remaining clevis pin. It may
be necessary to lift the door slightly to make the connection.
* Secure with a ring fastener.
» Run the opener through a complete travel cycle. If the door has a slight “tackwafcJ" slant in, full open position
as shown in the illijslration, decrease the UP limit until tho door is pafallet to the floor.
27