Replacing the front panel – Dell Studio XPS 435T / 9000 (Early 2009) User Manual
Page 23
Back to Contents Page
Replacing the Front Panel
Dell Studio XPS™ 435T/9000 Service Manual
1.
Follow the procedures in
Before You Begin
.
2.
Remove the computer cover (see
Replacing the Computer Cover
).
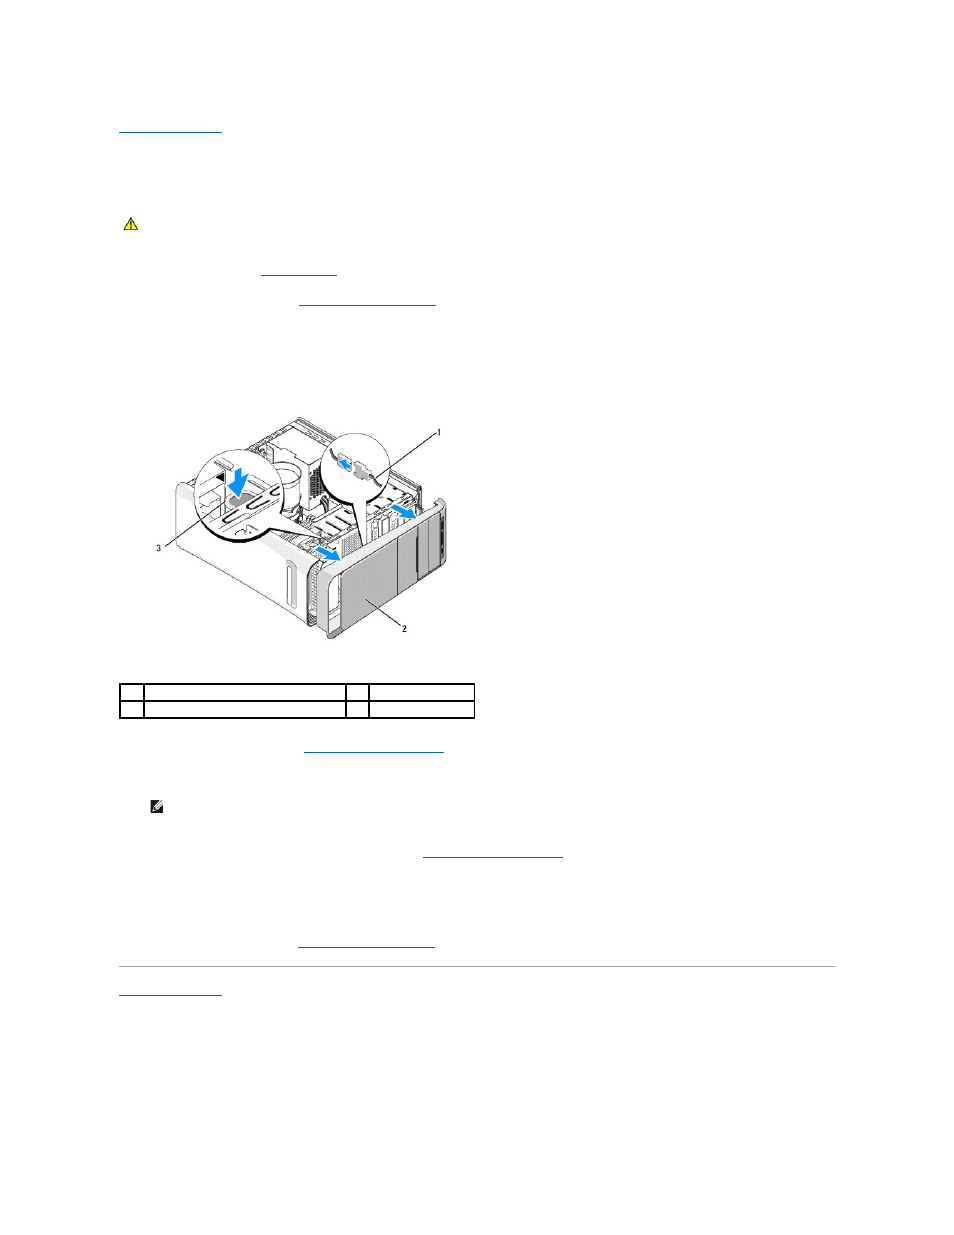
3.
Push the lever to release the front panel from the computer.
4.
Pivot the front panel away from the computer.
5.
Disconnect the badge back light cable from the front panel.
6.
Remove the badge back light (see
Replacing the Badge Back Light
).
7.
Set the front panel aside in a secure location.
8.
To replace the front panel, replace the badge back light (see
Replacing the Badge Back Light
).
9.
Align the front panel with the front of the computer.
10.
Push the front panel towards the front of the computer until it snaps into place.
11.
Replace the computer cover (see
Replacing the Computer Cover
).
Back to Contents Page
WARNING:
Before working inside your computer, read the safety information that shipped with your computer. For additional safety best
practices information, see the Regulatory Compliance Homepage at www.dell.com/regulatory_compliance.
1
badge back light cable
2
front panel
3
lever
NOTE:
Make a note of your computer's Service Tag/Express Service Code located on a label under the FlexBay panel. You will need the Service
Tag/Express Service Code to identify your computer when you call Technical Support.