Replacing the flexdock – Dell Studio XPS 435T / 9000 (Early 2009) User Manual
Page 16
7.
If you are not replacing the Media Card Reader go to
.
8.
If you are replacing the Media Card Reader or installing a new one, slide the Media Card Reader into place.
9.
Align the screw hole in the Media Card Reader with the screw hole in the chassis.
10.
Replace the screw that secures the Media Card Reader to the chassis.
11.
Connect the power and data cables to the Media Card Reader.
12.
Replace the front panel (see
Replacing the Front Panel
).
13.
Replace the computer cover (see
Replacing the Computer Cover
).
14.
Connect your computer and devices to their electrical outlets, and turn them on.
Replacing the FlexDock
1.
Follow the procedures in
Before You Begin
.
2.
Remove the computer cover (see
Replacing the Computer Cover
).
3.
Remove the front panel (see
Replacing the Front Panel
).
4.
Remove the two screws securing the FlexDock.
5.
Disconnect the power cable from the FlexDock Power connector.
6.
Disconnect the FlexDock USB cable from the connector (JUSB4 or JUSB5) on the system board (see
System Board Components
).
7.
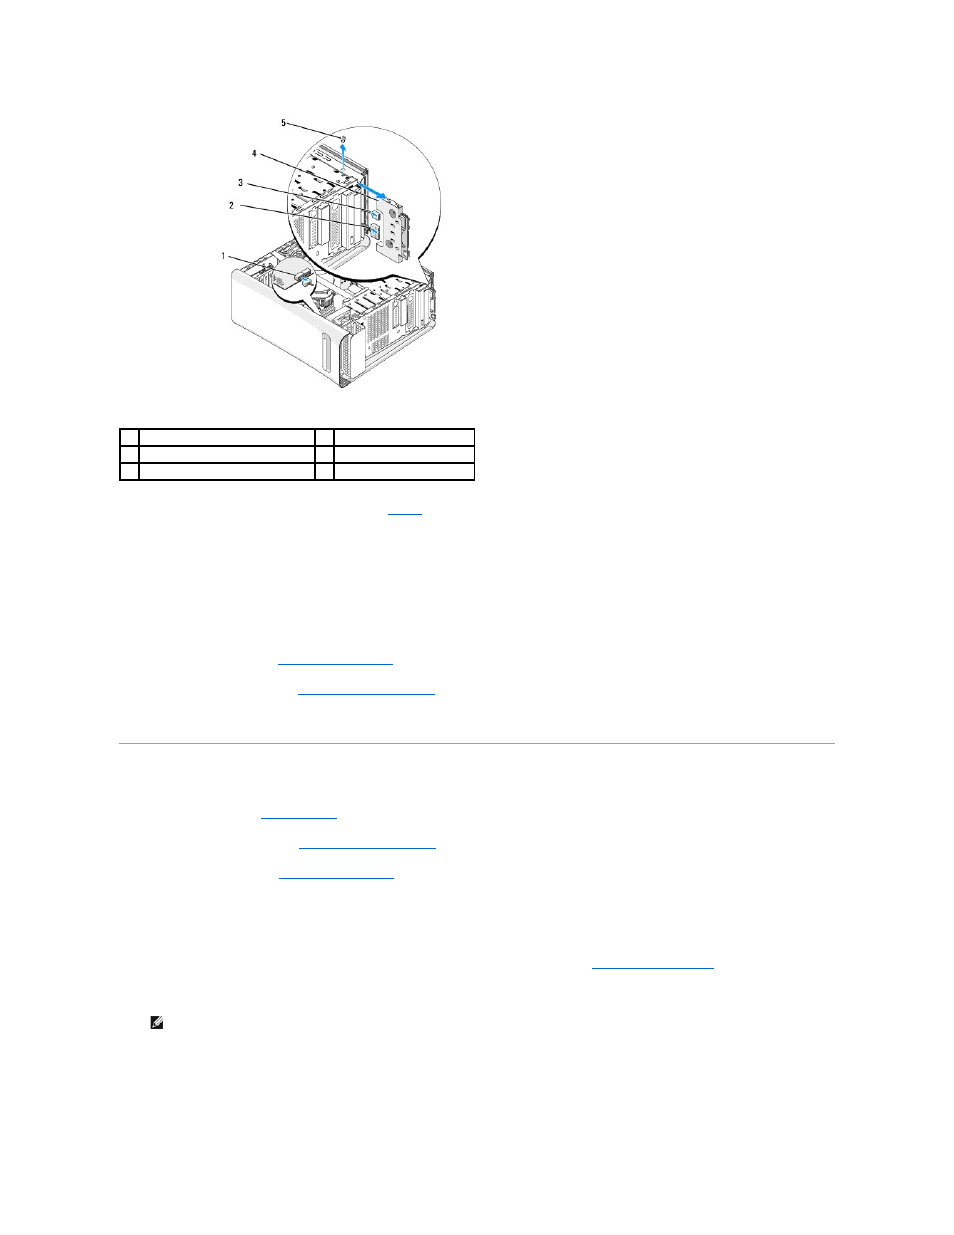
Slide the FlexDock out through the front of the computer.
1
system board connector
2
power cable
3
data cable
4
Media Card Reader
5
screw
NOTE:
If you are not replacing the FlexDock at this time, disconnect the other end of the data cable from the system board and set it aside. You
can use the data cable to install a FlexDock at a later time.