Replacing the flexdock drive insert – Dell Studio XPS 435T / 9000 (Early 2009) User Manual
Page 17
8.
If you are not replacing the FlexDock, replace the metal filler if applicable (see
) and proceed with
.
9.
If you are installing a new FlexDock:
a.
Remove the metal filler, if applicable (see
b.
Remove the FlexDock drive insert, if applicable (see
Replacing the FlexDock Drive Insert
).
c.
Remove the FlexDock from its packaging.
10.
Gently slide the FlexDock into place in the FlexDock bay.
11.
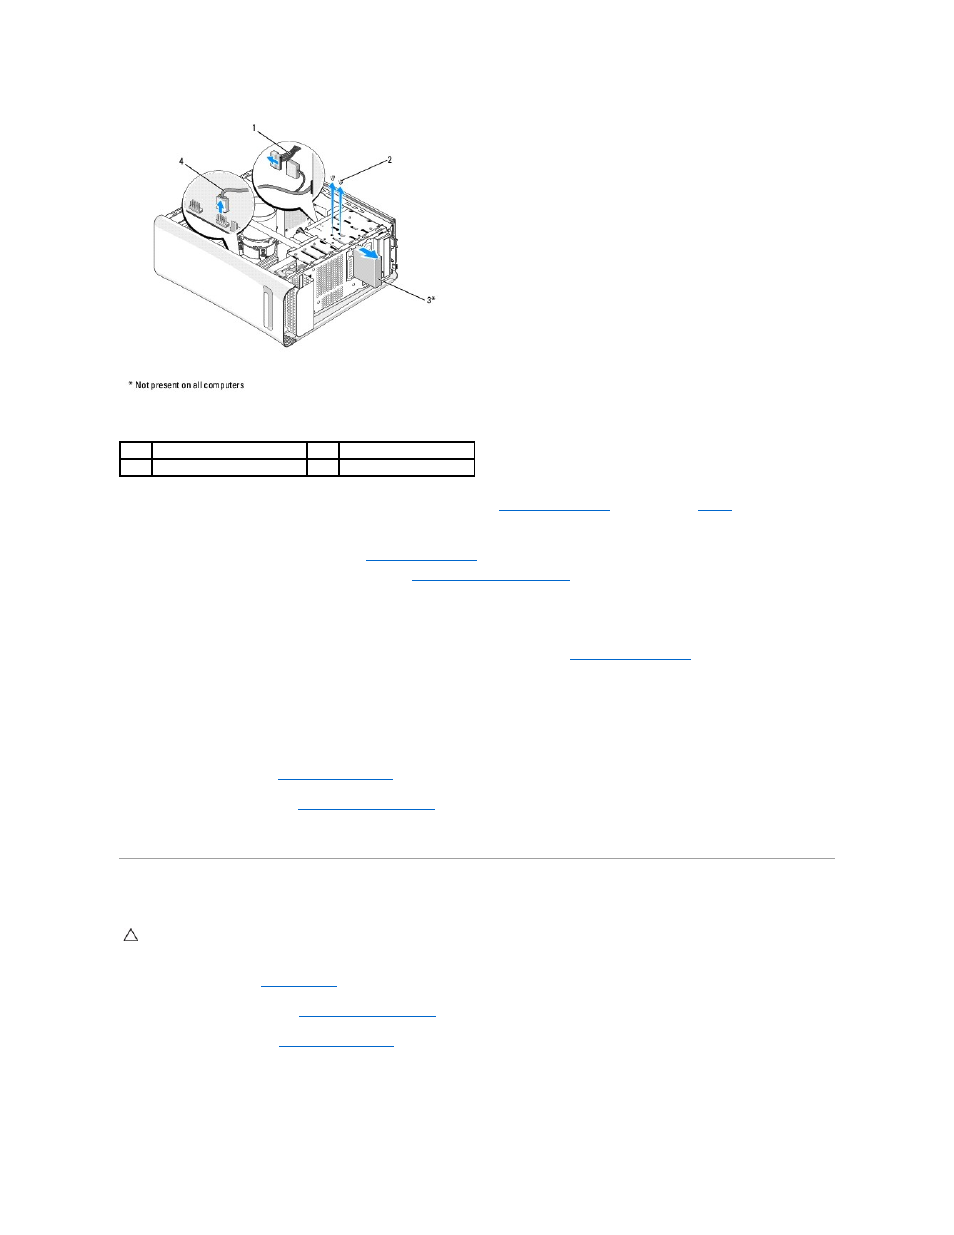
Connect the FlexDock USB cable to the connector (JUSB4 or JUSB5) on the system board (see
System Board Components
).
12.
Connect the power cable to the FlexDock power connector.
13.
Align the screw holes on the FlexDock with the screw holes on the FlexDock bay.
14.
Replace the two screws that secure the FlexDock to the chassis.
15.
Replace the front panel (see
Replacing the Front Panel
).
16.
Replace the computer cover (see
Replacing the Computer Cover
).
17.
Connect your computer and devices to electrical outlets, and then turn them on.
Replacing the FlexDock Drive Insert
1.
Follow the procedures in
Before You Begin
.
2.
Remove the computer cover (see
Replacing the Computer Cover
).
3.
Remove the front panel (see
Replacing the Front Panel
).
4.
To remove the FlexDock drive insert, spread the tabs apart and pull the FlexDock drive insert away from the front panel.
5.
To replace the FlexDock drive insert, align the FlexDock drive insert with the FlexDock drive insert slot in the front panel.
1
power cable
2
screws (2)
3
FlexDock
4
USB cable
CAUTION:
To comply with FCC regulations, it is recommended that you replace the FlexDock drive insert whenever the FlexDock is removed from
the computer.