Dell OptiPlex GX1p User Manual
Page 13
7. If you are installing a drive that has its own controller card, install the controller card in an expansion slot.
See "
Installing an Expansion Card
."
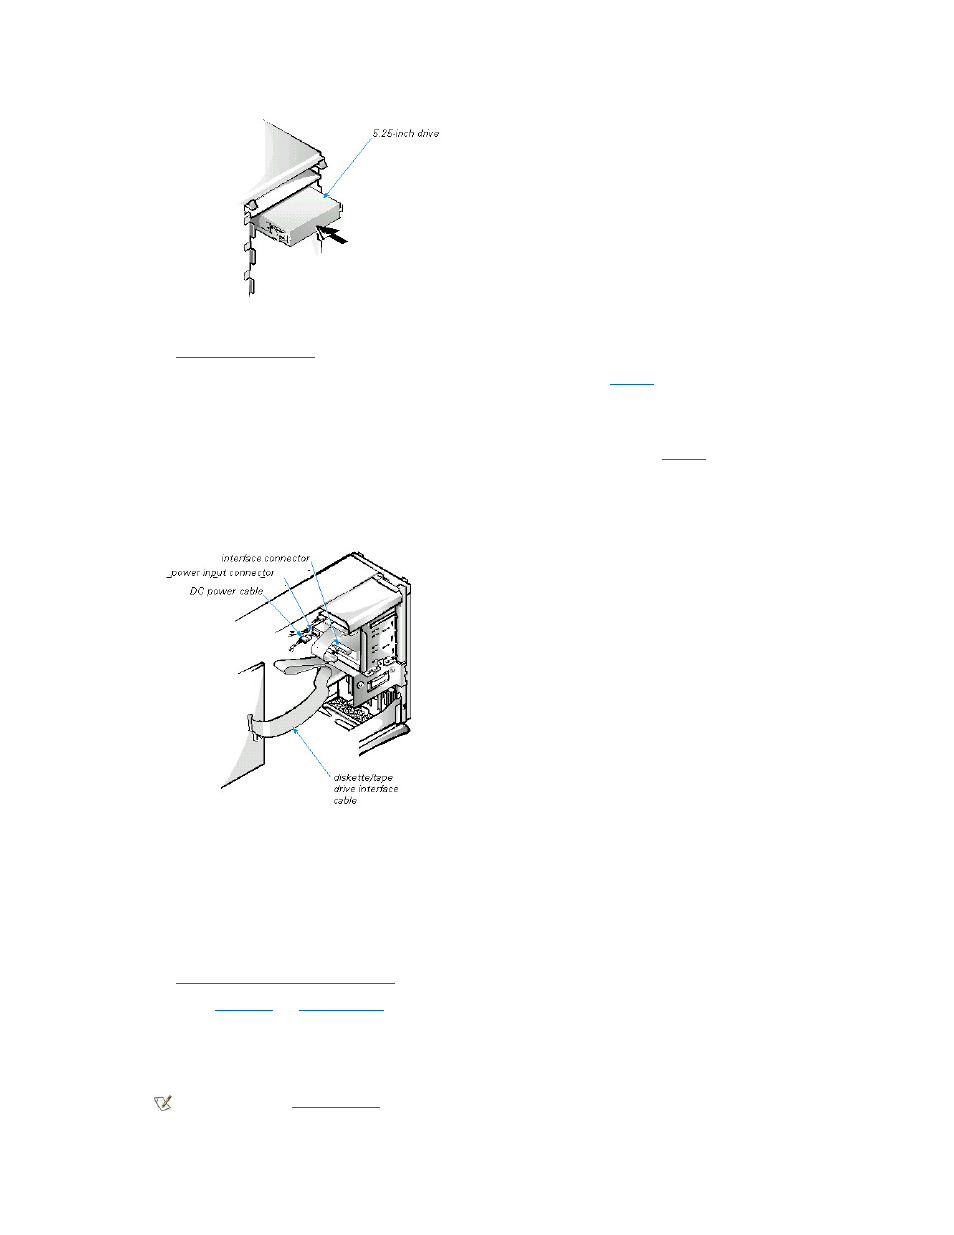
8. Connect a DC power cable to the power input connector on the back of the drive (see
).
9. Connect the appropriate interface cable to the interface connector on the back of the drive (see
If your system came with an EIDE CD-ROM or tape drive, use the spare connector on the existing interface cable. Otherwise, use the EIDE
cable provided in the drive kit.
Figure 9. Attaching Diskette Drive or Tape Drive Cables
10. For an EIDE tape drive or CD-ROM drive, connect the other end of the interface cable to the interface connector labeled "IDE2"
on the system board.
For a diskette drive, connect the cable from the drive to the interface connector labeled "DSKT" on the system board.
For a drive that comes with its own controller card, connect the other end of the interface cable to the controller card.
Check all cable connections. Fold cables out of the way to provide airflow for the fan and cooling vents.
11. If the 5.25-inch drive bay was previously empty, remove the front-panel insert from the front bezel.
See "
Removing and Replacing Front-Panel Inserts
."
12. Replace the
computer cover
.
If the bezel on your drive is not flush with the bezel on your computer, remove the drive and adjust the position of the drive on the bracket,
making sure to insert and tighten the screws in the order marked. Replace the drive in the drive bay, and then replace the computer cover.
13. Reconnect your computer and peripherals to an electrical outlet, and turn them on.
NOTICE: You must match the colored strip on the cable with pin 1 on the drive's interface connector to avoid possible
damage to your system.
NOTE: If Enabled, the
Chassis Intrusion
option will cause the following message to be displayed at the next system start-up: