Adding or replacing a microprocessor – Dell PowerEdge 6600 User Manual
Page 61
The following items are included in the microprocessor upgrade kit:
l
A microprocessor
l
A heat sink
l
A VRM, if you are adding additional microprocessors
Adding or Replacing a Microprocessor
1.
Remove the microprocessor tray (see "
Removing the Microprocessor Tray
").
2.
Place the microprocessor tray on a flat surface.
3.
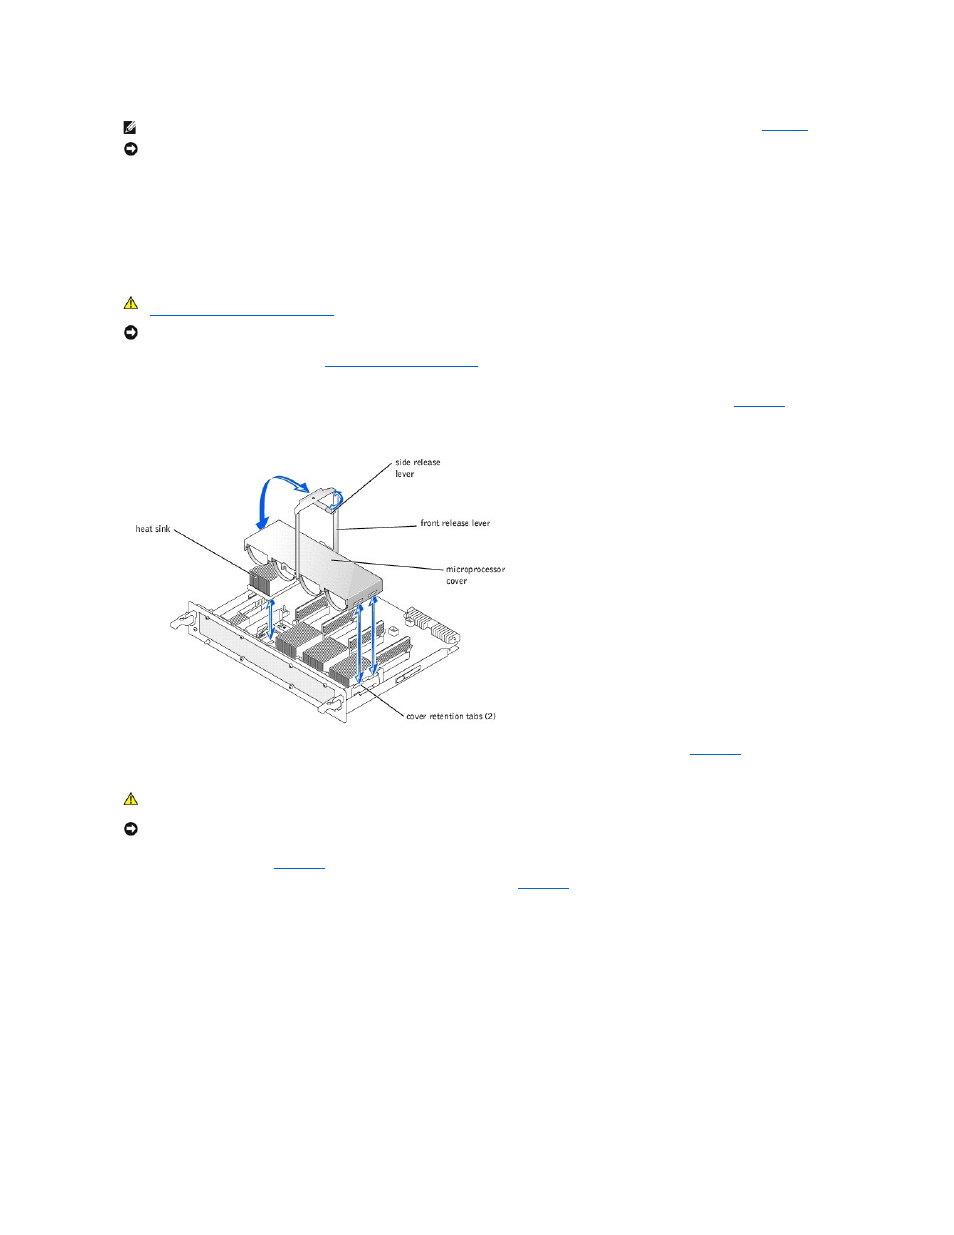
).
Figure 6-12. Removing and Replacing the Microprocessor Cover
4.
).
5.
Remove the cover.
6.
Remove the heat sink (see
).
7.
Pull the socket release lever straight up until the microprocessor is released (see
Figure 6-13. Removing and Replacing the Microprocessor
NOTE:
A microprocessor and VRM must be installed in the CPU1 and VRM1 sockets, respectively. To identify CPU1 and VRM1 sockets, see
Figure A
-4
.
NOTICE:
If a microprocessor socket does not have a microprocessor installed, a heat sink blank must be installed for that socket.
CAUTION:
Before you perform this procedure, you must turn off the system and disconnect it from its power source. For more information, see
"
Safety First—For You and Your System
" in "Troubleshooting Your System."
NOTICE:
See "Protecting Against Electrostatic Discharge" in the safety instructions in your System Information document.
CAUTION:
The microprocessor and heat sink can become extremely hot. Be sure the microprocessor has had sufficient time to cool before
handling.
NOTICE:
Never remove the heat sink from a microprocessor unless you intend to remove the microprocessor. The heat sink is necessary to maintain
proper thermal conditions.