Dell PowerVault 715N (Rackmount NAS Appliance) User Manual
Page 29
To replace the microprocessor, perform the following steps.
NOTE:
Only a technically knowledgeable person should perform this procedure.
CAUTION:
See "Protecting Against Electrostatic Discharge" in the safety instructions in your System
Information document.
CAUTION:
The microprocessor and heat-sink assembly can get extremely hot during system operation.
Be sure the assembly has had sufficient time to cool before you touch it.
CAUTION:
When handling the microprocessor and heat-sink assembly, take care to avoid sharp edges
on the heat sink.
1. Turn off the system, including any attached peripherals, and disconnect the power cord from the electrical outlet.
2. Remove the
3. Press down on the heat- sink securing clip to release it from the retaining tab on the ZIF socket (see
4. Remove the securing clip.
5. Carefully remove the heat sink and set it down with the underside of the heat sink facing up.
CAUTION:
Ensure that the thermal pad on the underside of the heat sink is not damaged during
handling.
NOTE:
Observe the orientation of the heat sink with respect to the microprocessor and its ZIF
socket.
6. Pull the socket release lever straight up until the microprocessor is released (see
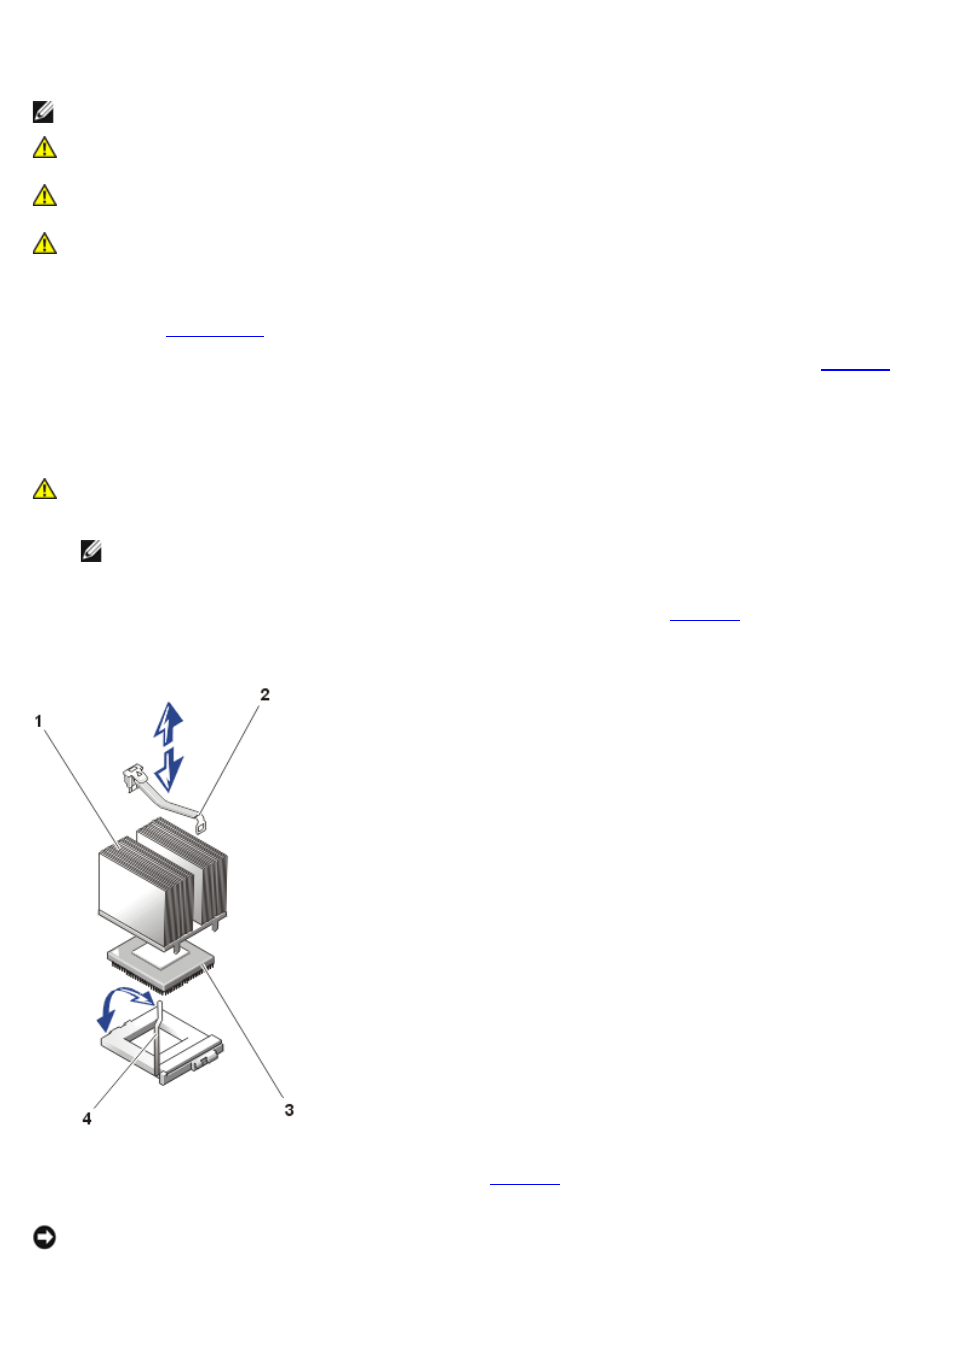
Figure 15. Microprocessor and Heat-Sink Replacement
1
Heat-sink assembly
2 Securing clip
3 Microprocessor
4 ZIF socket release lever
7. Lift the microprocessor away from the ZIF socket and leave the release lever in the upright position so that the
socket is ready for the replacement microprocessor (see
NOTICE:
Be careful not to bend any of the pins when removing the microprocessor. Bending the pins can
permanently damage the microprocessor.