Hard drives, Removing and replacing parts, Replace the primary hard drive – Dell PowerVault 715N (Rackmount NAS Appliance) User Manual
Page 17: Replace the secondary hard drive, Hard-drive removal, Hard-drive replacement
The hard-drive bays provide space for up to four, 1-inch hard drives. The hard drives are connected to an integrated
hard-drive controller on the system board through a backplane board.
Power is supplied to the backplane board, the system board, and internal peripherals through the power supply. The
backplane board provides power to the hard drives.
During a service procedure, you might be required to change a jumper or switch setting. For more information about the
system board jumpers, see "
Jumpers, Switches, and Connectors
Hard Drives
Your system comes with four IDE hard drives in a RAID configuration. The drives are not hot swappable. Each hard drive
is mounted in a hard-drive carrier.
CAUTION:
Read the safety instructions in your System Information document.
Hard-Drive Removal
CAUTION:
Read the safety instructions in your System Information document.
1. Shut down the system and disconnect the power cables from their outlets.
2.
3. Remove the power cord from the system power input receptacle.
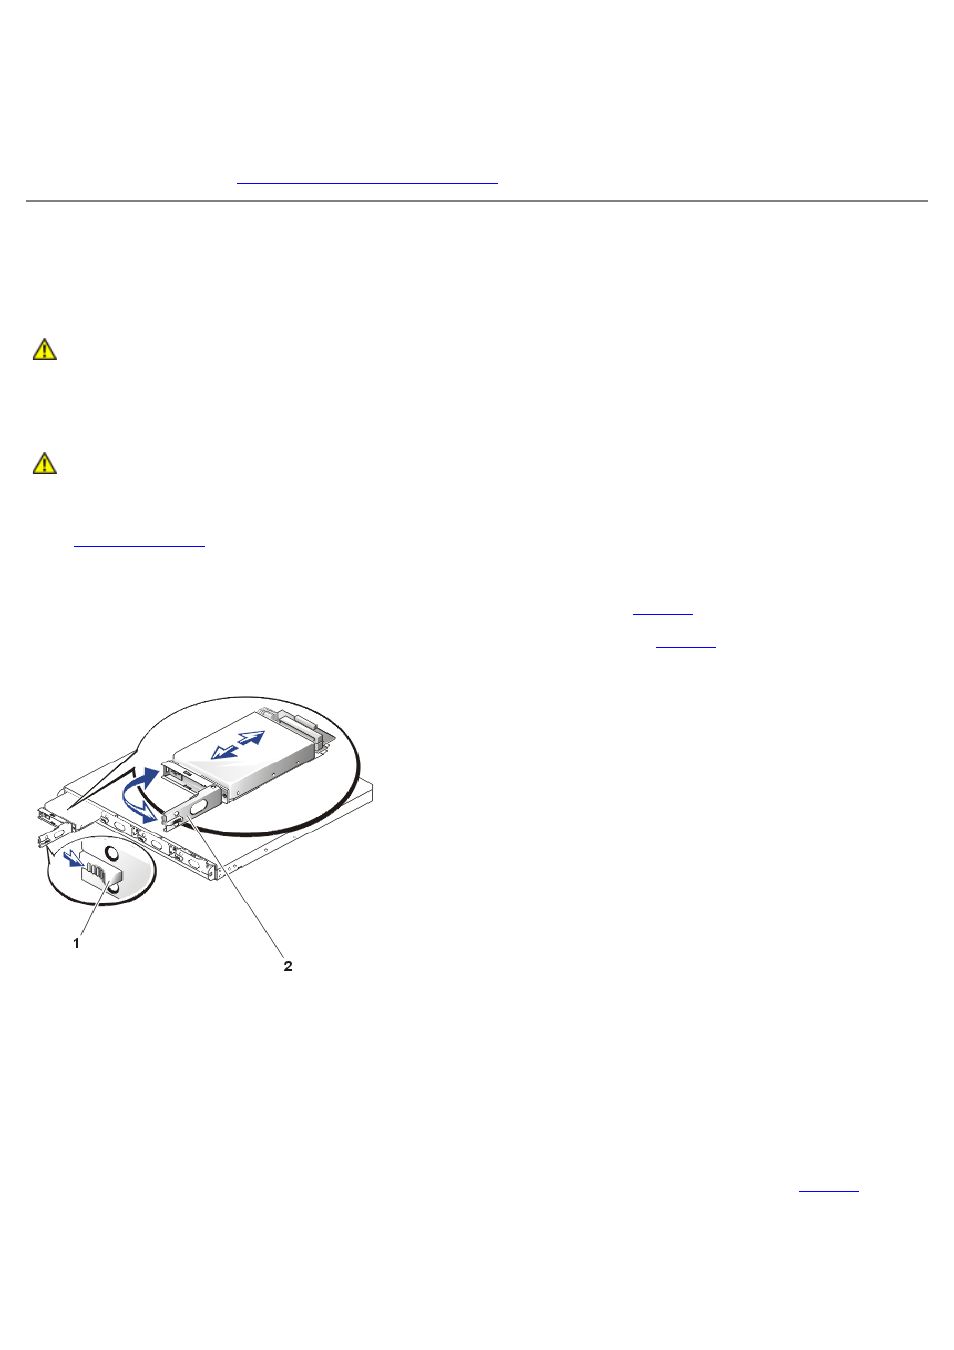
4. Open the drive carrier handle by pushing the release lever to the right (see
5. Pull open the latch and use it to pull the drive carrier out of the drive bay (see
Figure 4. Hard Drive and Carrier Removal
1 Release lever
2 Latch
Hard-Drive Replacement
1. Ensure that all configuration jumpers on the replacement drive are set to the same settings as the drive you
removed.
2. If your replacement hard drive is installed in its carrier, open the handle on the carrier.
3. If the replacement hard drive has no carrier, remove the faulty hard drive from its carrier:
a. Using a #1 Phillips screwdriver, remove the screws that secure the drive to the carrier (see
).
b. Remove the hard drive from the carrier.
Figure 5. Hard-Drive Removal From Carrier
1 Hard drive