Cooling fan, Removing the fan assembly – Dell PowerVault 715N (Rackmount NAS Appliance) User Manual
Page 19
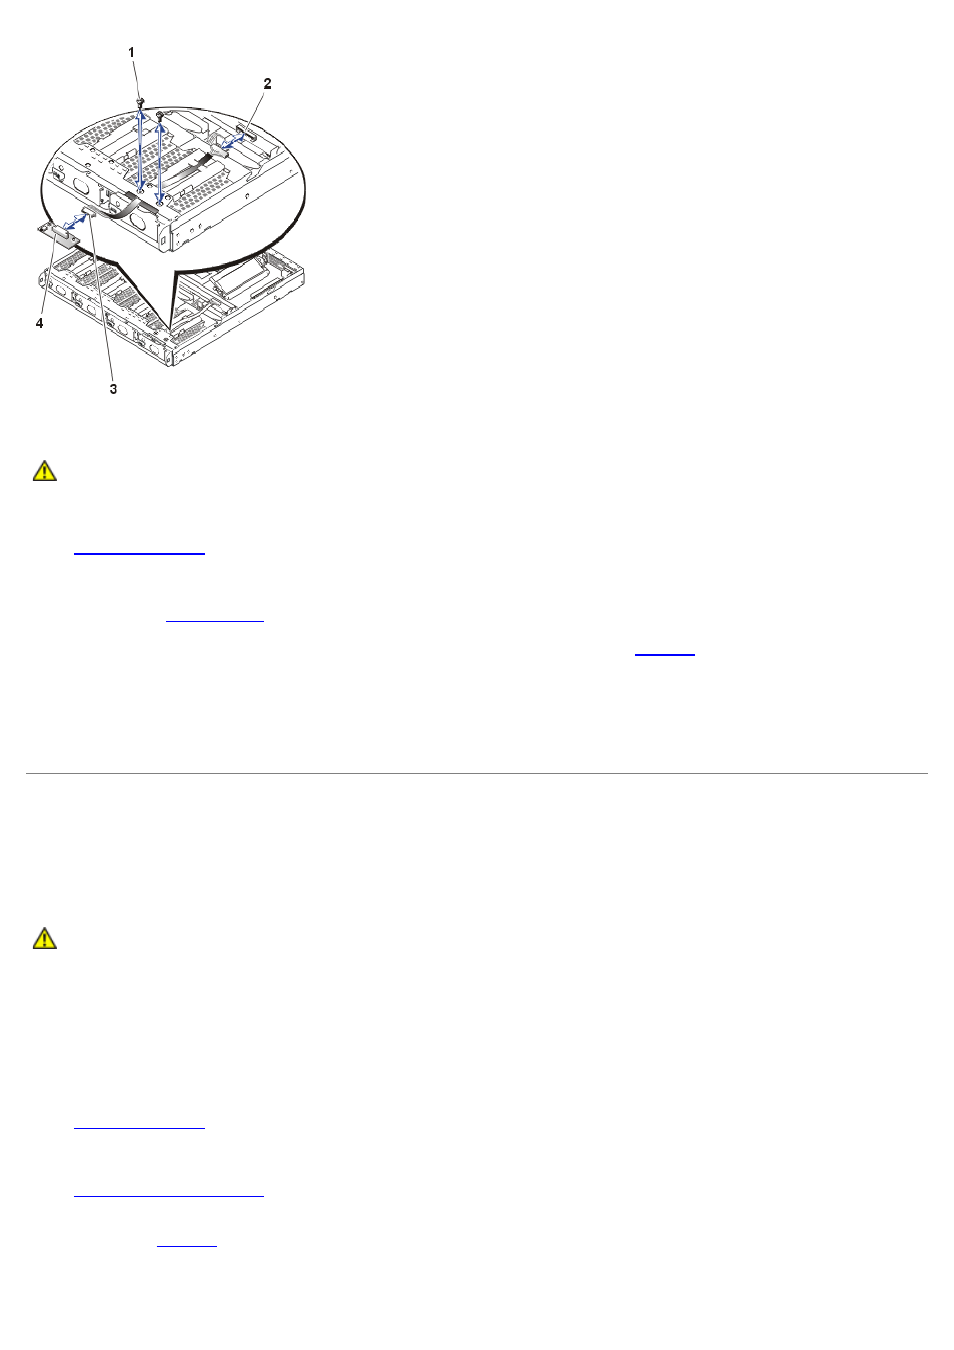
To remove the control panel assembly, perform the following steps.
CAUTION:
Read the safety instructions in your System Information document.
1. Turn off the system.
2.
3. Disconnect the system power cables from their electrical outlets.
4. Remove the
5. Disconnect the ribbon cable from connector JP5 on the midplane board (see
6. Using a #0 Phillips screwdriver, remove the two screws that secure the control panel to the chassis.
7. Push the ribbon cable forward until the control panel comes out of the front of the system chassis.
8. Disconnect the ribbon cable from the control panel board.
Cooling Fan
A single fan assembly is mounted beside the microprocessor and heat-sink socket. This cooling fan directs cooling air
across the microprocessor and heat sink and across the memory modules and the PCI expansion card before exiting the
chassis through holes in the back panel.
CAUTION:
Read the safety instructions in your System Information document.
Removing the Fan Assembly
If you observe that a fan is not operating or if the server management application issues a fan-related error message,
perform the following steps to replace the faulty fan:
1. Turn off the system.
2.
3. Disconnect the system power cables from their electrical outlets.
4.
5. Lift the fan assembly out of the chassis carefully, making sure that the connector disconnects from the system
board (see