Drive panel, Removing the drive panel, Replacing the drive panel – Dell XPS 710 H2C User Manual
Page 43
Removing and Installing Parts: Dell XPS 710 H2C Edition Service Manual
file:///C|/Preeji_working%20folder/Projects/E-Doc/Dimension%20and%20XPS/xps-710-h2c/SM/parts.htm[3/13/2013 11:45:23 AM]
1
power cable
2
data cable
9. Replace the computer cover (see
).
NOTICE:
To connect a network cable, first plug the cable into the network port or device and then plug it into the
computer.
10. Connect the computer and devices to electrical outlets, and turn them on.
See the documentation that came with the drive for instructions on installing any software required for drive operation.
Drive Panel
CAUTION:
Before you begin any of the procedures in this section, follow the safety instructions in the
Product Information Guide.
Removing the Drive Panel
2. Remove the computer cover (see
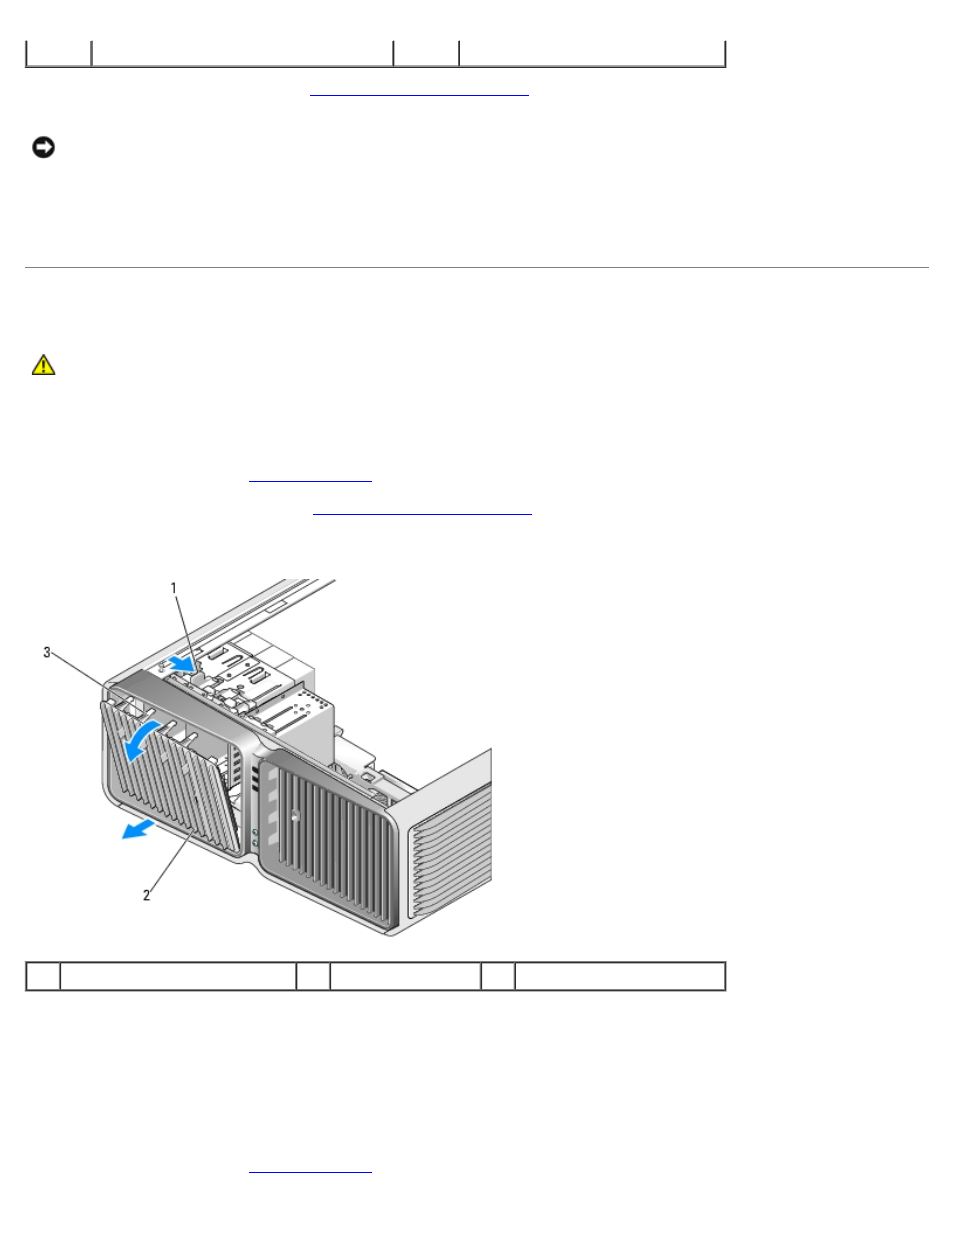
3. Grasp the drive release latch and slide it towards the base of the computer until the drive panel snaps open.
1
drive release latch
2
drive panel
3
drive panel tabs
4. Pivot the drive panel outward and lift it from its side hinges.
5. Set the drive panel aside in a secure location.
Replacing the Drive Panel