Closing the system – Dell PowerEdge 1850 User Manual
Page 31
2.
Turn off the system and attached peripherals, and disconnect the system from the electrical outlet and peripherals.
3.
Remove the system from the rack and place it on a work surface.
4.
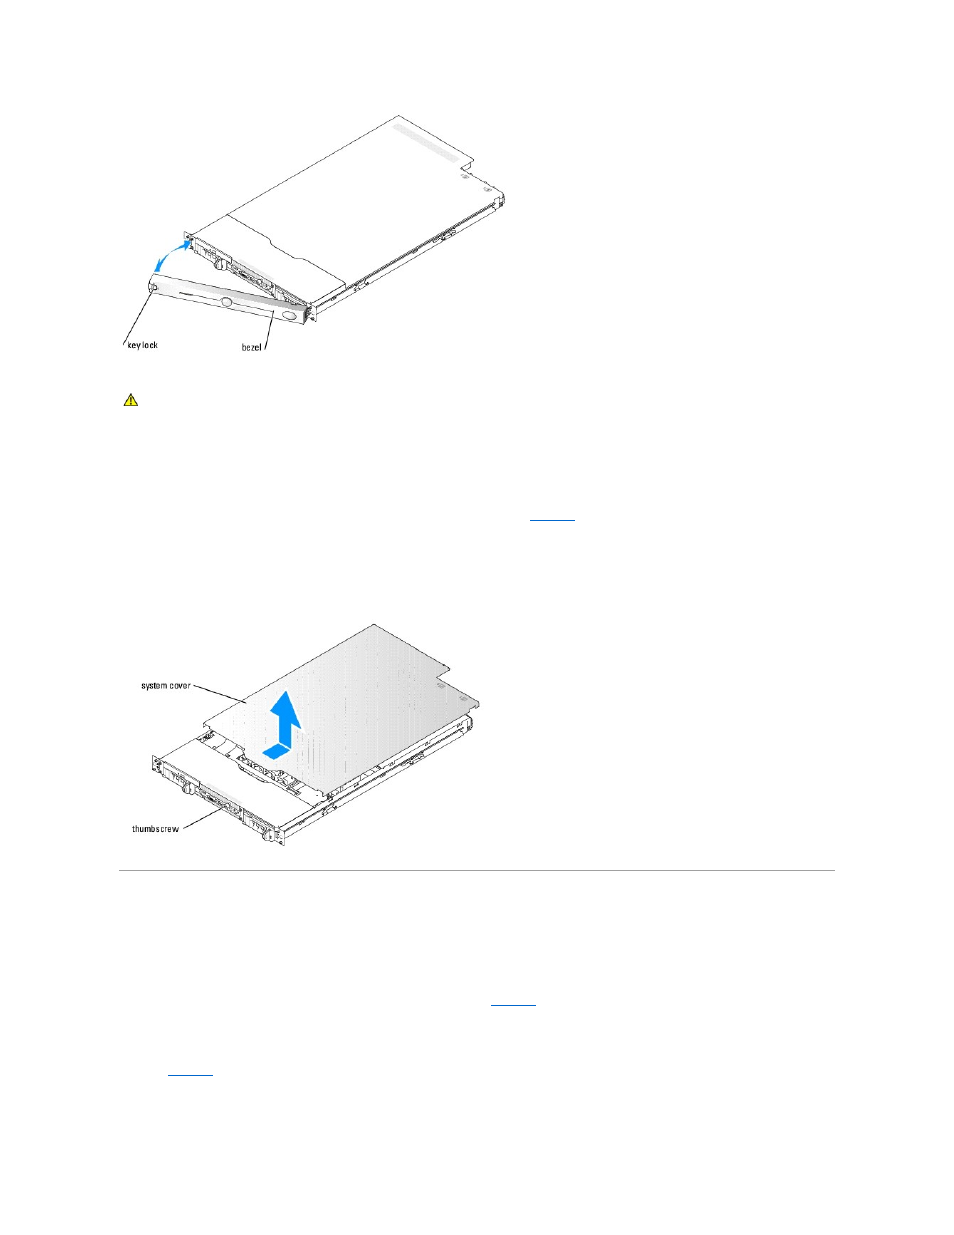
To remove the system cover, loosen the thumbscrew at the front of the system. See
.
5.
Slide the cover backward about 1.3 cm (0.5 inch), and grasp the cover on both sides.
6.
Carefully lift the cover away from the system.
Figure 5-3. Installing and Removing the System Cover
Closing the System
1.
Ensure that you did not leave tools or parts inside the system.
2.
Place the cover over the sides of the chassis, and slide the cover forward.
3.
Tighten the thumbscrew at the front of the system to secure the cover. See
.
4.
Replace the system in the rack, and reconnect the peripheral cables.
5.
To replace the optional bezel, hook the right end of the bezel onto the chassis, then fit the bezel onto the system. Secure the bezel with the keylock.
See
.
6.
Reconnect the system to the electrical outlet, and turn on the system.
CAUTION:
Many repairs may only be done by a certified service technician. You should only perform troubleshooting and simple repairs as
authorized in your product documentation, or as directed by the online or telephone service and support team. Damage due to servicing that is not
authorized by Dell is not covered by your warranty. Read and follow the safety instructions that came with the product.