Setting up water windows for a program – Baseline Systems BaseStation 1000 User Manual
Page 54
BaseStation 1000 Irrigation Controller Manual
Setting Up Water Windows for a Program
Water windows are used to indicate when watering will or will not be allowed. You can configure
water windows on a weekly basis (having the same water window settings for each day of the
week) or on a daily basis, where you can set each day of the week for a specific water window
schedule.
1. Press the Program Setup button. The Program Setup menu displays.
2. If the program that you want to modify displays in the upper-left corner of the screen,
continue to step 3. Otherwise, press the PRG button until the program that you want to
modify displays in the upper-left corner of the screen.
Note: To move backwards in the list of programs, press and hold the PRG button, and then
press the – button repeatedly.
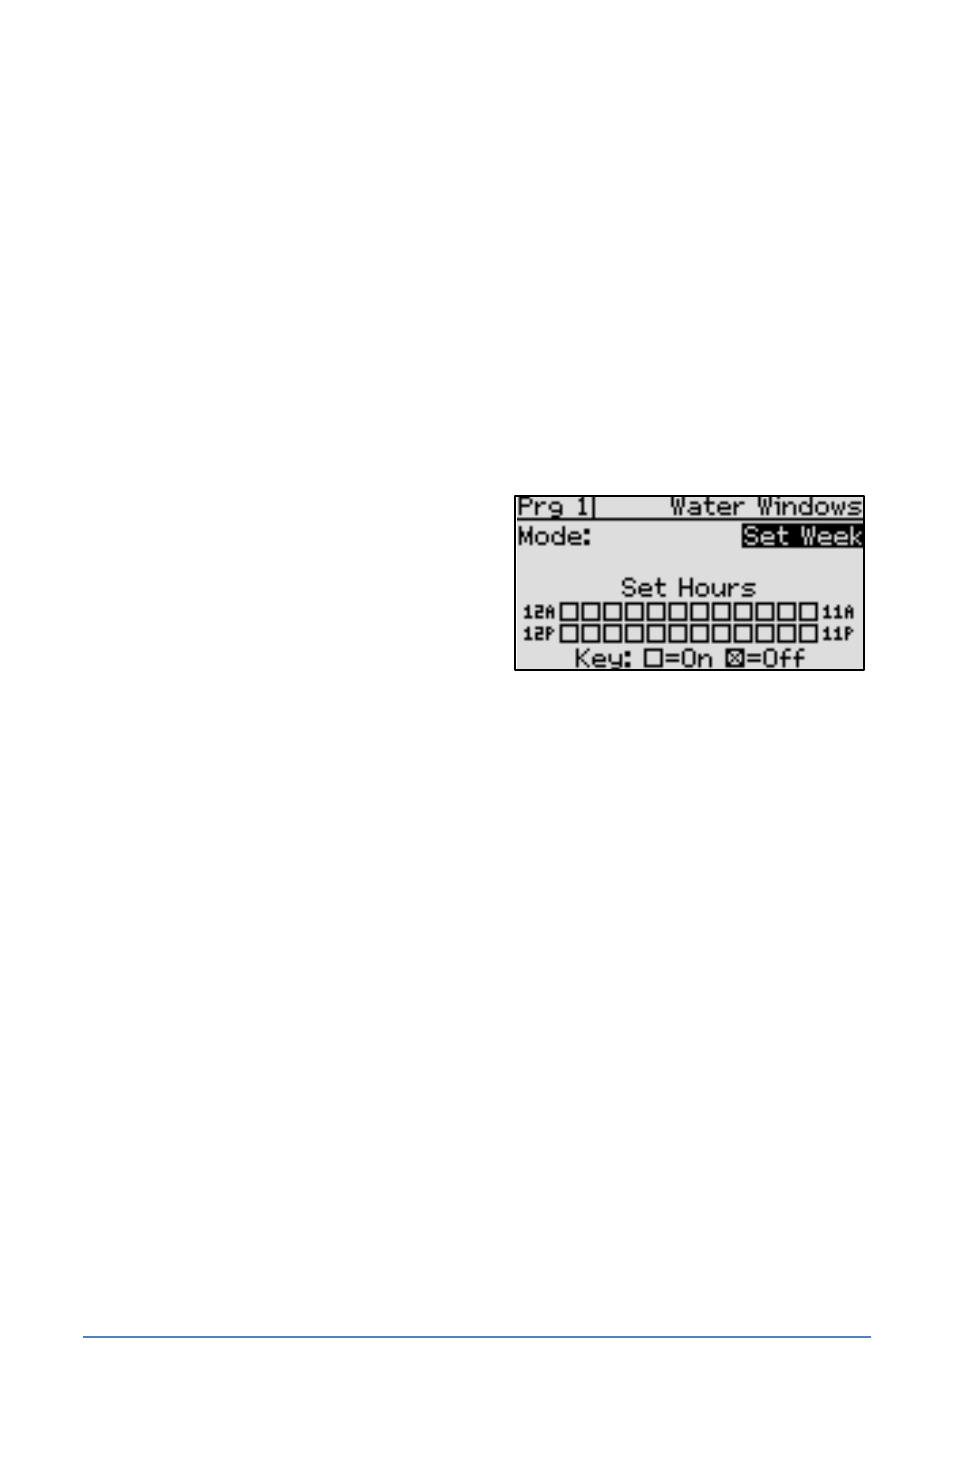
3. Press the button to highlight the Water
Windows option, and then press the OK
button. The Water Windows screen displays.
4. Press the + or – button to select one of the
following settings in the Mode field:
Set Week: Establish the same water
window settings for each day of the
week on an hourly basis.
Set Each Day: Establish a specific water window schedule for each day of the week on
an hourly basis.
5. Press the button to move to the water windows grid. By default, watering will be allowed
during all hours as indicated by the unmarked boxes in the grid.
6. Perform one of the following tasks to make changes to the individual boxes in the grid. An
outline displays around the box to indicate that you can change the setting in that box.
To move to another box in the grid, press the or button.
To turn on the water window for the time/day represented by that box, press the +
button. The box displays as unmarked.
To turn off the water window for the time/day represented by that box, press the –
button. An X displays in the box.
7. When you have finished setting up all the water windows for one program, do one of the
following:
To set up water windows for another program, press the PRG button until the program
that you want to modify displays in the upper-left corner of the screen.
Note: To move backwards in the list of programs, press and hold the PRG button, and
then press the – button repeatedly.
To continue setting up other components of the program, press the BACK button to
return to the Program Setup screen, where you can select the next item that you want
to set up.
To exit Program Setup, press the RUN button.
Page 48