Mount ground drive wheel, Install decal mount, Mount ground drive wheel install decal mount – Great Plains NP3000A Predelivery Manual User Manual
Page 27
Great Plains Manufacturing, Inc.
Install Components
23
03/31/2011
407-613Q
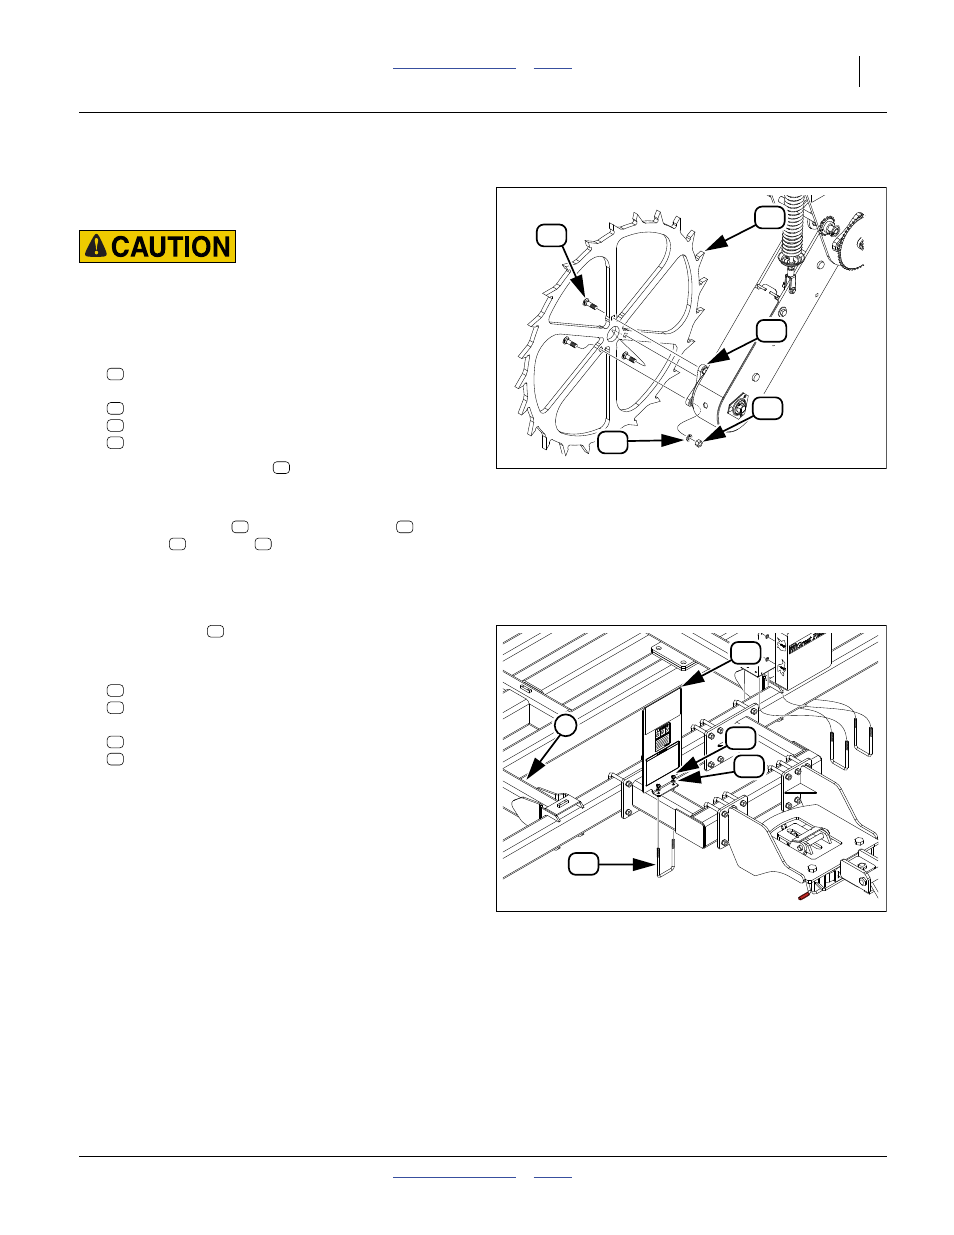
Mount Ground Drive Wheel
If the implement was ordered without a ground drive
pump, continue at section “Final Setup” on page 25.
Sharp Object Hazard:
Use a hoist or two people. Wear gloves. The wheel is heavy
and the tines are sharp.
Select one:
407-473D GROUND DRIVE WHEEL
and three sets:
802-331C RHSNB 1/2-13X1 3/4 GR5
804-015C WASHER LOCK SPRING 1/2 PLT
803-020C NUT HEX 1/2-13 PLT
2.
At the ground drive hub
, orient the wheel so that
at the top, the vertical face of the top tooth is to the
rear, and the longer angled face is to the front.
3.
Secure the wheel
to the hub with bolts
, lock
washers
and nuts
.
Install Decal Mount
Refer to Figure 34
If the decal mount
is already installed, continue at
1.
407-468D DECAL MOUNT
806-069C U-BOLT 1/2-13 X 4 1/32 X 7 1/4
and two sets:
804-015C WASHER LOCK SPRING 1/2 PLT
803-020C NUT HEX 1/2-13 PLT
Install the mount on the left side of the rear hitch
extension. If no extension is present, install the
mount on the lift-assist cross-tube left of center.
Install the mount with decals facing to the rear.
Figure 33
Install Ground Drive Wheel
31719
23
35
37
43
70
23
35
43
37
70
23
35
43
37
Figure 34
Decal Mount
32049
22
1
50
37
43
22
22
50
43
37