Preparing mounts, Preparing unitary (no splitter) mounts, Preparing split mounts – Great Plains Smartbox Mount Kit Yield Pro Planters User Manual
Page 9: Skip to step 16
Great Plains Mfg., Inc.
Installation Instructions
9
12/12/2006
403-206M
Preparing Mounts
Items for these steps supplied by AMVAC:
➀
Smartbox frames
➁
Smartbox base containers & fasteners
➂
Meters
➃
Gaskets
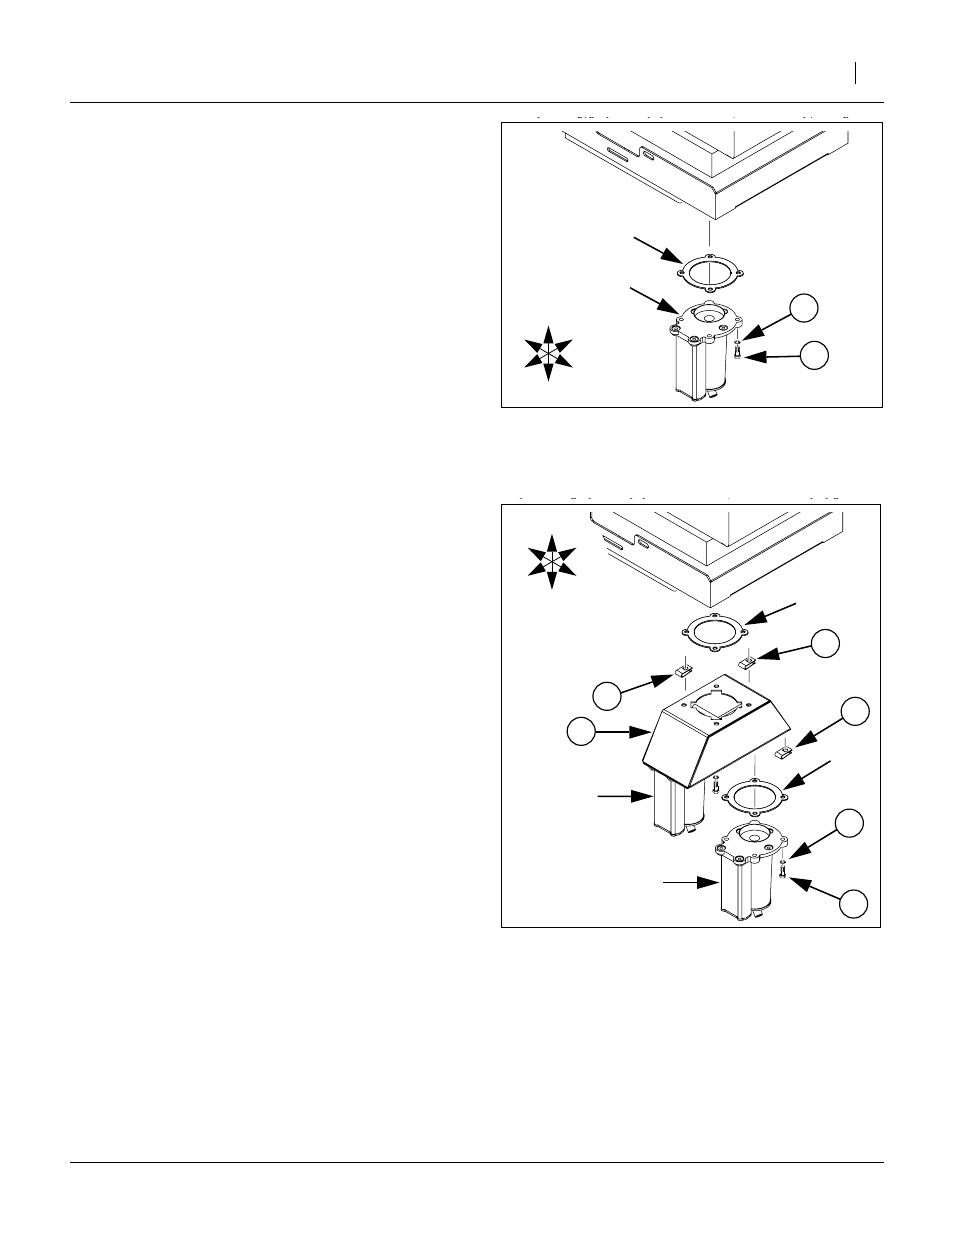
Preparing Unitary (no Splitter) Mounts
Refer to Figure 13 (base container shown with Smartbox frame - do
not assemble to frame at this time).
For each mount point which has no splitter, the meter is
attached to the Smartbox base container. Orient meter
exit ports per the table on page 8.
16. Select:
four (25) 802-004C,
(HHCS 1/4-20X3/4 GR5),
four (32) 804-007C,
(WASHER FLAT 1/4 SAE PLT), and
four (29) 803-088C (not shown),
(NUT HEX LOCK 1/4-20 FLG).
Position gasket
➃
between Smartbox base con-
tainer
➁
and meter
➂
. Insert bolt (25) through flat
➂
to base container
➁
using nut (29) (not shown). Do not mount base
container on frame
➀
at this time.
17. Repeat Step 16 for each unitary Smartbox.
Preparing Split Mounts
Refer to Figure 14 (base container shown with Smartbox frame - do
not assemble to frame at this time)
For each mount point which has a splitter, the splitter is
attached to the Smartbox base container and two
meters are attached to the splitter.
18. Select:
one (16) 403-202H,
(SMARTBOX METER SPLITTER WLDMNT),
twelve (25) 802-004C,
(HHCS 1/4-20X3/4 GR5),
twelve (32) 804-007C,
(WASHER FLAT 1/4 SAE PLT), and
twelve (23) 800-163C,
(CLIP U-TYPE NUT 1/4-20 SLF-RET).
19. Insert all bolts (25) through flat washers (32).
20. Insert a clip nut (23) at each of the fastener open-
ings in the top of the splitter (16). Insert the clip
with the flat side Up.
21. Insert a clip nut (23) at each of the fastener open-
ings in the bottom of the splitter (16). Insert the clip
with the flat side Down.
22. Position a gasket
➃
between Smartbox base con-
tainer
➁
and splitter (16). Using four bolts and
washers, attach splitter (16) to base container.
23. Position a gasket
➃
between a meter
➂
and the
splitter (16). Attach meter to splitter with four bolts
and washers. Repeat for second meter.
24. Repeat Step 18 through for Step 23 each splitter.
Figure 13
Unitary Pre-Assembly
25326
➀
➂
U
D
L
R
B
F
➁
➃
Figure 14
Split-Mount Pre-Assembly
25327
➀
➁
➂
➂
➃
➃
U
D
L
R
B
F