SARGENT R8200 with Simpli Roseless Trim User Manual
Page 2
2
(1) Important: Check template A4647 to prep
door for function holes, size & location. Verify
strike location according to template. Clean
out door pocket and door edge of any debris.
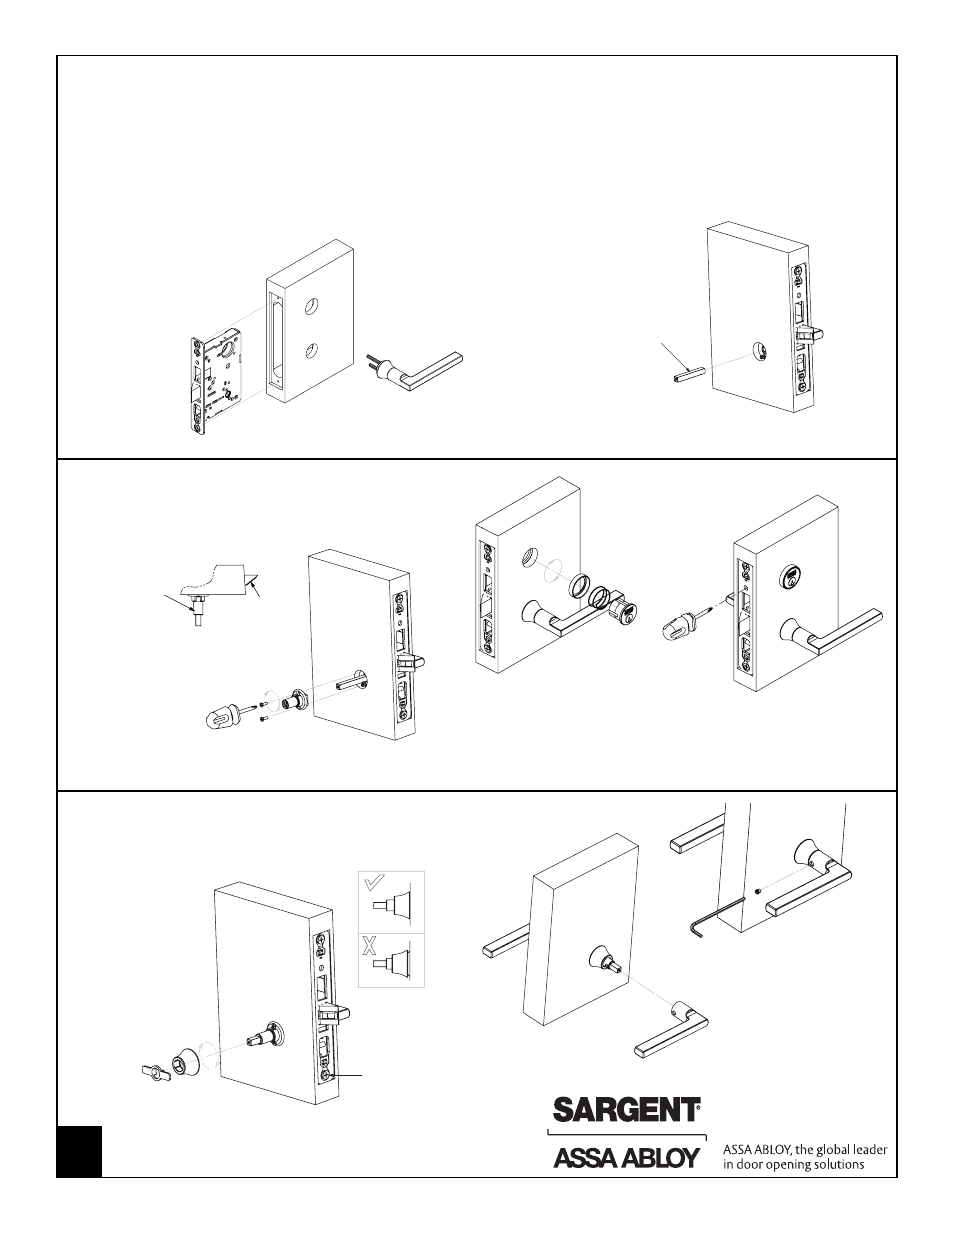
(2) Make sure the handing of the lock (latch & locking piece) match
the handing of the door.
Note: Keep door open while installing lock
Step #3
Insert spindle into lockbody hub
Step #1
Slide lock into the door
Step #2
Slide outside lever assembly
through the door; lock
body and hold
Step #5
Slide cylinder through the
spring then the collar, then
thread into lock, make flush
with collar also verify the logo
is straight and at the top
Step #6
Secure cylinder in lock using
access hole just above the
deadbolt opening
RHR Door Shown
Step #4
Slide inside adapter over
spindle, verify threaded hole
in adapter faces the hinge
Latchbolt
Spindle
Threaded hole to
attach lever must
be facing towards
the hinge
Step #9
Slide lever over spindle
and adapter and
secure with set screw
Inside of
door
Inside
of door
Inside
of door
Inside
of door
Inside
of door
Inside
of door
Outside
of door
A8030:A 4/16/10
Copyright © 2010, Sargent Manufacturing Company, an ASSA ABLOY Group company.
All rights reserved. Reproduction in whole or in part without the express written
permission of Sargent Manufacturing Company is prohibited.
Tighten lockbody screws
to secure lock in the door
Step #8
Attach collar to adapter by rotating
clockwise using tool supplied, assemble
flush with door
Step #7
:
Secure lock in door
with two wood
screws #12 x 1-1/4"
or machine screws
#12-24 x 1/2"