11 fitting of optional roll cage, Fitting of optional roll cage -18, Transmig 250i installation/setup – Tweco 250i Multi Process Welding Inverter 2RT Wire Feeder User Manual
Page 36
TRANSMIG 250i
INSTALLATION/SETUP
INSTALLATION/SETUP 3-18
Manual 0-5187
CAUTION
Loose welding terminal connections can cause overheating and result in the male plug being fused in the
terminal.
Remove any packaging material prior to use. Do NOT block the air vents at the front or rear of the Welding
Power Source.
NOTE
Depending on the type of wire you will be using the Welding Power Cable may need to be switched. Follow
the wire manufacturers recommendation.
NOTE
Spool hub and feed plate set up and operation are the same as the 250i which can be reviewed later in this
section starting at 3.14.
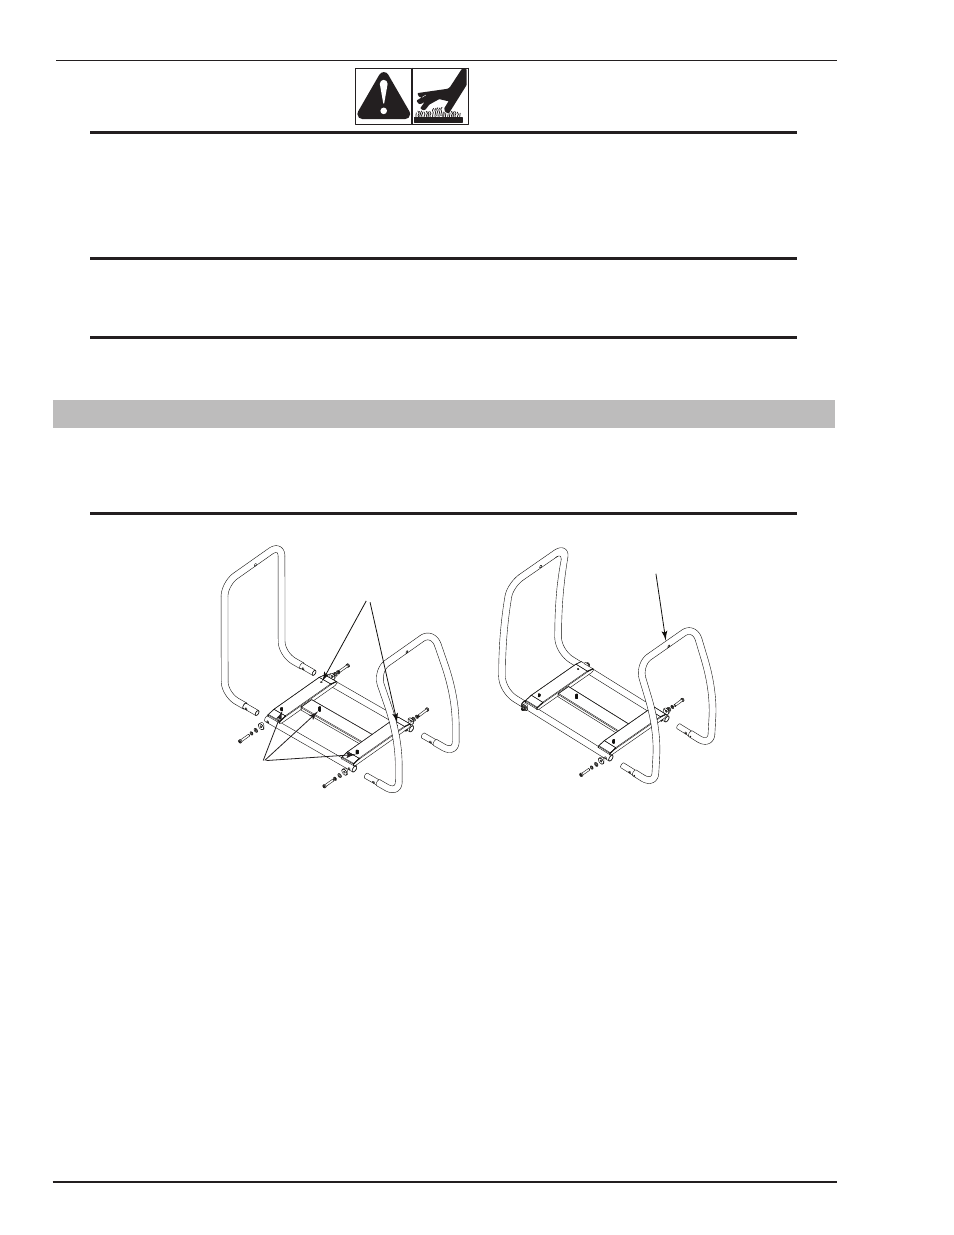
3.11 Fitting of Optional Roll Cage
1. Assemble the Roll Cage according to Figure 3-11. Ensure that all hardware is properly tightened and will not
come apart with the power source attached.
NOTE
You will need to wait to attach the front roll bar until after the welder has been mounted.
Art # A-10336
These holes are not used
Note the orientation
of the 3 studs
Rear
Front
Do not attach front yet
Rear
Front
Figure 3-11: Roll Cage Assembly
2. Disconnect power from the power source.
3. Remove the top centre screw in the cover and open the side cover to the wire spool so you can see the 3 holes
that will need to align with the mounting studs from the roll cage.
4. Carefully lift the unit and maneuver into place aligning the 3 studs with the 3 holes in the bottom of the power
source.