Transmig 200i – Tweco 200i Multi Process Welding Inverter User Manual
Page 29
TRANSMIG 200i
Manual 0-5209
3-11
INSTALLATION, OPERATION AND SETUP
20. Burnback Control (located in wirefeed compartment)
The burnback control is used to adjust the amount of MIG wire that protrudes from the MIG torch after
the completion of MIG welding (commonly referred to as stick out). To decrease the burnback time (or
lengthen the amount of wire protruding from the MIG torch at the completing of welding), turn the burnback
control knob anti clockwise. To increase the burnback time (or shorten the amount of wire protruding from
the torch at the completing of welding), turn the Burnback Control knob clockwise.
21. Local / Spool Gun Switch (located in wirefeed compartment)
The Local / Spool Gun switch is used only when a Spool Gun is fitted to the unit via the remote control
socket (item 9). When the Local/Spool Gun switch is in the Spool Gun position, the unit will control the
wire drive motor in a Spool Gun. When in the local mode, the internal Wire Drive Unit is active.
Note that the trigger will operate at all times on the remote control socket irrespective of the position of
the Local / Spool Gun switch (ie in both local and Spool Gun modes).
22. Cooling Fan
The Transmig 200i is fitted with a fan as needed feature. Fan as needed automatically switches the cooling
fan off when it is not required. This has two main advantages; (1) to minimize power consumption, and
(2) to minimise the amount of contaminants such as dust that are drawn into the power source.
Note that the fan will only operate when required for cooling purposes and will automatically switch off
when not required.
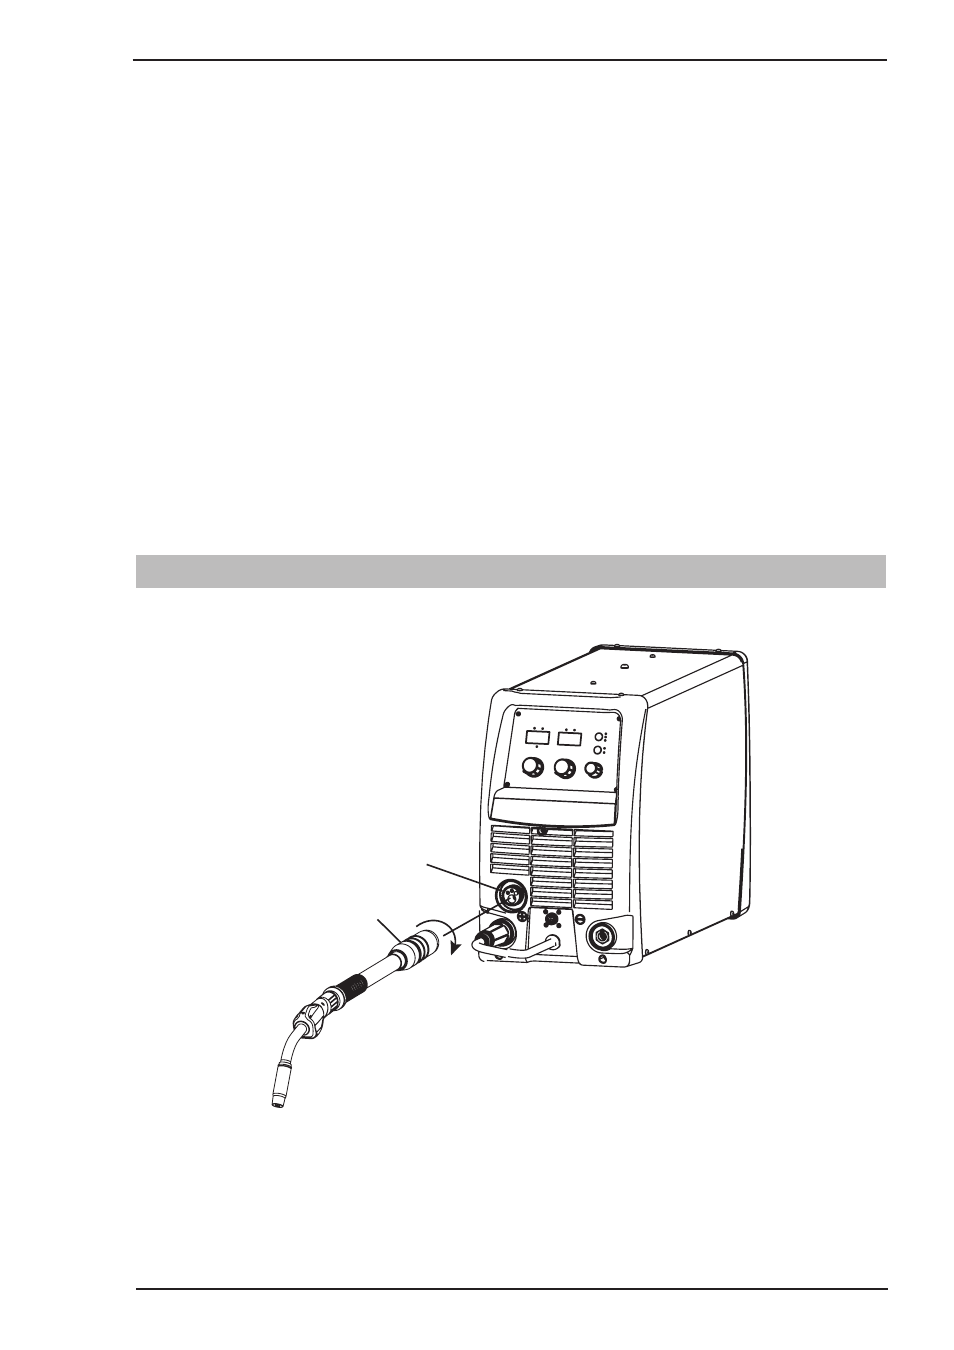
3.07 Attaching the Tweco Professional Fusion MIG Torch (Euro)
Fit the MIG Torch to the power source by pushing the MIG torch connector into the MIG torch adaptor and
screwing the plastic torch nut clockwise to secure the MIG torch to the MIG torch adaptor.
Mig Torch Adaptor
Mig Torch Connector
Art # A-10423
Figure 3-5: Attaching MIG Torch