Tweco 200 Auto-Cut User Manual
Page 48
Manual No. 0-4805 Auto-Cut 200
3-24
INSTALLATION
5. Use the removal tool to hold the cartridge assembly, while turning the shield cup onto the cartridge
assembly. When this group is fully assembled, the shield should protrude from the front of the shield
cup 0.063" to 0.083" (1.6 - 2.1 mm). Without this protrusion the shield cup is not properly tightened
onto the cartridge assembly.
Assembled Cartridge
Cartridge Tool
Shield Cup
Art # A-04344
Installing Shield Cup Onto Cartridge
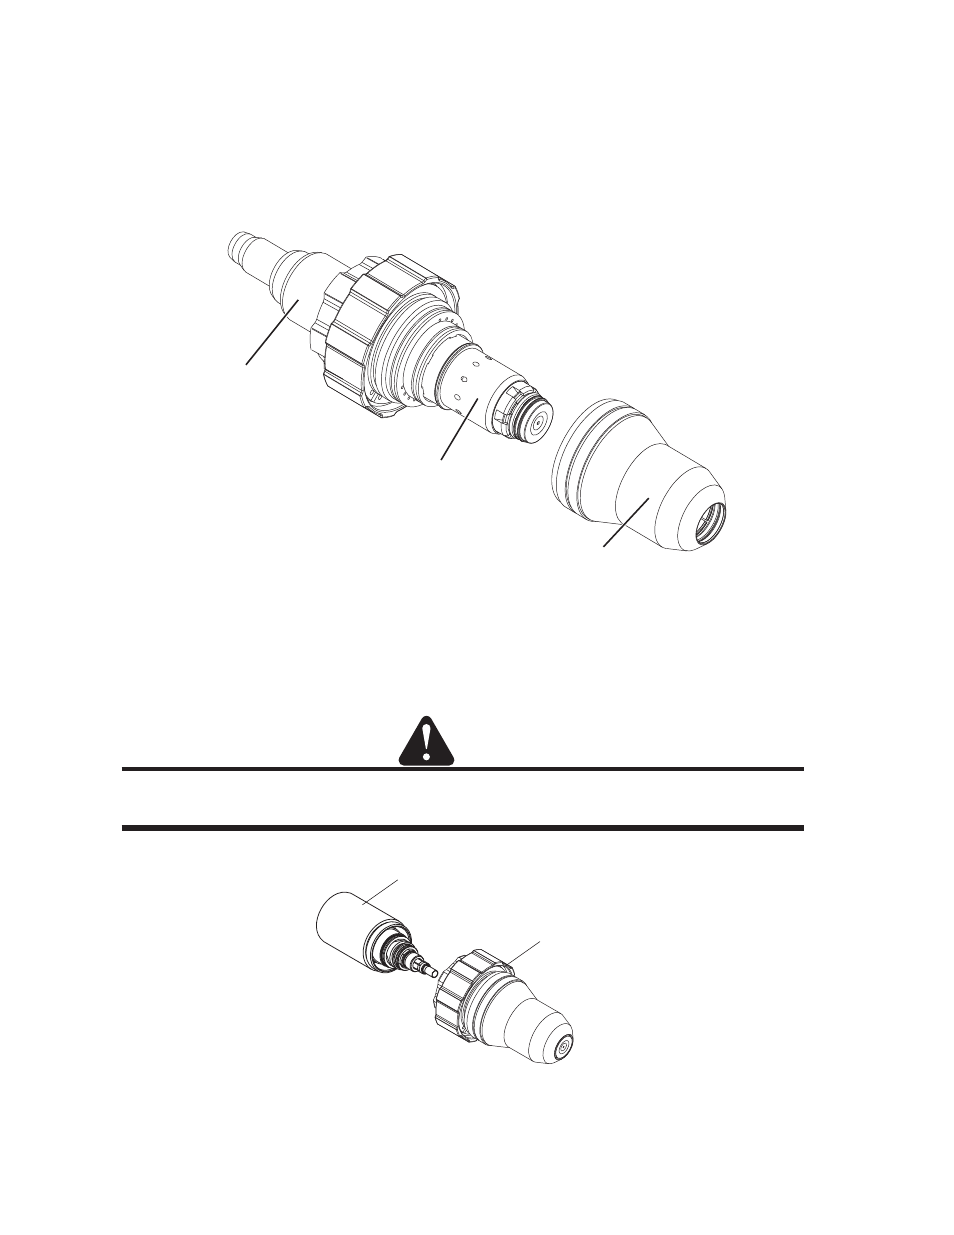
6. Take the removal tool off the cartridge. Fit the cartridge assembly onto the torch head. The cartridge
should seal to the large O-ring on the torch body as shown. If the cartridge does not seal on the O-ring, the
cartridge is not fully tightened.
CAUTION
Do not force the cartridge if it will not fully tighten. Remove the cartridge and gently clean the threads on the
torch head body with a wire brush. Apply oxygen-compatible lubricant (supplied with the torch) to the threads.
Art # A-03893
Torch Head
Assembled Cartridge
Installing Assembled Cartridge Onto Torch Head