Triton TCB 100 User Manual
Page 9
9
GB
Assembly
LOCKING THE PROTRACTOR
You can lock the protractor so that it will not slide in its
slot when using the side pressure finger or if attaching
a jig.
Slide the protractor partly out of the table slot, loosen
the round knob by about 8 turns and rotate the T bolt
through 90° so it protrudes through the windows in
the strip.
Tighten the knob about 6 turns, then slide the
protractor back along the slot to the required position
and then tighten the knob so that the protractor is
firmly locked in its slot.
CAPTIVE PUSH-STICK & SIDE PRESSURE FINGER
Side Pressure Finger
The side pressure finger is on the inside face of the
protractor and, when extended, presses the workpiece
against the fence on the right hand side of the blade.
The finger can be locked fully retracted or fully
extended, and is released by pressing the tabs and
sliding sideways (Fig 20).
Prepare the protractor for locking (T bolt across the
slot, as per Fig 19) and fully extend the side pressure
finger. Place the workpiece in position against the
fence and adjust the protractor angle until the finger
presses the workpiece against the fence (Fig 20). The
finger should flex a little, but avoid applying excessive
pressure.
Adjust the position of the protractor in the slot until the
finger is about 20mm in front of the blade. Then tighten
the protractor knob, locking both the protractor and the
angle setting.
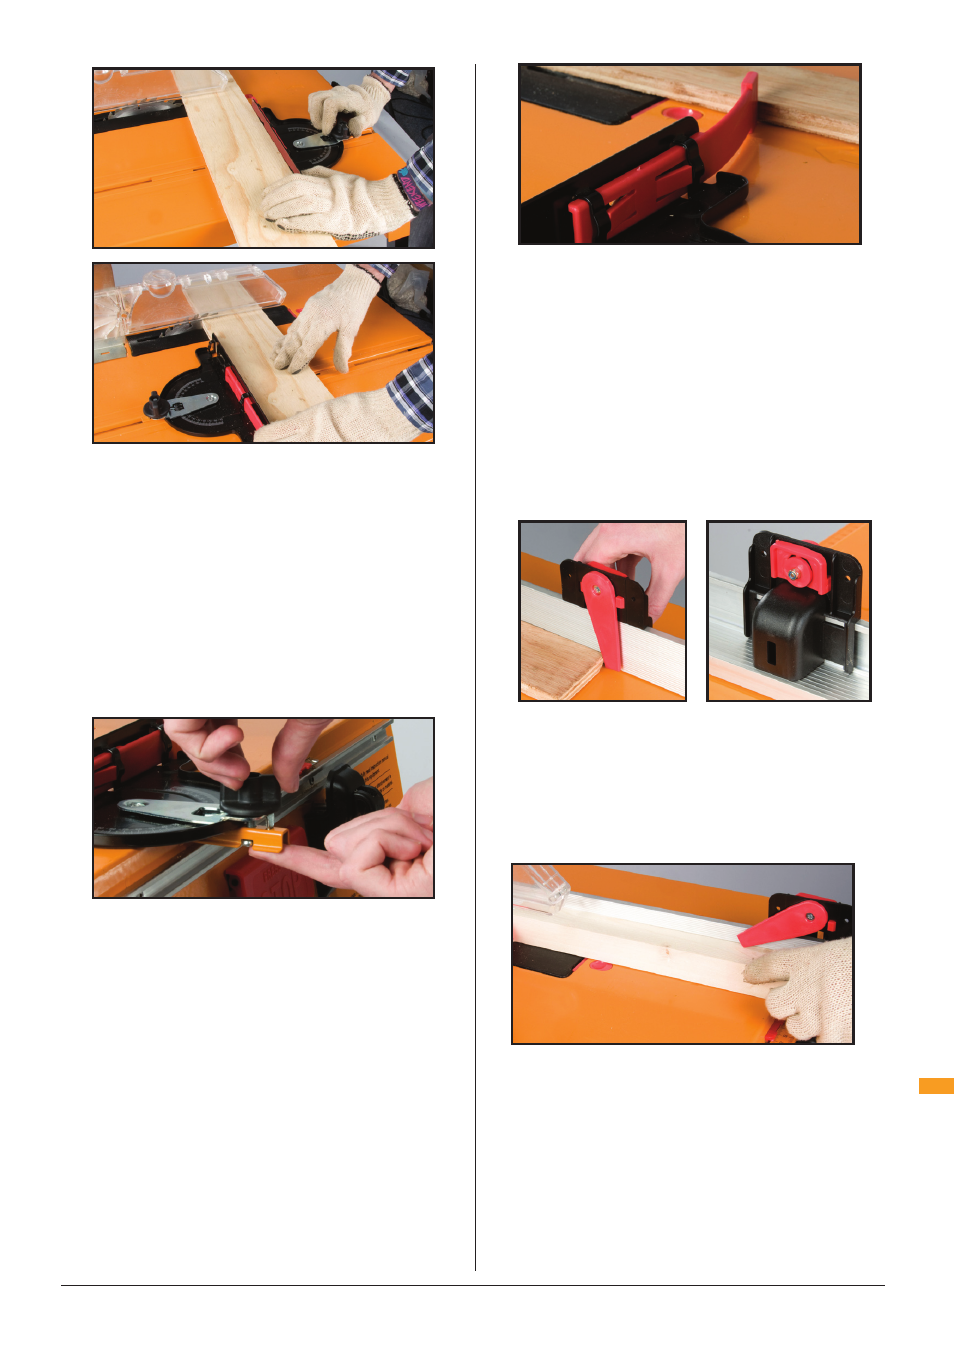
Captive Push-Stick
The Captive Push-stick (5) slides along the tracks on
the back face of the rip fence. The swing-arm rests
against the front face of the fence and should pivot
freely (Fig 21). The lock direction of the swing-arm can
be reversed, depending on which side of the blade the
rip fence is used.
To change the direction, press the rocker switch firmly
and the other red stop will appear through the face. Use
the stop which allows the swing-arm to pivot towards
the blade, not away from it.
Position the push-stick with the swing arm either
raised up or resting on top of the workpiece in front of
the overhead guard (Fig 22).
As the end of the workpiece passes the captive push-
stick, the swing-arm will drop behind it, allowing you
to push the work through with your fingers clear of the
blade.
When not in use, hang the protractor and captive push-
stick from the storage hooks below the table. The fence
can be stored upside down in its
clamping tracks.
Fig 17
Fig 18
Fig 19
Fig 20
Fig 21
Fig 22