Triton TCB 100 User Manual
Page 6
6
GB
obstructions on the saw, such as raised sections of
the base plate or the saw’s height adjustment lever.
Remove the saw and fit the four long Coach Bolts (I),
with Washers (J) under their heads as shown (Fig 4),
into the selected slots.
Replace the saw, with the blade touching the fence.
Firmly finger-tighten the Temporary Saw Clamps (R)
onto the coach bolts using the Flange Nuts (K). See
Fig 5, below.
FITTING THE LEGS
Plug the Rear Legs (B) fully into their housings at the
rear of the unit. Plug the uncapped ends of the Front
Legs (C) in the front panel sockets. Lock them by
tightening the round knobs (Fig 6).
NOTE: There may be cracking noises as the powder
coat seal breaks – this is normal.
Turn the saw table right way up and test that all four
feet are square on the ground. Adjust as necessary by
extending one of the legs slightly from its housing until
unit is stable.
FINAL SAW FITTING
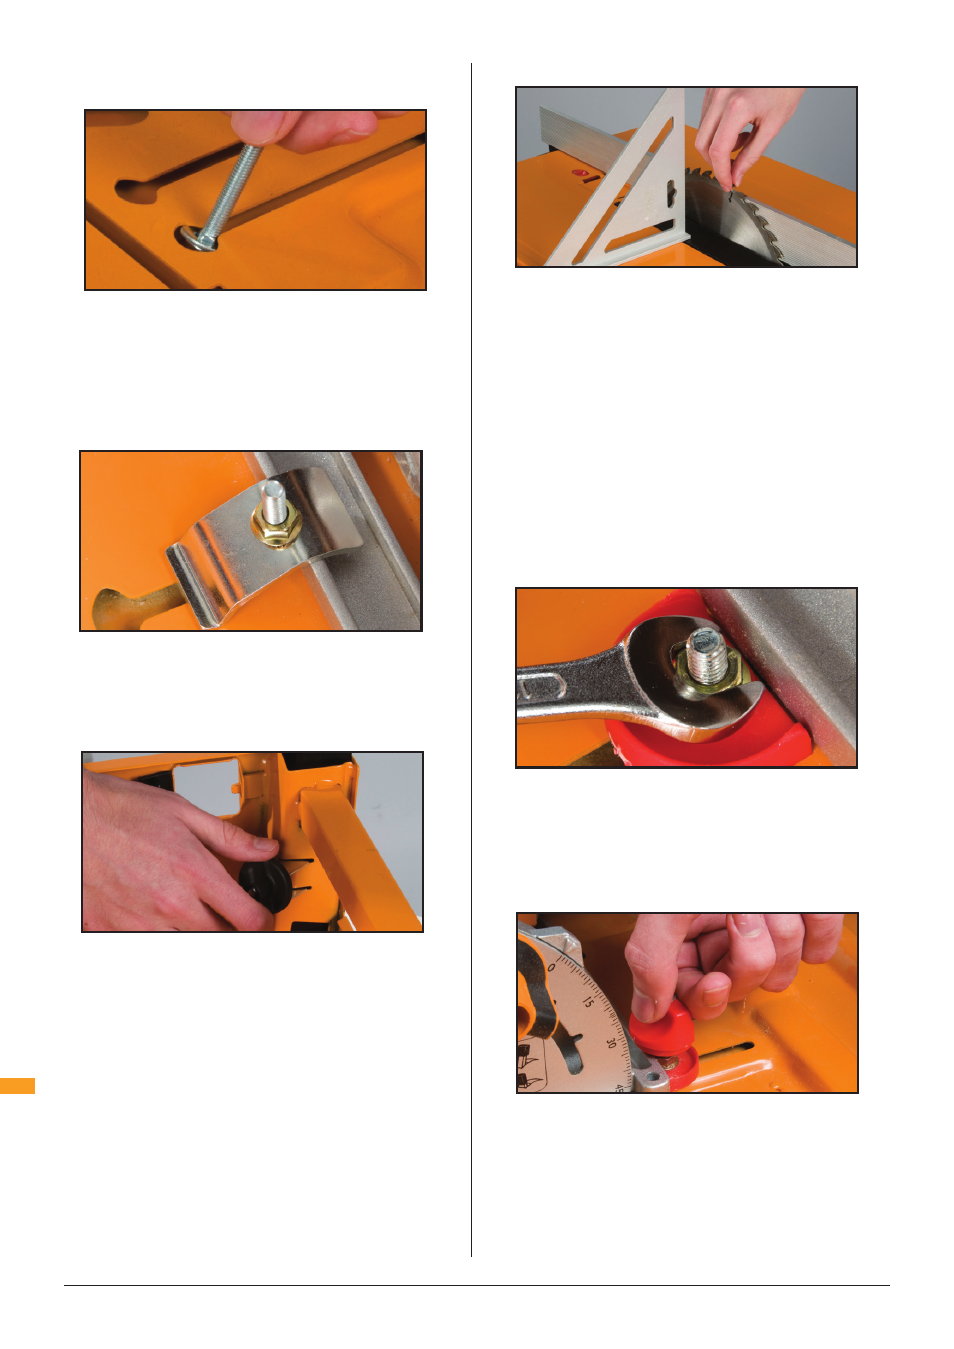
Use your set square to check the blade is exactly 90°
to the table. If necessary, adjust the blade angle (see
Troubleshooting).
Adjust the position of the saw so that the teeth just
touch, front and rear. This step is critical – take your
time to get it right!
Spin the blade backwards by hand. The teeth should
very lightly skim the fence set at ‘0’. Use a spanner to
tighten the flange nuts, temporarily locking the saw
in position.
Turn the unit upside down again, taking care not to
bump the saw.
Twist or snip the Clam Knobs (M) and Clamp bases
(N) from their moulding tree and trim off any remnants
with scissors or a file.
One at a time, replace the temporary saw clamps with
the plastic clamp bases. Slide them along the slots
until they touch the saw base plate and tighten the
flange nuts with a 10mm spanner (Fig 8).
The clamp bases accurately align your saw, so after
you’ve fitted them check that you cannot twist or move
the saw sideways at all.
Screw the clamp knobs onto the coach bolts (they cut
their own threads) until they touch the lip of the saw
base plate and clamp it firmly in position (Fig 9).
NOTE:
1. File any burrs in the base plate at the clamp locations
to avoid damaging the knobs
2. There is no need to over-tighten knobs. They will still
clamp securely, and be vibration-proof, if you leave
them about half a turn past where they first scrape on
the bas plate
Assembly
Fig 5
Fig 6
Fig 7
Fig 8
Fig 9
Fig 4