Triton TCB 100 User Manual
Page 10
10
GB
THE OVERHEAD GUARD
The overhead guard has hold-down fingers to prevent
kick-back. Always ensure the guard is lowered until
the fingers flex a little and lightly press the workpiece
down on the table.
Having the guard as low as possible will also improve
the dust collection by the overhead guard if a vacuum
is connected.
The bolt and knob on the overhead guard can be
reversed, if necessary, to allow the rip fence to be
adjusted closed to the blade when using the fence on
the left-hand side of the blade.
Check your square
First, check your square! Use a board with an
absolutely straight edge. Press the handle (base) of the
square firmly against it, and use a sharp pencil or utility
knife to trace the edge of the blade on the board.
Flip the square over, press it against the straight edge
again, and move the blade to the line. Any error in your
square is seen as doubled, and is thus more clearly
visible.
Crosscutting with the protractor
Set up as shown in (Fig 24), with the safety guard just
high enough to admit the piece of wood. Check that the
protractor is set at exactly ‘0’.
Switch on the power. Hold the wood firmly against the
main fence of the protractor and push down lightly with
your other hand as you feed the wood smoothly into
the blade.
Push the protractor until the workpiece is past the back
of the blade, then switch off the power by bumping the
STOP plate with your thigh.
If the leading edge of the wood fouled the overhead
guard support, or if the back of the blade re-cut or
burnished the cut end, your saw is mounted slightly
crooked. Adjust the positions of the saw clamp bases
and knobs (see ‘Final Saw Fitting’), then check the saw
alignment (see ‘Checking Saw Alignment’).
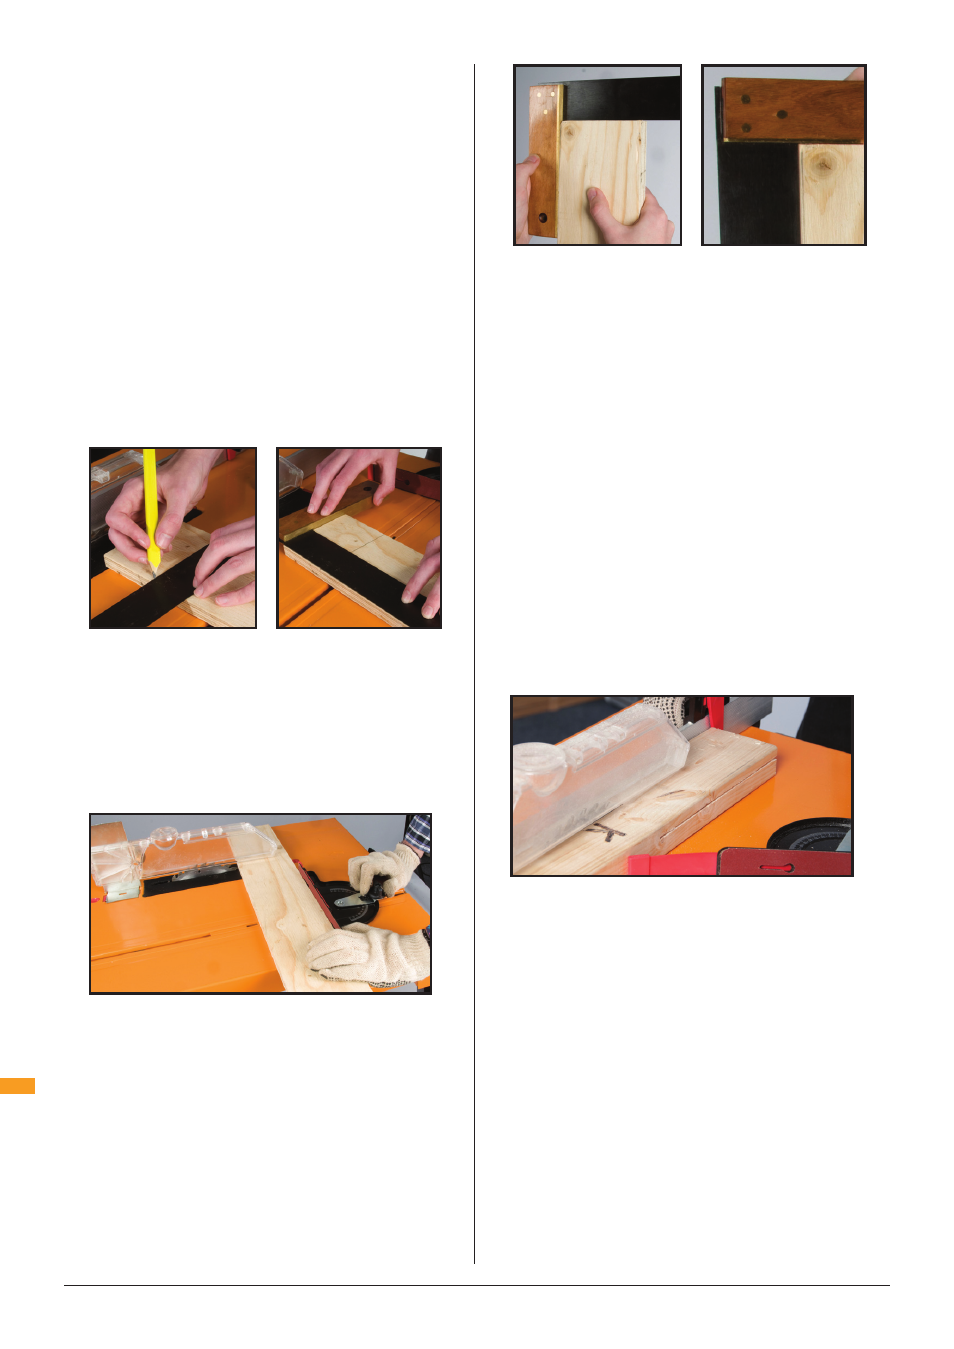
Hold the base of your square against the edge of the
timber that was against the protractor face (Fig 25a);
adjust the protractor angle slightly if necessary.
Then hold your square against the face which was on
the table (Fig 25b). Adjust the angle of the saw blade
to the table if necessary, using the saw’s adjuster. See
Troubleshooting if unable to get a satisfactory result.
Ripping test
Take a straight piece of wood at least 70mm wide and
approx 35mm thick. Place it flat on the table and lower
the overhead guard to just above the workpiece.
Lock the rip fence exactly parallel to the blade with a
fence setting that will give you an off-cut of, say, 5mm:
eg 70mm wide wood, less 3mm for the saw cut, less
5mm for the off-cut = 62mm.
Set up the captive push-stick and side pressure finger.
Switch on the power, and feed the wood smoothly.
Keep pushing it – ideally without pausing – until it is
fully past the blade. Keep fingers well away from the
blade. [Fig 26]
Hold the base of the square against the face that was
on the saw table and check the cut at various points.
Move the fence 1mm closer to the blade, front and rear,
and make a finishing cut for best results.
If the leading edge of the wood fouled the overhead
guard support, or if the back of the blade re-cut or
burnished the cut end, your saw
is mounted slightly
crooked. Adjust the positions of the saw clamp
bases and knobs (see ‘Final Saw Fitting’), then
check the saw alignment (see ‘Checking Saw
Alignment’).
Basic Ripping
Set the fence parallel to the blade, firmly locked
at both ends, with safety guard correctly lowered.
Ideally have the wider section of the workpiece
between the blade and the fence (Fig 27), so you
can keep good control of it with your hands or
with the captive push-stick.
Fig 24
Fig 26
Assembly
Fig 23
Fig 25